You can absolutely install brick pavers over an existing concrete patio, and for most homeowners it is one of the smartest patio upgrades available. You skip the demolition cost, keep the solid base you already have, and end up with a surface that looks far better than bare concrete. The key is making sure that concrete is genuinely worth building on, then layering pavers correctly so water drains away instead of getting trapped underneath. Do those two things right and the finished patio will outlast the original slab.
How to Install Brick Pavers Over a Concrete Patio

Felix Rowe
28 Jun 2026
Step 1: Assess Feasibility and Plan Your Layout and Height Transitions
Before you buy a single paver, walk your slab and be honest about what you see. An overlay only works if the concrete underneath is structurally sound. If you are wondering whether you can lay patio pavers over concrete, start by checking that the slab is sound and slopes away from the house can you lay patio pavers over concrete. That means no active cracking, no sections that rock when you step on them, no crumbling edges, and no frost heave that has broken the slab into separate pieces. A hairline crack here and there is usually fine. A slab with wide cracks or sections that move independently will eventually telegraph those problems up through your new pavers, and no amount of sand or adhesive fixes a failing foundation.
Drainage is the other non-negotiable. The slab must already slope away from your house. The minimum acceptable pitch is 1 inch of fall for every 8 feet of run, which works out to roughly 1/4 inch per foot (about a 2% slope). If your slab drains toward the house or sits flat, you have a problem that pavers will make worse, not better, because water will pool in the sand bed and get trapped against the concrete. Check the slope with a long level and a tape measure before you commit to an overlay.
Height transition planning is where most DIYers get caught off guard. Adding pavers over concrete raises your finished floor level by roughly 2.5 to 3.5 inches total (1 inch of bedding sand plus the paver thickness, which is typically 2 3/8 inches for a standard concrete paver). Measure the gap between the top of your existing slab and the bottom of any door thresholds or doorsills before you start. If that gap is less than 3 inches, you will need thinner pavers, a thinner setting bed, or you will need to undercut the threshold. Do not skip this measurement. It is a lot easier to plan around it now than to grind down a door threshold after the job is done.
- Walk the entire slab and mark any cracks wider than 1/4 inch, soft spots, or rocking sections with chalk
- Check drainage slope: use a 4-foot level and measure the gap under one end (you want at least 1/4 inch of fall per foot away from the house)
- Measure from the top of the slab to every doorsill, step nosing, or threshold that the new surface will meet
- Add up your proposed layer thicknesses: 1-inch sand bed plus your chosen paver thickness
- Confirm the total added height does not create a trip hazard or block a door from opening
Step 2: Clean and Prep the Concrete Surface
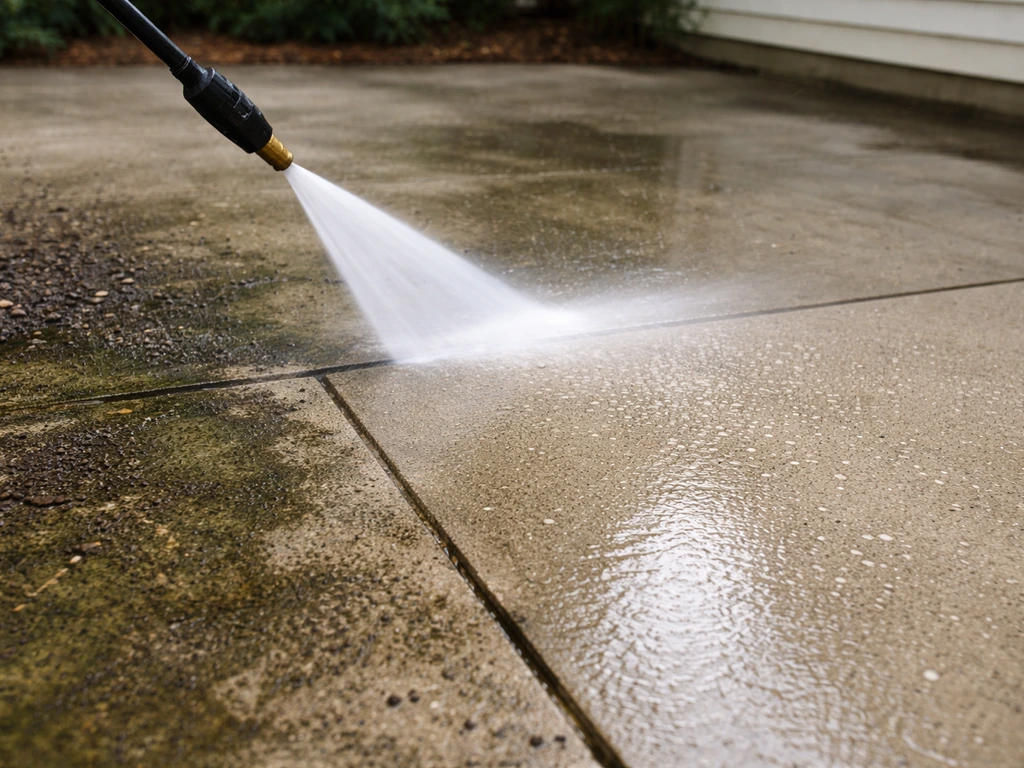
A clean, profiled surface is what makes the rest of the job hold together. Start by pressure washing the entire slab to remove dirt, moss, algae, and any loose material. Let it dry completely, then inspect again. If you find oil stains, treat them with a degreaser before washing. If there is old paint or a penetrating sealer on the concrete, that coating needs to come off because it will prevent a bonded setting bed from sticking and can cause the sand bed to shift. Use a floor grinder or shot blaster for large sealed areas, or a hand grinder for smaller spots.
For small cracks (under 1/4 inch wide), fill them with a concrete crack filler and let it cure fully before proceeding. For larger cracks or areas where the slab has settled unevenly, you have a decision to make. Minor high spots can be ground down with an angle grinder. Low spots of up to about 1/2 inch can be leveled with a self-leveling concrete resurfacer. If sections of the slab have settled more than an inch out of plane, weigh whether an overlay is still the right choice or whether partial demolition and repour makes more sense.
One more thing: if the slab is perfectly smooth and sealed, even for a sand-set installation you want a bit of surface texture so the bedding layer has something to grip. A quick pass with a concrete grinder or even a stiff wire brush on key areas gives you that profile without major effort.
Step 3: Choose Your Installation Method
There are two main approaches to installing pavers over concrete, and which one you choose changes how the whole project works. Both are legitimate for residential patios, but they suit different situations.
| Method | How It Works | Best For | Key Trade-offs |
|---|---|---|---|
| Sand-Set Overlay (Dry-Set) | 1-inch layer of coarse bedding sand screeded level over the concrete; pavers laid on top and swept with polymeric joint sand | Most DIYers; slabs in good condition with correct drainage slope already established | Water can pool in sand bed if drainage is imperfect; easier to repair individual pavers later |
| Mortar-Set (Bonded Overlay) | Thin mortar bed (roughly 1 inch) troweled over concrete; pavers pressed into mortar and mortared joints filled after cure | Slabs with minor slope issues; areas that need a more rigid, monolithic surface | Harder to remove or repair individual pavers; requires more skill to achieve consistent bed thickness; mortar joints can crack over time |
For most homeowners doing this as a DIY project, the sand-set overlay is the more forgiving choice. It is easier to execute consistently, mistakes are easier to fix mid-project, and replacing a single damaged paver years later takes minutes. The mortar-set approach creates a more monolithic, rigid system because the pavers bond directly to the concrete substrate, which can be an advantage in high-traffic areas or where the slab slope needs slight correction through the mortar bed thickness. Just know that once a mortar-set paver is down and cured, removing it without damage takes real effort.
One important note on the sand-set method over concrete: because the concrete beneath acts as an impermeable barrier, water that moves through the paver joints and reaches the sand bed cannot drain straight down the way it would over a compacted stone base. This is the central challenge of any overlay. You address it by making absolutely sure your slab slope is adequate (that 1/4 inch per foot minimum), and in larger installations you can drill weep holes through the concrete edge at the low end, at least 1 inch in diameter and spaced roughly every 10 feet, covered with a small piece of geotextile fabric to keep sand from washing through.
Step 4: Build the Base and Get Drainage Right
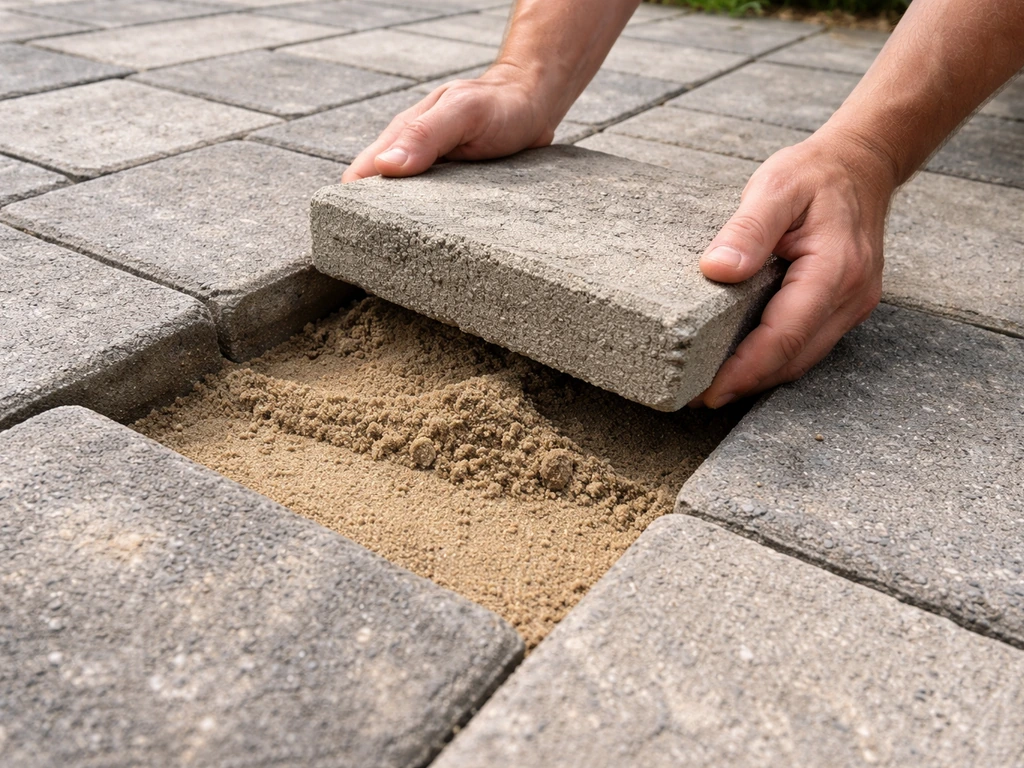
For a sand-set overlay, your concrete slab is already acting as the base. You are not adding a crushed stone sub-base the way you would for a ground-up installation. What you are adding is a 1-inch bedding sand layer, and getting that layer right is everything. Use coarse, washed concrete sand (ASTM C33), not fine play sand or mason sand, which compact too tightly and hold water.
Screed the sand to a consistent 1-inch depth using two metal pipes or conduit as screed rails. Lay the pipes parallel across the slab, set them so their top surface is exactly 1 inch above the concrete, dump sand between them, and drag a straight 2x4 across to level it. Pull the pipes out as you go and fill the channels. Do not walk on screeded sand once it is set. The goal is a perfectly flat, consistent bed so no paver rocks after it is placed.
A critical detail: your screeded sand surface must maintain the same slope as the underlying concrete. If your slab already drains correctly at 1/4 inch per foot, the screeded sand layer follows that slope automatically when you set your screed rails parallel to the slab surface. Check your slope with a level and tape measure after screeding a section to confirm. For a 4-foot level, you should see roughly 1 inch of gap under the high end when the bubble reads level, which confirms about a 2% slope.
If you are going the mortar-set route, mix your mortar to a stiff, workable consistency (a dry-pack or semi-dry mix is common for this application). Spread it in sections you can cover before it starts to set, typically about 20 to 30 square feet at a time in warm weather. You can use the mortar bed thickness to make minor slope corrections of up to about 1/2 inch across the slab, but do not try to fix a fundamentally sloped-wrong slab with mortar.
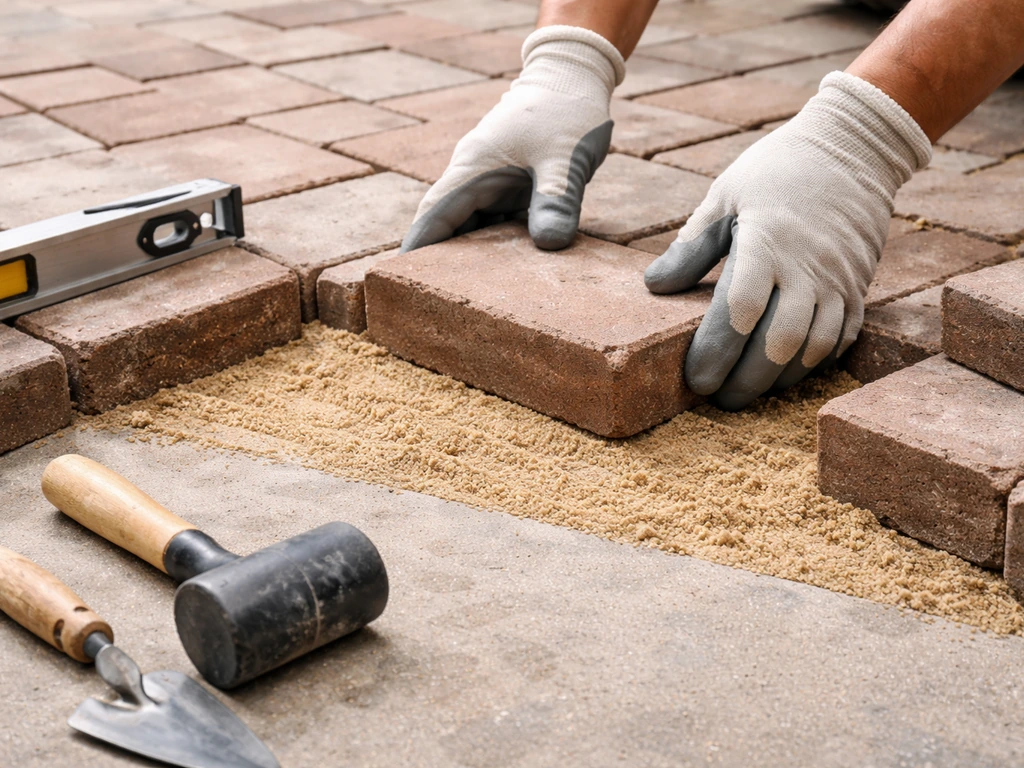
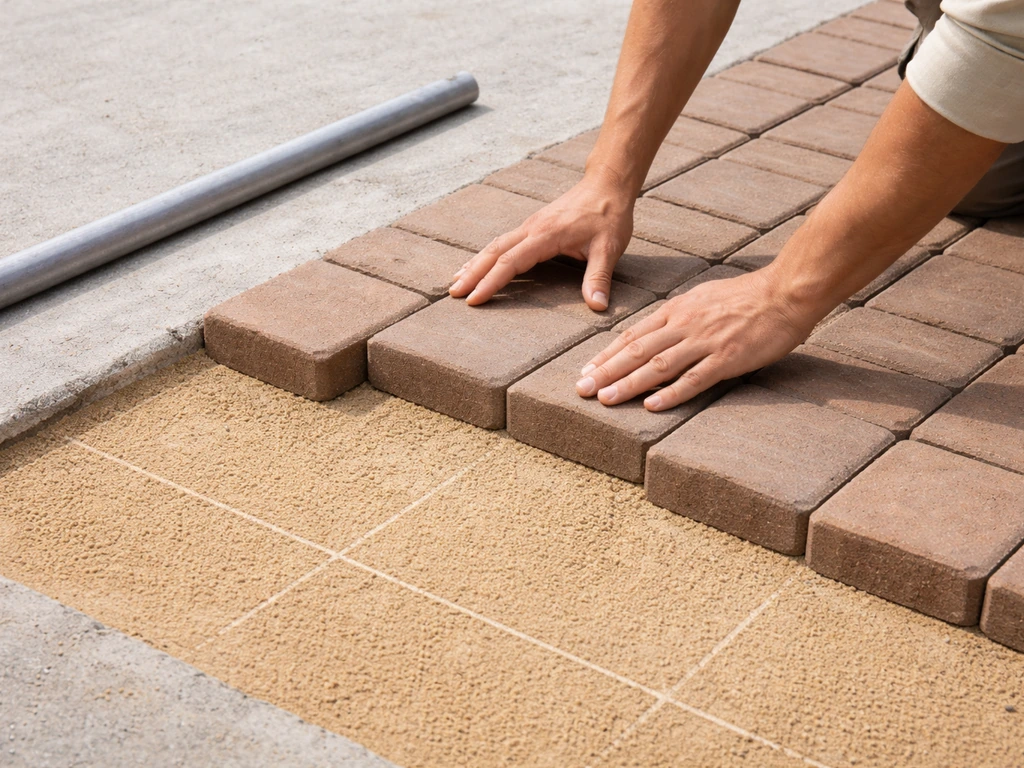
Step 5: Lay the Pavers, Plan Your Pattern, and Cut the Edges
Plan your layout before you lay anything
Snap chalk lines across the entire slab before you touch the first paver. Start from the most visible edge (usually the side seen from the house) and work outward. Dry-lay a full row in both directions from your starting point to see how the pattern works out at the edges. Once you have your layout and heights figured out, the same edge-spacing and base steps apply when you’re learning how to lay pavers next to an existing patio how to lay pavers next to existing patio. You want cuts at the perimeter to be at least half a paver wide if possible. Tiny slivers at the edges look bad and are structurally weak. If your dry layout shows 2-inch cuts all around, shift your starting point a few inches and re-dry-lay. This five-minute adjustment saves a lot of grief.
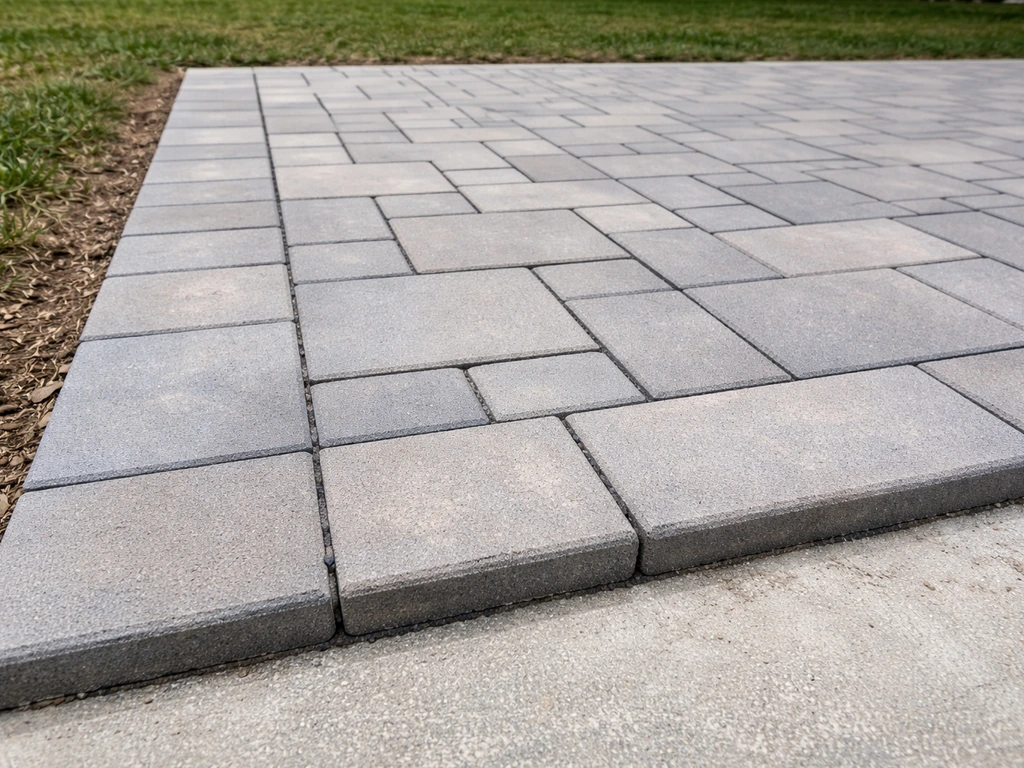
Running bond (offset rows like brickwork), herringbone, and basketweave are all common patterns for brick pavers. Herringbone at 45 or 90 degrees is actually the most stable pattern for pedestrian traffic because the interlocking geometry distributes load well, though it generates more cuts at the edges. Running bond is the easiest for a first-time DIYer to execute accurately. Whatever you choose, keep consistent joint gaps of about 1/16 to 3/16 of an inch between pavers as you lay them.
Laying and cutting
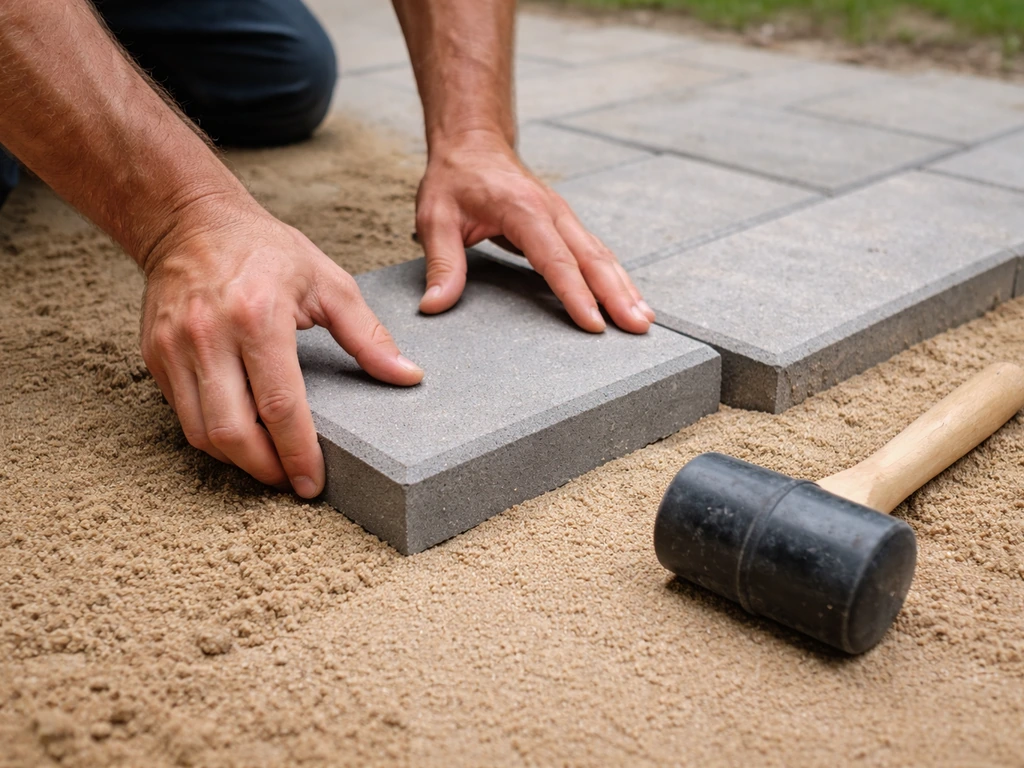
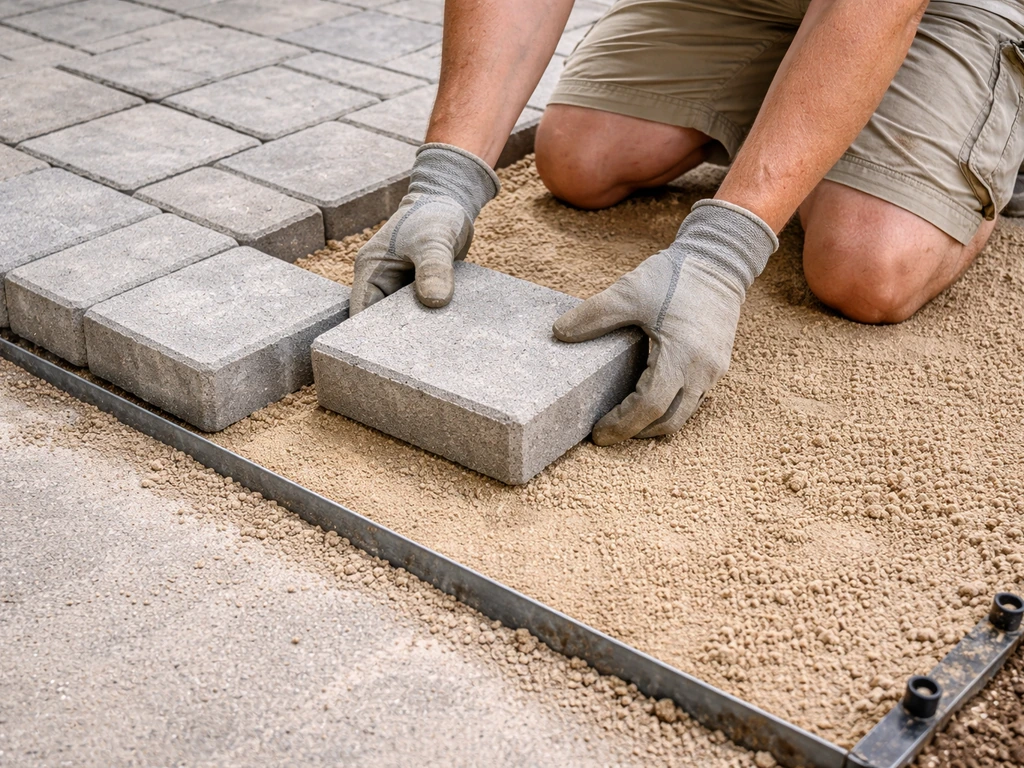
Work from one corner outward, placing pavers gently onto the sand bed without sliding them (sliding disturbs the screeded surface). Use a rubber mallet to tap each paver flush with its neighbors and check frequently with a long straightedge or level. For a sand-set install, do not compact with a plate compactor while laying: set pavers by hand and check as you go. Plate compaction happens after all pavers are down and edge restraints are installed.
For cuts at the perimeter, around downspouts, or along obstacles, a diamond blade wet saw gives clean, precise cuts and is well worth renting for a full patio project. An angle grinder with a diamond blade works for occasional cuts but generates a lot of dust and less precise lines. Score and snap can work for straight cuts on thinner pavers but will frustrate you quickly. Measure each cut individually rather than assuming all edge pieces are the same width. Even a well-prepared slab rarely has perfectly parallel sides.
Step 6: Edge Restraints, Finishing, and Sealing
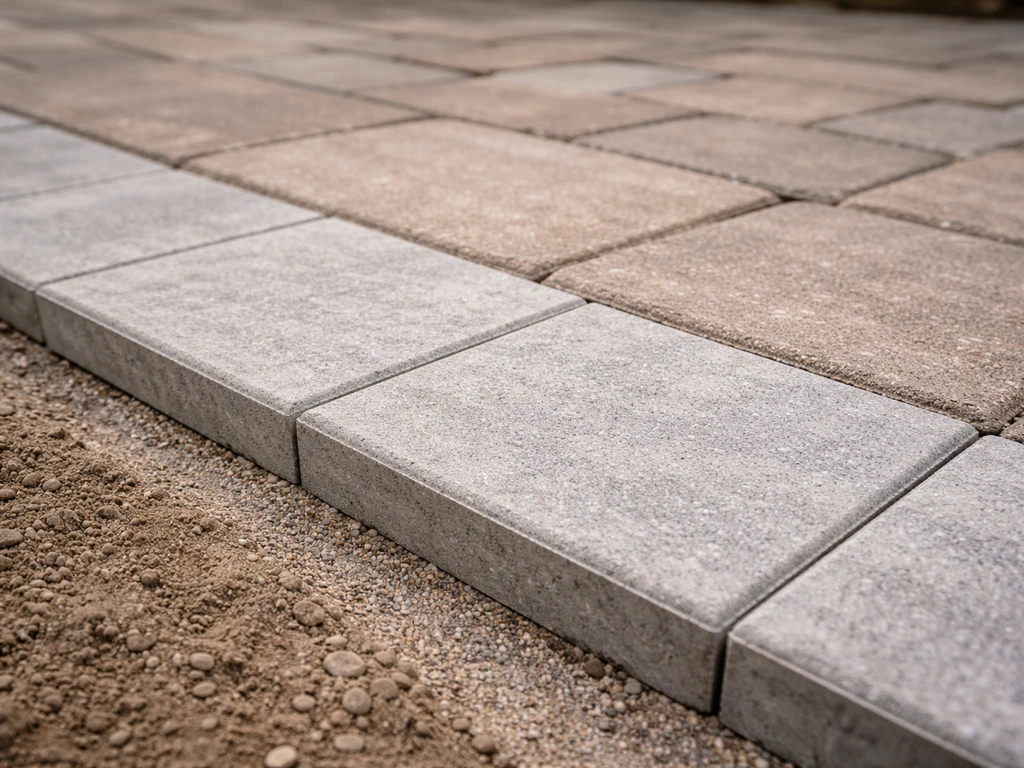
Edge restraints keep the entire paver field locked in place. Without them, pavers at the perimeter gradually creep outward under foot traffic and the whole field loses its tight joints over time. Install plastic or aluminum paver edging along any exposed edge where pavers are not already confined by a wall, step, or existing concrete border. The edging should sit about 1/2 inch below the top surface of the pavers and be secured with 10-inch or 12-inch galvanized spikes driven through the edging into the concrete below. Pre-drill the spike holes if needed. On sides where pavers butt directly against a house foundation or an existing concrete step, you do not need edge restraints on that abutting side since the structure itself contains the pavers.
Once all pavers are down and edge restraints are set, it is time for plate compaction (sand-set method only). Run a plate compactor over the entire surface to seat pavers into the sand bed. Use a rubber pad or carpet strip under the plate if your pavers have a textured or tumbled finish to avoid scratching. After the first compaction pass, sweep coarse polymeric joint sand across the surface and work it into the joints with a push broom. Make two or three passes until the joints are filled to within about 1/8 inch of the top. Then do a final compaction pass to lock everything in.
Activating polymeric sand requires water. Use a fine mist or gentle shower setting on your hose nozzle to wet the surface evenly across all joints, saturating without flooding. Let it soak in for a minute, then mist again. The water activates the polymer binders that harden the sand into the joints and discourage weed growth. Blow off any pooled water or excess sand sitting on paver faces before the polymers cure, because dried polymeric sand residue on the paver surface causes a chalky white haze that is difficult to remove.
Sealing is optional but genuinely useful on brick pavers over concrete. A penetrating sealer helps lock joint sand in place, reduces efflorescence, makes the surface easier to clean, and can enhance color. Wait at least 90 days after installation before sealing to allow any efflorescence (white calcium deposits) to work its way out naturally. Clean the surface thoroughly before applying sealer. Follow the manufacturer's instructions exactly, as over-applying sealer causes a milky film that is very hard to fix.
Step 7: Troubleshooting Common Problems and Keeping Things Looking Good
Uneven or rocking pavers after installation
If a paver rocks after you have laid it, the bedding sand underneath is not consistent. Pull the paver up, add or remove sand as needed, and re-set it. Do not try to fix a rocking paver by hammering it harder. If you notice rocking after compaction, the joint sand around that paver may need to be pulled out, the paver lifted, the bed corrected, and the joints refilled. It is tedious but not hard.
Cracked concrete underneath showing movement
If the underlying slab has an active crack (one that moves with temperature or moisture), that movement will eventually crack the paver above it or cause a joint to open. The best you can do is place a joint in your paver layout directly over the crack location so the movement is absorbed in the joint rather than through a paver face. Over a mortar-set installation, an active crack in the slab is a real problem and may rule out the bonded approach entirely.
Water pooling between pavers and the slab
This is the most common long-term issue with paver overlays. If you notice pavers sinking in a specific area or the joint sand washing out, water is likely trapped under the pavers at that point. Check that your drainage slope is still intact (some slabs settle over time). If water is pooling at the edge of the patio, confirm your edge restraints are not acting as a dam. In persistent cases, drilling weep holes through the concrete at the low edge (1-inch diameter, every 10 feet, covered with geotextile) gives trapped water an escape route.
Efflorescence (white haze on pavers)
Efflorescence is calcium carbonate migrating to the paver surface through moisture. It is very common in the first year, especially on new concrete paver installations over concrete slabs where moisture is present on both sides. Most of it weathers away on its own in 6 to 12 months. If you want to speed it up, use an efflorescence cleaner designed for concrete pavers (avoid plain muriatic acid, which can etch the surface). Avoid sealing too early, since trapping efflorescence under a sealer makes it permanent.
Ongoing maintenance
Paver patios over concrete are low maintenance but not no maintenance. Re-sweep polymeric sand into joints once a year, or whenever you notice joints looking thin or weeds establishing. Pressure wash the surface every one to two years and re-apply sealer every three to five years if you chose to seal. Inspect the edge restraints each spring to confirm no spikes have worked loose. If a single paver cracks or stains badly, the beauty of a sand-set installation is that you can pull it, swap it, and re-sand the joints in under 30 minutes.
Your Pre-Start Checklist
Before you buy materials or schedule a weekend for the install, work through this checklist. If you are looking for the full process, this guide covers how to cover a concrete patio with pavers step by step. Answering each item clearly will prevent the most common and costly overlay mistakes.
- Confirm the slab is structurally sound: no active movement, no crumbling sections, no cracks wider than 1/4 inch that you cannot repair
- Verify drainage slope of at least 1/4 inch per foot (2%) away from the house across the entire slab
- Measure the doorsill and threshold clearances and confirm your total added height (sand bed plus paver thickness) fits without blocking doors or creating a trip hazard
- Decide on installation method: sand-set for most DIYers, mortar-set if you need minor slope correction or a more rigid surface
- Choose your paver: standard concrete brick pavers at 2 3/8 inches thick are the most common; confirm thickness fits your height constraints
- Plan your pattern and do a dry layout before committing
- Gather tools: plate compactor (rental), diamond wet saw (rental), long level, screed pipes, rubber mallet, push broom, and safety glasses
- Order materials: ASTM C33 coarse sand, pavers with 10% extra for cuts, polymeric joint sand, paver edging and spikes, and optional sealer
- Mark weep hole locations at the low edge of the slab if your patio is larger than roughly 100 square feet
- Set a realistic timeline: a typical 200-square-foot patio takes one full weekend for a DIYer working carefully
If you are working with a larger patio, thinking about extending beyond the existing slab footprint, or dealing with a slab that has significant issues, there are related projects worth thinking through alongside this one. Extending the patio, covering the concrete with pavers as a purely cosmetic refresh, or adding pavers adjacent to an existing concrete border all involve slightly different planning steps. If you are wondering how to extend patio with pavers, focus on matching the height and keeping drainage flowing away from the house Extending the patio. But the core principle stays the same: solid base, correct slope, consistent bedding layer, tight joints, and protected edges. Get those five things right and you will have a patio that looks like it was always meant to be there.
FAQ
Can I install brick pavers over a concrete patio if the slab is not perfectly level?
You usually can, but only if the existing concrete is stable, pitched correctly, and you can handle the added height at doors and thresholds. If the patio drains toward the house or you cannot maintain the required fall, the overlay will create pooling under the pavers. If the height gap is under about 3 inches, plan for thinner pavers, a thinner bedding layer, or undercutting the doorway components before starting.
What if my concrete patio has low spots or uneven sections?
Minor flatness issues are workable, as long as the overall drainage slope remains correct. You can grind small high spots and level limited low spots, but if the slab has settled more than about 1 inch out of plane in a section, an overlay may fail prematurely. In that case, consider partial demolition and repour or a different drainage plan rather than relying on the sand bed alone.
Do I need to add a crushed stone sub-base when pavers are installed over concrete?
Avoid adding crushed stone or additional fill under the pavers when you are doing an overlay on an existing slab, because the concrete becomes your base. The system relies on a consistent bedding sand layer, and changing the build-up can throw off drainage and door-clearance calculations. Stick to a 1-inch coarse, washed concrete sand bedding layer and keep the sand bed slope consistent with the slab.
Should I use polymeric joint sand or regular sand for paver joints over concrete?
Not necessarily. Polymeric joint sand is often preferred for paver overlays because it helps lock joints and reduces weed growth, but you must match it to your paver type and follow activation instructions carefully. If you choose plain joint sand, expect more frequent joint re-filling and higher weed risk, especially since water cannot drain downward through the concrete.
Can I install pavers over concrete that has been sealed or painted?
Yes, but treat it like a different surface prep problem. A sealed concrete slab coating can prevent proper bonding and can also reduce how well sand stays where you place it. Grind or remove penetrating sealers and paint thoroughly, then wash and let it dry completely before you start the bedding and layout.
How should I handle expansion or control cracks in the existing concrete patio?
If your concrete has an active movement crack, it is a red flag for any overlay, especially the mortar-set approach. The practical fix is to place a joint in your paver pattern over the crack so the paver movement is absorbed in the joint, not through a paver face. For mortar-set installations, active cracking can still cause failure even with a good plan.
What should I do if a paver rocks after installation?
If the pavers are only rocking because of an uneven sand bed, you should pull that paver, adjust the sand underneath, and reset it. Do not try to fix rocking by pounding harder, because it compacts the area unevenly and can disturb nearby bedding. After resetting, recheck with a straightedge and verify joint sand levels after compaction.
How do I prevent bad-looking or weak edge cuts at the perimeter?
Yes, but you must keep cuts large enough for stability. The article’s guidance of avoiding tiny edge slivers matters because small pieces are weaker and can shift. If your dry layout shows very thin cuts all around, shift your starting point and re-layout before you start setting pavers, so cuts at the perimeter land around at least half a paver when possible.
When should I use the plate compactor during the overlay?
Not while setting. During the initial installation, set pavers gently by hand and check alignment often. Save plate compaction for after all pavers are fully installed and edge restraints are set, because early compaction can disturb the screeded sand surface and create future rocking spots.
Can I extend the patio beyond the existing concrete slab using pavers?
Yes, you can extend a patio visually beyond the existing slab, but you need to plan the transition. Match the finished height and drainage away from the house at the tie-in, and do not create a low spot where water can collect. If the extension is over new base, your drainage and thickness build-up will differ from the overlay, so plan the whole grade line together.
Why do pavers sink in one area or lose joint sand over time?
If you see sinking or joint sand washing out, trapped water is often the cause, even if you started with the right slope. Re-check the slope and edge restraint placement, then consider additional drainage solutions such as drilling weep holes at the low edge spaced about every 10 feet (1-inch diameter, with geotextile to reduce sand loss) for persistent issues.
Is efflorescence a problem, and when should I seal if I see white deposits?
Efflorescence is often normal in the first months because moisture migrates through and carries minerals to the surface. Most of it weathers off within 6 to 12 months, and you should wait at least 90 days before sealing to avoid trapping it. If it needs help, use an efflorescence cleaner made for concrete pavers rather than aggressive acids that can etch the surface.
If one brick paver gets damaged, can I replace it without tearing up the whole patio?
Yes, and it is usually easier with sand-set. If a single paver cracks or stains badly, you can lift that piece, correct the sand bed locally, and re-sand and re-level the joints rather than redoing the whole patio. Keep extra pavers from the same batch when possible so color and texture match.
How exactly do I activate polymeric sand, and what watering mistakes should I avoid?
You can, but be careful with watering and timing. Polymeric sand needs moisture to activate, use a fine mist or gentle shower and mist gradually so you saturate joints evenly, then remove excess sand from paver faces before it cures. Over-wetting or flooding can wash polymers out of the joints and cause haze that is hard to clean.
Next Articles
How to Install Pavers Over Existing Concrete Patio
Step-by-step DIY for installing patio pavers over concrete, including feasibility, prep, leveling base, setting, edges,
How to Add Pavers to an Existing Patio: Step-by-Step
Step-by-step DIY for adding paver overlays to an existing patio, including prep, base, leveling, cuts, drainage, and tro
How to Lay Pavers Next to an Existing Patio Seamlessly
Step-by-step DIY for laying pavers next to an existing patio: matching heights, building base, seamless transitions, lev