You can absolutely lay patio pavers over an existing concrete patio, and when the concrete is in decent shape, it's actually one of the most stable bases you can work with. The key is checking the concrete's condition first, building a thin and consistent bedding layer on top, keeping your slope right for drainage, and locking everything in with edge restraints and polymeric sand. Done correctly, pavers over concrete look great, drain well, and hold up for decades without the full excavation a new patio would require.
How to Lay Patio Pavers on Concrete: Step-by-Step DIY

Felix Rowe
22 May 2026
Check the concrete first: is your slab actually ready for pavers?

Before you buy a single paver, spend 20 minutes really looking at your concrete. The slab needs to be structurally sound, and that means no major heaving, no large sections that flex when you step on them, and no areas where the concrete is actively crumbling or delaminating. If your slab is cracked but still solid and flat, you're likely fine. If it's broken into chunks or has significant vertical displacement between sections (more than about half an inch), pavers laid on top will eventually mirror those problems.
Here's what to specifically look for during your walkthrough: To do this properly, follow the steps for how to cover a concrete patio with pavers, starting with slab readiness and finishing details like jointing and drainage.
- Hairline cracks: generally acceptable if stable and not widening. Fill them with a concrete crack filler before you start.
- Spalling or surface pitting: small spalls can be patched with hydraulic cement or a concrete resurfacer. Large spalled areas that affect the slab's flatness need addressing or the unevenness will telegraph through your bedding layer.
- Heaving or settlement: if one section is higher or lower than an adjacent section by more than about half an inch, you'll have a hard time keeping your pavers level across the joint. This is the biggest red flag.
- Drainage slope: your concrete should already slope away from the house. The target is at least 1/4 inch per foot (about a 2% grade). If your slab slopes toward the house or pools water, that problem will carry over to your pavers and needs to be corrected in your bedding layer.
- Existing coatings or sealers: if the concrete is sealed or painted, that surface can prevent a bedding layer from bonding properly. You may need to grind or shot-blast the surface for adhesion if you plan to use mortar.
One more thing to check: overhead clearance. Adding pavers over concrete raises your finished surface by at least 2 to 3 inches (the paver thickness plus bedding). Make sure that won't create a problem at doorway thresholds, sliding glass doors, or steps. If your door threshold sits only an inch above the current concrete, you'll need to account for that before proceeding.
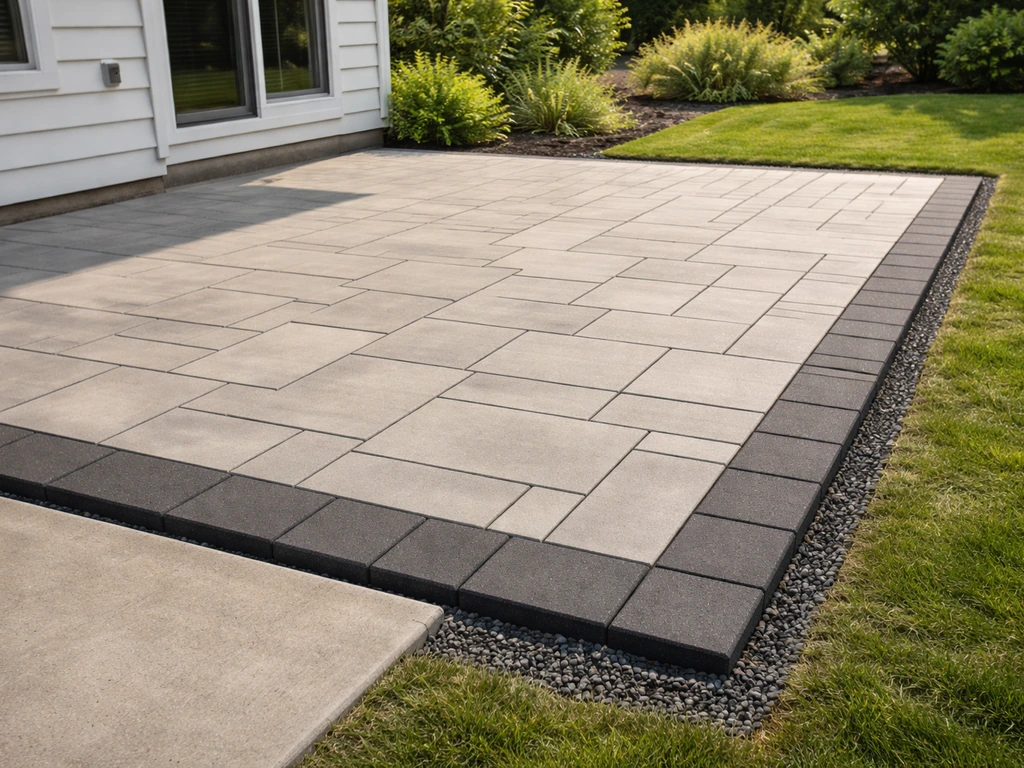
Plan your layout, pattern, and measurements before anything else
Measure your concrete slab accurately in both directions and sketch out the area on graph paper or a free design app. If you are planning to extend a patio with pavers, the same planning, slope, and edge restraint steps used for an overlay will help the new section match the existing surface extend patio with pavers. Note the dimensions, any obstacles like drains, posts, or planters, and where the edges of the slab fall. This is where you decide on your paver pattern, which directly affects how many cuts you'll need to make and where they'll land.
Running bond (like a brick wall laid on its side) is the easiest for beginners and minimizes cuts along straight edges. Herringbone at 45 degrees looks great but creates a lot of angled cuts along the perimeter. Basketweave is somewhere in between. For a first-timer working over concrete, a simple running bond or stack bond pattern keeps the project manageable.
Once you've chosen a pattern, do a dry layout on paper. Calculate whether full pavers land near the edges, or whether you'll be cutting thin slivers (anything less than a third of a paver width looks awkward and is structurally weaker). If your numbers produce a lot of small cuts, shift your starting point by half a paver width and recalculate. Getting this right on paper saves hours of frustration on the patio. Also plan for your joint spacing now: blank" rel="noopener noreferrer">a standard spacing of 1/8 to 1/4 inch between pavers works well and falls within ICPI guidelines for sand-set installations.
Prep the concrete surface so your pavers have something solid to sit on
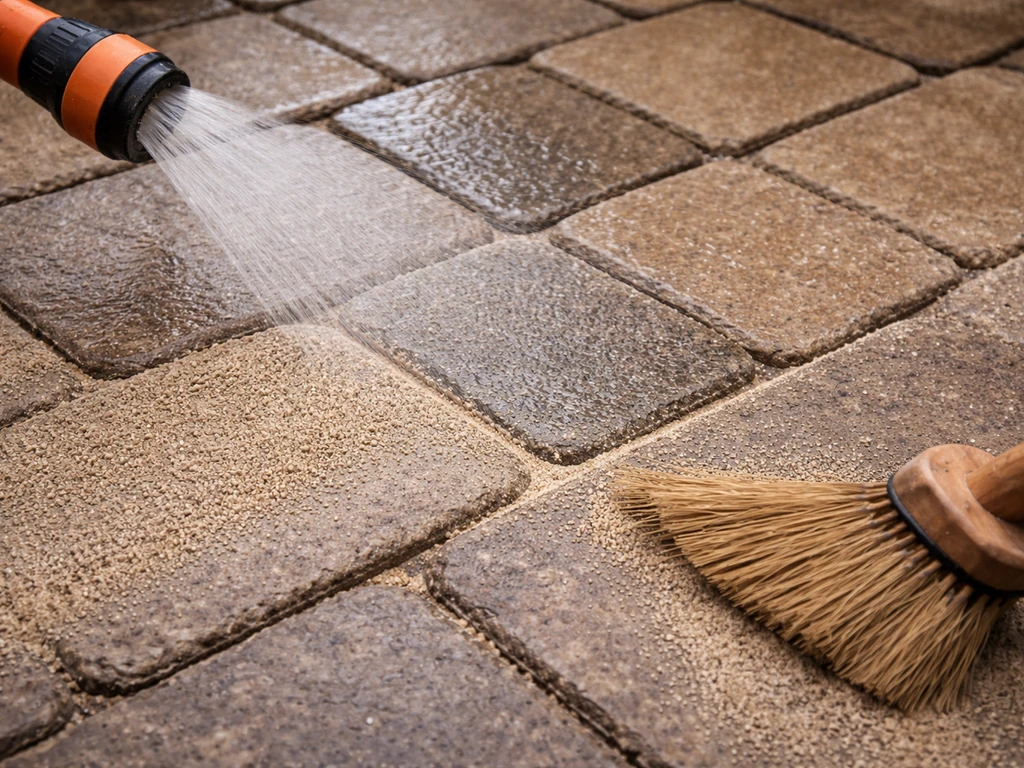
Clean it thoroughly
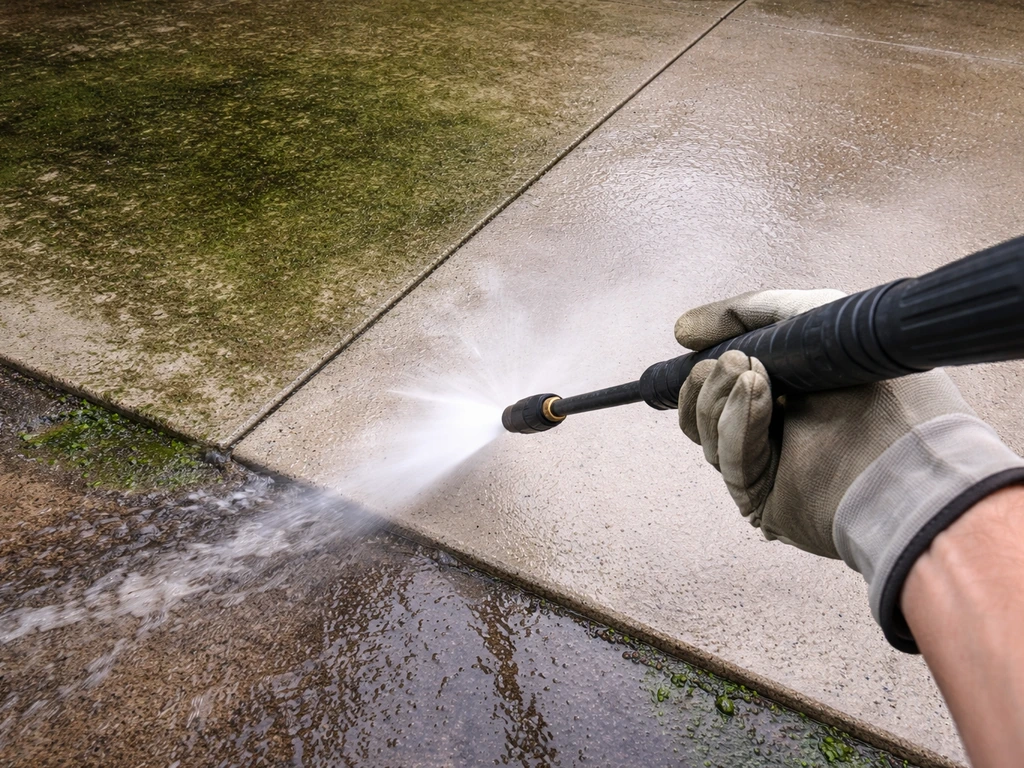
Pressure-wash the entire slab and let it dry completely. Remove any moss, algae, grease, or efflorescence. If you're using a sand bedding layer (the most common DIY approach), debris trapped under the sand creates soft spots. If you're using mortar or an adhesive-based setting bed, cleanliness is even more critical because contamination breaks the bond.
Fix the surface problems
Fill hairline cracks with a self-leveling concrete crack filler. For spalled areas or low spots deeper than about a quarter inch, use a vinyl concrete patch compound or hydraulic cement and feather it smooth. Give patches at least 24 hours to cure before continuing. High spots (raised crack edges, old anchor bolt stumps, anything protruding) need to be ground down with an angle grinder or concrete grinder so your bedding layer sits consistently level across the whole slab.
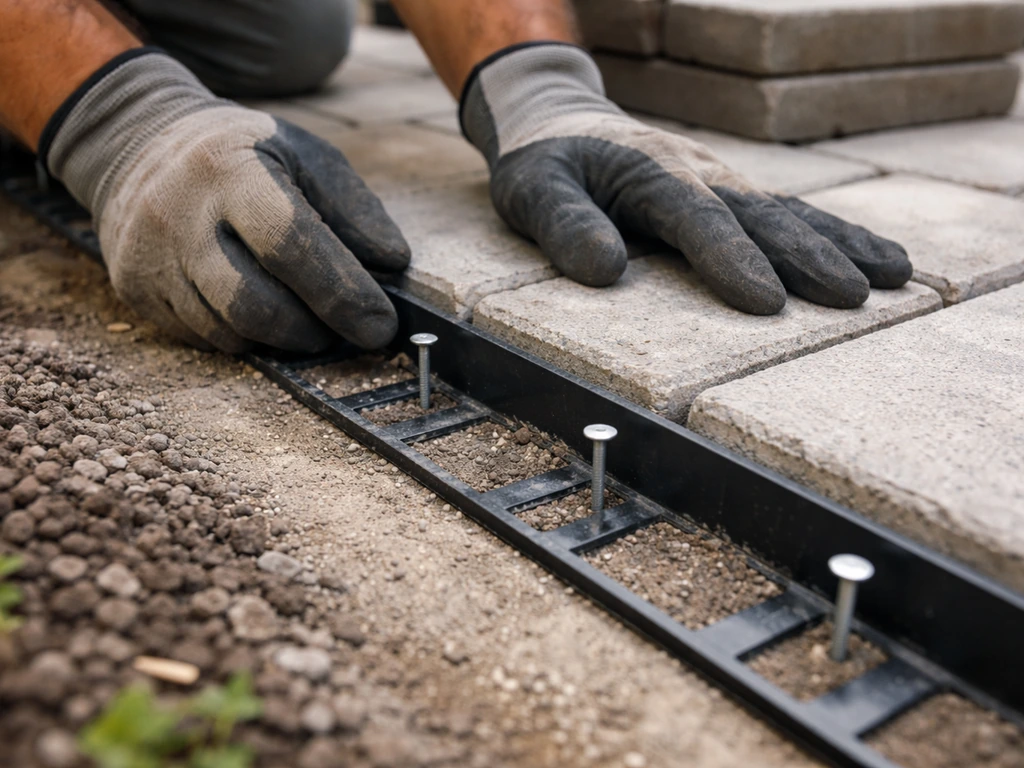
Set up edge restraints
Edge restraints are non-negotiable. Without them, the pavers at the perimeter will slowly migrate outward over time, causing joints to open and the whole field to become unstable. For over-concrete installations, plastic paver edging spiked into the ground at the slab perimeter works if there's soil to spike into. If the concrete extends to a curb or foundation, you can use construction adhesive to bond the edge restraints directly to the concrete, or set border pavers in a full mortar bed as a fixed perimeter frame. Plan your edge restraint system before you start setting pavers, not after.
Check and mark your drainage slope
Use a long level and a tape measure to verify your existing slope. You need at least 1/4 inch of drop per foot of run, directed away from your house or any structure. If the existing slab falls short of that, you can build up your bedding layer slightly on the high side to create the necessary slope in the finished surface. Mark your target slope on the concrete using chalk lines so you have something to work to when screeding your bedding layer.
Choose and build the right base layer over the concrete
This is where over-concrete installations differ most from a traditional ground-up paver job. You're not building a deep compacted gravel base. You're creating a thin, even setting bed directly on top of the slab. You have three main options:
| Method | Best For | Thickness | Skill Level | Key Trade-off |
|---|---|---|---|---|
| Coarse sand (screeded) | Most DIY installs, standard concrete pavers | 1/2 to 1 inch | Beginner-friendly | Can wash out at edges if not well-contained; pavers not bonded to slab |
| Dry-set mortar (mudset) | Thin pavers, porcelain, more formal installs | 1/2 to 1 inch | Intermediate | Less forgiving of mistakes; harder to adjust pavers after setting |
| Compacted crushed stone/gravel | Situations with minor slab imperfections | 3/4 to 1 inch | Beginner-friendly | Needs solid edge containment; slightly more depth added to finished height |
For most homeowners using standard concrete pavers (the 2-to-3-inch-thick kind), screeded coarse sand is the most practical choice. If you’re adding pavers to an existing patio, the key is building a thin, even setting bed directly on top of the concrete so the surface stays stable and drains correctly existing slab. Use concrete sand (also called coarse washed sand), not play sand or fine mason's sand. Fine sand compacts unevenly and is more susceptible to washout. Belgard and other paver manufacturers note that for thin concrete or porcelain pavers over an existing slab, a sand or dry mudset bed works well provided the slab itself is strong enough, ideally at least 4 inches thick with adequate compressive strength. If your existing slab is thin or suspect, mortar-setting your pavers is more stable.
To screed the sand: set your screed rails (pipe sections or lumber) on the concrete surface at the correct elevation to account for your paver thickness plus 1/2 to 1 inch of sand. Pour sand between the rails and drag a straight board across them to create a perfectly flat, sloped surface. The ICPI recommends keeping bedding sand between 1/2 and 1 inch thick; thicker than that and pavers can rock after compaction. Critically: do not compact the screeded sand before setting pavers. You want it loose and level so pavers bed into it uniformly. Compaction happens after the pavers are in place.
One more thing: Belgard recommends including expansion joints in any overlay scenario, just as you would with a new concrete pour. Every 8 to 10 feet of paved surface, leave a slightly wider joint (about 3/8 inch) and fill it with a flexible polymeric sand or backer rod rather than rigid mortar. This lets the assembly move slightly with temperature changes without cracking or heaving.
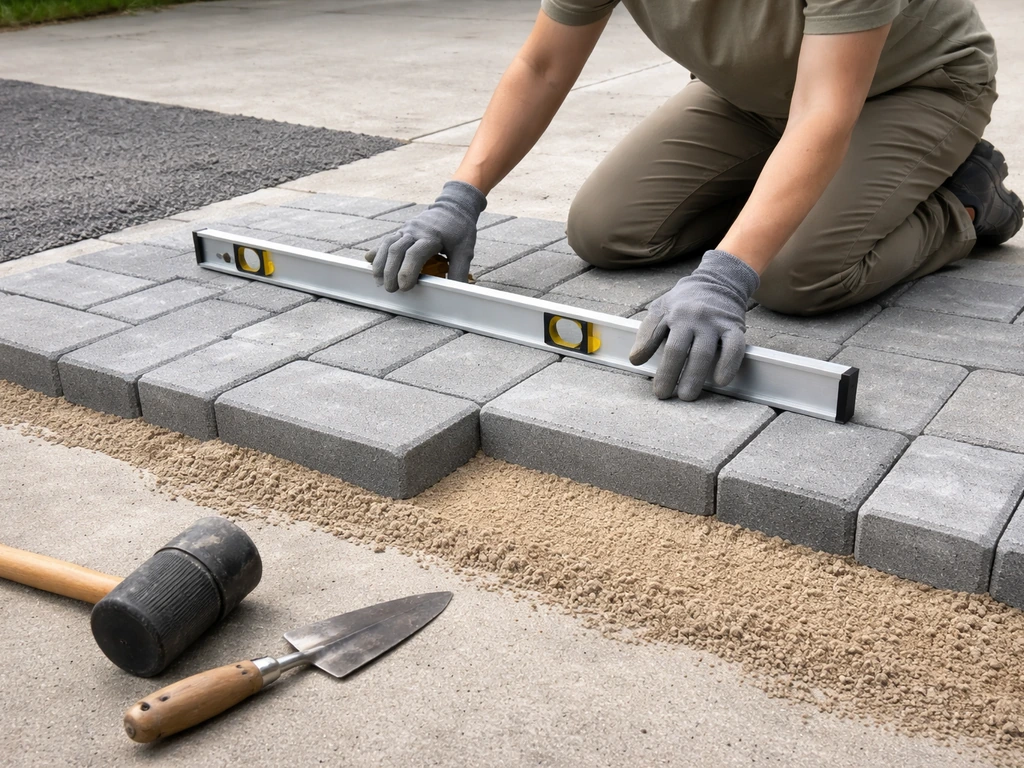
Setting the pavers: placement, spacing, cutting, and keeping things level
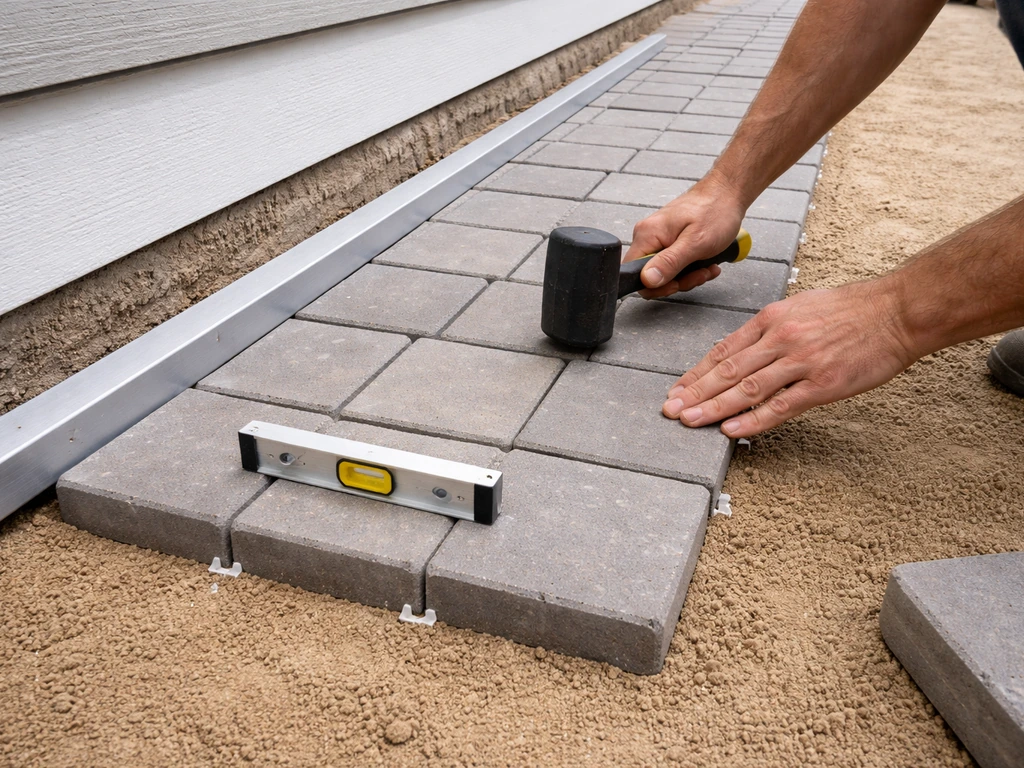
Start from a fixed straight edge, typically the house wall or a chalk line you've snapped across the slab. Work outward from that line, laying pavers in your chosen pattern. Never step on the screeded sand before you have pavers under your feet. Kneel on a piece of plywood set on top of already-placed pavers to avoid disturbing your screeded bed.
- Place each paver firmly but gently onto the sand, pressing it down evenly. Don't slide it into position, as that drags sand and creates ridges.
- Maintain your joint spacing as you go. Use paver spacers or small pieces of 3/16-inch plywood as spacers. The ICPI joint spec is 1/8 to 1/4 inch; tighter than 1/8 inch makes it hard to fill with polymeric sand, and wider than 3/8 inch starts to look sloppy and can allow joint sand to wash out.
- Check for level frequently. Use a long straightedge or a 4-foot level spanning 3 to 4 pavers at once. If a paver is high, lift it and scrape a little sand out. If it's low, lift it and add a small amount of sand, then re-set.
- Check your slope as you go. Every 4 to 6 rows, use a level with a slope gauge to verify you're maintaining that 1/4-inch-per-foot fall away from the house.
- When you reach the perimeter or any obstacles, mark your cut lines with a pencil or chalk and cut using a circular saw with a diamond blade or a wet tile saw. For curved cuts, an angle grinder with a diamond cup wheel works well. Always wear safety glasses and a dust mask.
- Once all full pavers and cuts are in place, run a plate compactor over the entire field (rent one for about $60 to $90 per day). Make two passes in perpendicular directions. This beds the pavers into the sand and brings everything to final elevation. Use a rubber pad under the compactor if your pavers have a textured surface that could be damaged.
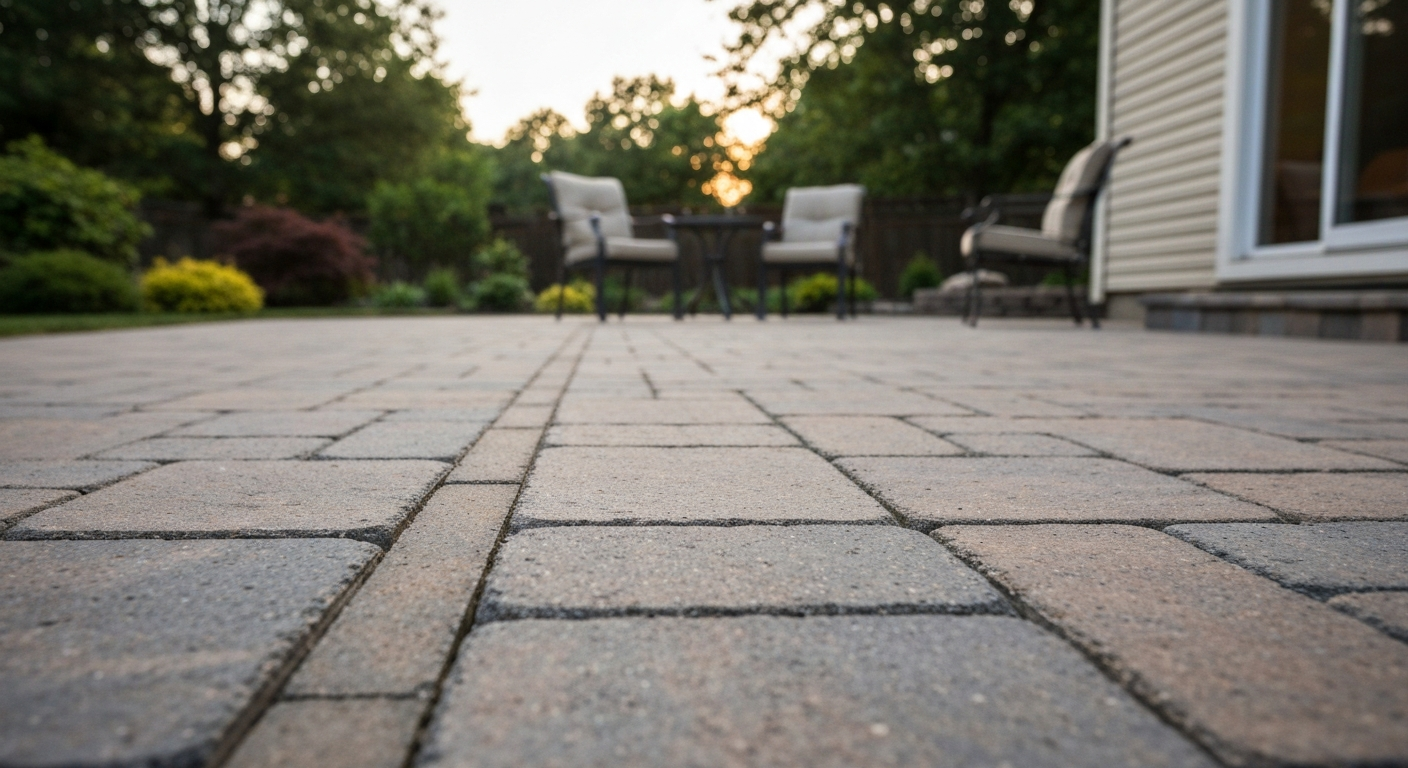
Finishing details: jointing sand, sealing, drainage checks, and cleanup
Fill the joints with polymeric sand
Polymeric sand is worth the extra cost over regular joint sand. It contains polymer binders that harden when wet, resisting washout, weed growth, and ant excavation. Pour the dry polymeric sand over the paver surface and sweep it into all the joints using a stiff push broom or street broom. Work it in multiple passes and in multiple directions until the joints are fully packed. According to Pavestone's guidance, fill the joints to about 1/8 inch below the top edge of the pavers, not flush to the top. That slight recess prevents the polymeric sand from haze-bonding to the paver face. Once joints are filled, blow off any excess sand from the paver surface with a leaf blower on low. Leaving sand sitting on the surface during activation causes a white haze that's difficult to remove.
To activate the polymeric sand, mist the entire surface with water using a garden hose on a fine spray setting, not a strong stream that will blast sand out of the joints. Work in sections. The sand will darken and begin to firm up. Follow the manufacturer's timing on your specific product, but most require a 24-hour cure before foot traffic and a couple of days before full use. Techniseal's guidance recommends waiting at least 30 days after installation before sealing or cleaning the surface, to allow the polymeric sand to fully cure and the pavers to settle.
Sealing the pavers (optional but recommended)
Sealing protects the paver color, reduces staining, and can enhance the surface appearance (matte or wet-look finishes are both available). Once the polymeric sand has cured fully (30 days minimum after installation), apply a paver sealer with a low-pressure garden sprayer or roller. Apply a thin first coat, let it penetrate, then apply a second coat. Avoid puddling. Plan to reseal every 3 to 5 years depending on traffic and sun exposure.
Final drainage and cleanup check
Run a garden hose over the finished patio and watch how water moves. It should sheet cleanly toward the yard, not pool anywhere on the surface or drain toward the house. If you see pooling, identify whether it's a low paver that needs to be reset or a joint that's restricting flow. Clean any remaining haze or dust from the paver surface with a mild concrete cleaner and a soft brush.
Troubleshooting common problems and keeping your patio looking good
Rocking or unstable pavers
A paver that rocks after installation usually means the bedding sand is too thick in one spot, or there's a high point on the concrete beneath it. Lift the paver, check the sand depth, and either add or remove sand to create a flat, even bed. If the concrete itself has a bump causing the problem, grind it down before re-setting. This is much easier to fix during installation than after everything is compacted and jointed.
Joint sand washing out
If polymeric sand is washing out of joints after rain, it's usually because it wasn't activated properly (not enough water, or too much water that flushed the sand out), or because the joints weren't filled deeply enough. For minor washout, you can top off with fresh polymeric sand and re-activate. For significant washout, you may need to sweep out the joints completely and start fresh. Make sure you're using enough product to fill the full depth of the joint.
Pavers settling unevenly over time
If pavers start dropping in a specific area months after installation, the most likely culprits are a void in the concrete beneath the bedding layer (an old spall or hollow area you didn't catch), or water eroding the sand from below. Lift the affected pavers, inspect the concrete and the remaining sand, fill any voids in the concrete, add fresh sand, and re-set. This is exactly why a thorough slab inspection before you start matters so much.
Drainage problems after installation
If water is pooling on your finished patio, your slope wasn't quite right somewhere in the installation. If you’re working right against an existing patio, pay extra attention to the jointing and leveling transitions so you don’t create a trip edge or drainage low spot pooling on your finished patio. You can sometimes correct minor drainage issues by carefully lifting a section of pavers, adjusting the bedding sand to create more slope, and re-setting. For persistent drainage problems near the house foundation, a channel drain or French drain at the patio edge may be a more permanent fix.
Ongoing maintenance
Maintaining pavers over concrete is straightforward. Sweep or blow off debris regularly to prevent moss and algae from establishing in joints. Re-apply polymeric sand to any joints that show thinning every year or two, particularly after harsh winters. Reseal every 3 to 5 years. Inspect the perimeter edge restraints annually and re-secure any that have shifted. A well-maintained paver patio over concrete should look great and perform well for 20 years or more, and the concrete slab beneath it actually extends the life of both.
FAQ
Can I lay patio pavers on concrete that has small surface scaling but isn’t moving much?
It depends on whether the slab is still firmly bonded to itself. Surface scaling can usually be ground off or removed and then patched, but if pieces can lift or flake when scraped, the bedding bed will fail because the loose concrete will crumble under vibration. If in doubt, pressure-wash, then probe the worst spots with a chisel, if chunks come away easily, choose mortar-setting or replace the concrete.
What slab thickness and condition should I look for before using a sand setting bed?
For a sand or dry mudset bed over concrete, the slab should be structurally sound and ideally thick enough to resist point loading and minor flex. If your slab is thinner than about 4 inches or you see flex, significant vertical displacement, or active cracking, the project is at higher risk. In that case, mortar-setting or a different base approach is usually more stable than relying on sand alone.
How do I handle a concrete expansion joint that runs through or across my patio?
Treat it as an expansion control in the paver system. Leave a slightly wider joint through the overlay where movement is likely, then fill it with a flexible joint material such as backer rod plus polymeric sand or an elastomeric joint filler as appropriate. Avoid locking that area with rigid mortar, rigid framing, or hard grout, because paver edges can crack or tent as the slab moves.
Should I compact the sand layer after screeding but before setting pavers?
No. The sand should remain loose and level so each paver can bed uniformly when pressed. Compaction before placement can create hard spots and voids, which then show up as rocking pavers and uneven heights after the joints are filled and activated.
How much bedding sand should I target over concrete?
Keep it in the thin range (commonly about 1/2 inch to 1 inch for sand-set overlays). If you end up thicker in places to “fix” bumps, you can create springy areas that move after compaction and joint filling. Use grinding and patching on the concrete to keep the sand layer consistent rather than relying on extra sand.
What’s the safest way to cut pavers for an overlay on concrete?
Plan cuts so you avoid tiny slivers, and start your pattern so most cuts land along the perimeter where they can be adjusted. Use a wet saw for best edges on many paver types, dry cutting tends to overheat and can chip. Always dry-fit border courses and verify the final paver height still works with door thresholds and step risers.
Why do pavers look hazy after activating polymeric sand, and how can I prevent it?
Haze usually happens when polymeric sand dust or residue is left on the paver faces during activation, or when too much water is used. Prevent it by filling joints to slightly below the top, sweeping off excess thoroughly before misting, and using a fine spray setting. If haze appears, wait for the sand to cure first, then clean with a mild appropriate cleaner and soft brush rather than aggressive scraping.
How do I stop polymeric sand from washing out during the first big rain?
Make sure joints are packed to the correct depth and that activation uses enough misting to firm the sand without blasting joints. Also check that the surface slope sends water away from the house; pooling near doors or walls can soften joints longer and increase washout risk. After heavy washout, you may need to remove and refill joints, topping off only works reliably for minor losses.
Will laying pavers over concrete trap water and cause mold or staining on the slab?
It shouldn’t if drainage is correct, because pavers over a sand bed still allow water to move through joints and then drain across the surface. The key is ensuring your slope is right, joints are not sealed with impervious materials, and water flows away from the house. If you have frequent pooling, address the drainage first, otherwise moisture can concentrate at edges and promote biological growth.
How soon can I walk on the new pavers, and when can I use heavy loads?
Joint activation polymeric sand typically needs a cure period before foot traffic, often around 24 hours, and longer before full use. Avoid moving heavy items across the patio early because joints can loosen and bedding can shift before the assembly stabilizes. Follow the product timing on your specific polymeric sand rather than assuming all brands cure the same.
Do I need to seal pavers laid over concrete?
Sealing is optional, but it helps reduce staining and can make maintenance easier, especially for porous pavers. If you seal, wait until the polymeric sand has fully cured, then apply a thin first coat and a second coat without puddling. Choose a sealer matched to your paver type, and plan re-sealing based on traffic and sun exposure.
What’s the best way to correct a slightly uneven or rocking paver after installation?
Lift the affected paver(s) before they are fully locked in by foot traffic and joint hardening. Check whether the concrete has a high spot or whether the sand depth is uneven, then grind the high concrete bump or add/remove sand to level the bed. Re-set the paver, refill the joint to the correct depth, and re-activate polymeric sand if that area was involved.
How do I maintain edge restraints over time on a concrete overlay?
Inspect the perimeter annually and after freeze-thaw seasons. If edging has shifted, joints can open and pavers can migrate. Re-secure any loose plastic edging into stable points, and for areas where edging is bonded to concrete, look for gaps where water might erode bedding beneath borders.
Next Articles
How to Extend a Patio With Pavers: Step-by-Step DIY
Step-by-step guide to extend a patio with pavers, including base prep, cutting, leveling, and drainage on concrete or ex
How to Use Quikrete Patio Paver Jointing Sand: Guide & Tips
How to use Quikrete Patio Paver Jointing Sand: step-by-step application, tools, timing, coverage, and care.

How to Use Patio Paver Sand: Step by Step DIY Guide
Step-by-step guide to apply patio paver sand correctly: prep base, set pavers, fill joints, compact, and troubleshoot is