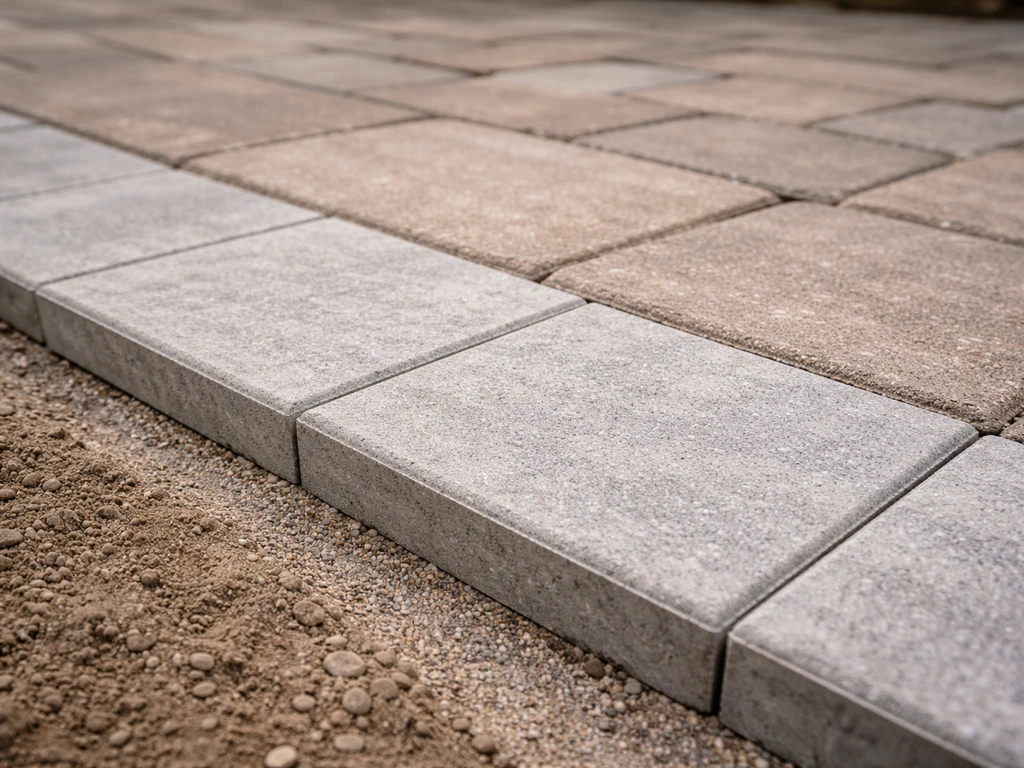
You can lay pavers next to an existing patio and have the new section look and perform like it was always there, but only if you nail three things: matching the finished height of the old surface, maintaining a slope that drains water away from your house, and building a base that's just as solid as what's under the original patio. Get those right and the seam between old and new will stay tight for years. Rush any of them and you'll be dealing with rocking pavers, pooling water, or a growing gap by next spring.
How to Lay Pavers Next to an Existing Patio Seamlessly

Felix Rowe
30 May 2026
Plan the tie-in before you touch a shovel
The single biggest mistake people make is heading straight to the digging phase without understanding how the new section needs to relate to the old one. Spend 30 minutes on measurements and math first, and you'll save yourself hours of rework.
Measure the existing surface height and slope

Walk the edge of your existing patio with a tape measure and a 4-foot level. Note the finished surface height at multiple points along the edge where the new pavers will meet the old ones. If the existing patio is concrete, measure from grade to the top of the slab at several spots. If it's an existing paver patio, measure the top surface. You'll likely see some variation, especially on an older patio that has settled. Write every measurement down.
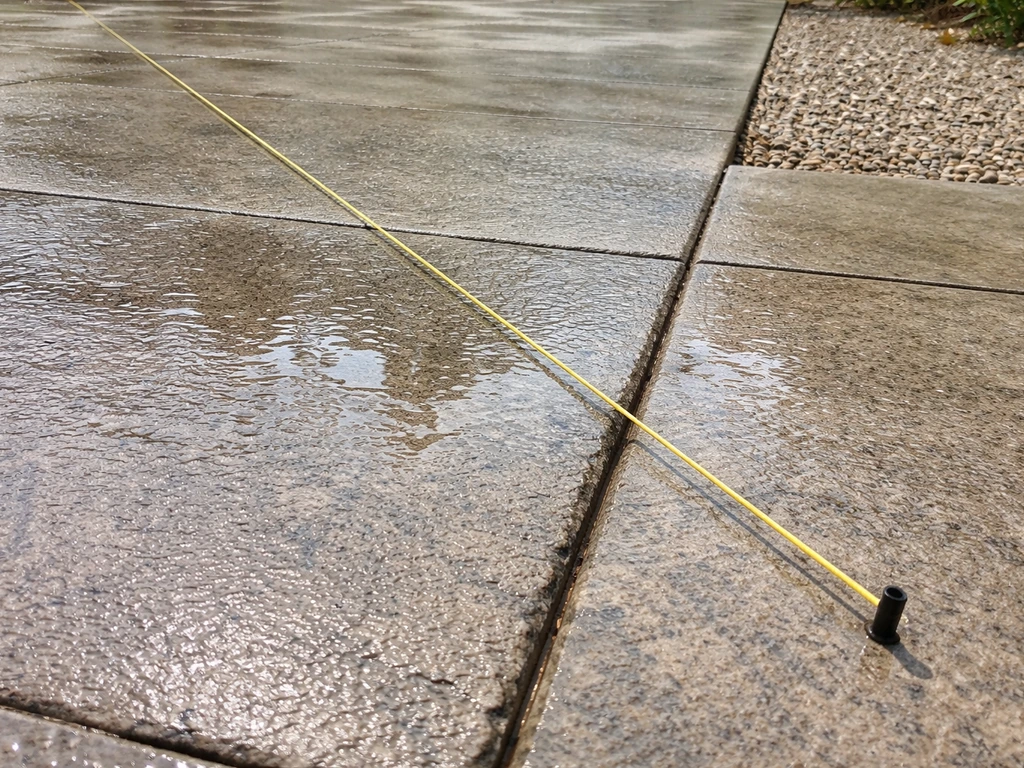
Next, check the existing drainage slope. The standard for paver installations is 1/4 inch of drop per foot directed away from your house or any structure. That's about a 1-inch drop over 4 feet. Your new section needs to continue that slope seamlessly, not fight it. Use a laser level stretched from the house outward to see exactly where your existing patio sits and what slope you're working with. A laser level is the most reliable tool here because string lines can sag and throw you off by half an inch across a wider run.
Calculate your finished height target
Once you know the height of the existing surface edge, that number becomes your target finished height for the new pavers at the seam. From there, work backward to figure out how deep to dig. A standard sand-set paver installation uses: excavation depth = base thickness + 1 inch of bedding sand + paver thickness. For a typical residential paver (about 2.375 inches thick), with a 4-inch compacted base and 1-inch sand bed, you're digging roughly 7.5 inches below the finished paver surface. If your existing patio edge sits at a specific height relative to grade, that math tells you exactly how far down to go.
Plan the drainage path across the seam
Water doesn't care where old ends and new begins. Make sure your planned slope continues through the new section at the same rate as the original. If the existing patio drains at 1/4 inch per foot toward the yard, your new section should too. Mark the slope direction on your site plan before digging. If extending a patio that abuts the house, confirm that your new section's highest point (at the house edge or at the seam with the old patio) still lets water flow outward.
Assess what you're actually tying into
The existing patio surface dictates how you approach the seam. It's not a one-size-fits-all situation, and getting this wrong leads to an ugly, unstable joint line.
Existing paver patio
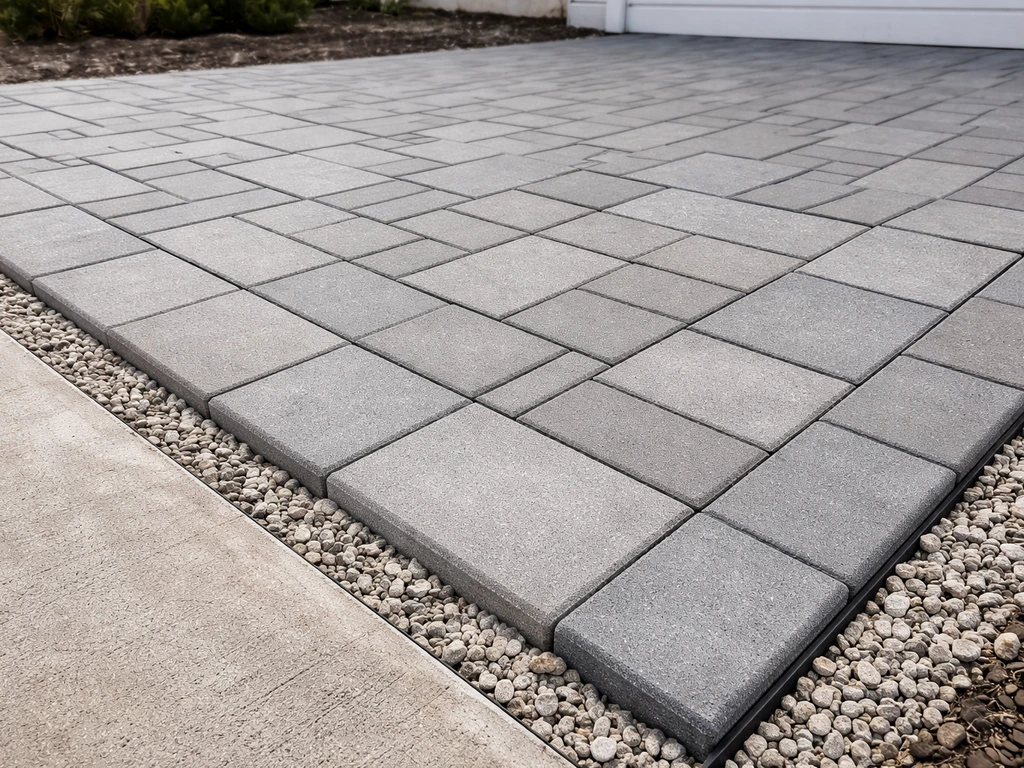
This is the most forgiving scenario. You're matching paver to paver, and if you use the same paver thickness and brand, the transition can be nearly invisible. Walk the edge and check for any settled, rocking, or raised pavers along the tie-in zone. Fix those first by pulling them, adjusting the sand bed, and re-setting them before you build the new section. A weak or uneven existing edge will transfer movement into your new work over time.
Existing concrete slab
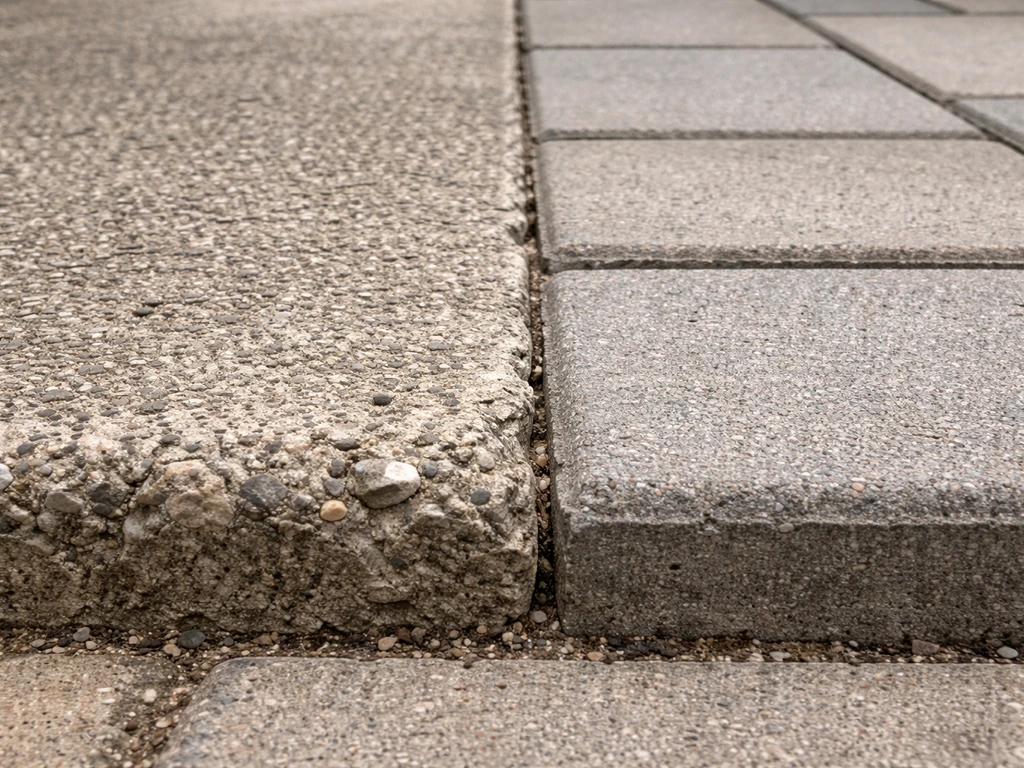
Concrete edges are rigid and usually stable, but they can have chips, settled sections, or spalled edges. If you're working on a concrete slab, follow the right surface prep and height-tie steps so your brick pavers sit correctly over the patio Concrete edges are rigid and usually stable. Run your hand along the edge and look for crumbling or cracked areas that would create an uneven boundary for your new pavers. If the concrete edge is in decent shape, you can use it as your height reference. If you’re installing pavers over an existing concrete patio, use this edge condition as your height reference and follow the same base and slope planning so the seam stays stable install pavers over an existing concrete patio. If the edge is crumbled or uneven, you may need to cut a clean, straight line with a concrete saw before you start. Topics like laying patio pavers on concrete or installing pavers over an existing concrete patio involve different approaches, but when you're adding pavers alongside (rather than on top of) a concrete slab, the slab edge becomes your height benchmark and your structural neighbor. If you're wondering about the process, this is different from how to lay patio pavers on concrete, where you typically prepare the slab and plan around drainage and height changes.
Existing brick patio
Older brick patios often sit higher than modern pavers because they were set in a mortar bed or on a thicker base. Measure carefully. If the brick surface is more than about 3/8 inch taller than your planned new paver surface, you'll need to adjust your base thickness or consider a transition strip. Brick edges also tend to be less uniform, so plan on cutting your first row of new pavers to fit any irregularities.
When to cut or demo the existing edge
Cut the existing edge when: the edge is ragged or crumbled (concrete or brick), the existing pavers overhang into your new work zone, or you need a perfectly straight reference line for laying the new section. Use a circular saw with a diamond blade or a dedicated concrete saw for concrete edges, and a cold chisel plus mallet for individual pavers you need to remove. Always wear eye protection and a dust mask. Cutting concrete generates a lot of fine silica dust, so work in a well-ventilated area and consider a wet-cutting saw to control it. Protect the existing surface during any cutting by taping cardboard or plywood along the cut line to prevent chip-out on the surface you're keeping.
Excavating along the edge: depth, width, and limits
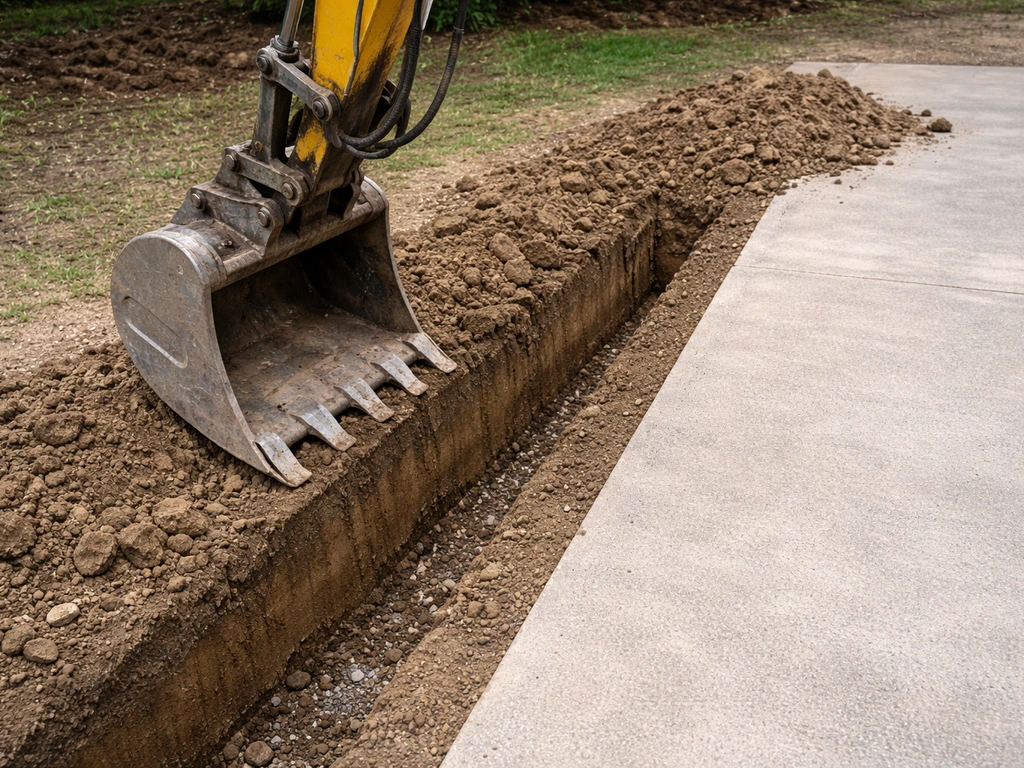
This is where the real work starts. Excavation next to an existing patio is a bit more controlled than digging an open area from scratch because you're working in a confined zone and you cannot undercut the existing patio's base.
How deep to dig
Your excavation depth is determined by your finished paver height target (set by the existing patio edge) minus the depth underground. Work the formula: base thickness + 1 inch sand bed + paver thickness = total depth below finished grade. For most residential projects with standard pavers, that puts you 7 to 8 inches below the finished surface. Measure down from the existing patio edge using a straight board laid across from the old surface, then dig to the correct depth below that board.
Protect the existing base
When you're digging along an existing slab or paver edge, do not undercut the base of the existing installation. Stay a few inches away from the edge when using a spade and finish the last few inches by hand. Undercutting the existing base can cause the old patio edge to settle or crack, which is the last thing you want right before laying new work next to it. If you see gravel or compacted base material from the existing patio as you dig, that's your cue to slow down and be precise.
Slope the subgrade correctly
The bottom of your excavation (the subgrade) needs to slope at the same rate as your planned finished surface, which is at least 1/8 to 1/4 inch per foot away from structures. Don't assume a flat dig will self-correct once you add base material. Slope the dirt floor of your excavation from the start, then build each layer (base, sand) at the same consistent depth so the slope carries all the way to the top.
Tools and time for excavation
For a small addition (say, 50 to 100 square feet), you can do this with a flat spade, a round-point shovel, and a wheelbarrow. Plan on 2 to 4 hours for digging depending on soil type. Clay soil is a workout. If you're adding a larger section (200+ square feet), rent a small plate compactor and consider a mini excavator for a half-day to save your back. Always call 811 before any digging to have utilities marked.
Building a base that connects to the existing patio
The base is where this job wins or loses. A weak or disconnected base means the new section will shift independently of the old one, and that gap or step at the seam will show up within a season or two.
Lay landscape fabric first
Before adding base material, line the excavated area with a geotextile landscape fabric. Tuck it up against the existing patio edge (or overlap it onto the existing base if the old edge is exposed). This fabric separates the base aggregate from the subgrade soil, blank" rel="noopener noreferrer">prevents sand migration upward, and helps keep weeds from pushing through joints. It's a step a lot of DIYers skip, but it matters for long-term stability, especially near the seam where water and freeze-thaw cycles will constantly test the joint.
Add and compact crushed stone base
Fill with compactable crushed stone (3/4-inch clean gravel or processed gravel base, also called road base or crusher run). Add it in 3-inch lifts and compact each lift with a plate compactor before adding the next. This is critical. One thick dump of gravel compacted once will shift. Two thinner lifts compacted separately will hold. Run the plate compactor in overlapping passes, including passes running perpendicular to the previous ones. Get close to the existing patio edge with the compactor but stop about 6 inches away to avoid vibrating the existing installation. Hand-tamp that last strip.
Target a total compacted base depth of 4 inches for most residential foot-traffic projects. In cold climates with significant freeze-thaw cycles, go to 6 inches. Check your base height frequently by measuring down from a string line or board placed across from the existing patio surface. You want the compacted base to sit exactly 1 inch below the finished paver surface minus paver thickness, because that 1-inch gap is reserved for your bedding sand layer.
Avoid creating a weak seam at the base level
If you can see the base of the existing patio during excavation, try to get your new base material in contact with it rather than leaving a gap or a step at the base level. The two bases don't need to be fused, but having your new compacted gravel butted right up against the existing base material means there's no void for water to pool or for the edge to cantilever over.
Edge restraints, leveling, and your starting line
Before any pavers go down, you need edge restraints installed on all open sides of the new section, and you need a solid reference line to work from.
Installing edge restraints
Use plastic or aluminum snap-edge restraints along all exterior edges of the new paver section (the sides that don't butt against the existing patio). Do not install edge restraints between the new pavers and the existing patio edge. That seam is handled by the snug fit of the pavers against the old surface and the polymeric sand you'll use to lock it. Restraints go on the outside edges only, spiked into the compacted base with 10-inch galvanized spikes every 12 inches (or closer on curves). Set the restraints at exactly the right height: the top of the restraint should be even with the top of the finished paver surface. If the restraint is even slightly too high, your edge pavers will rock. This height-setting step is one the ICPI installation guidelines emphasize as critical for long-term stability, and it's easy to rush. Take your time here.
Screed the bedding sand
Once the base is compacted and restraints are set, spread coarse (concrete) bedding sand across the area to a depth of 1 inch. Use two pieces of conduit or screed rails set at the correct height as guides, then drag a straight 2x4 screed board across them to create a perfectly flat, 1-inch-deep sand bed. Work in sections. Do not walk on the screeded sand. Set up a kneeling board to work from, moving it as you progress.
Set your starting line
Your starting line is the existing patio edge. When the concrete patio edge is uneven or damaged, plan your transition so the new pavers sit at the right height and the seam stays tight existing patio edge. If you plan the layout from the existing patio edge, you will find it easier to extend your patio with pavers so the seam stays tight and level. That's your reference. Snap a chalk line along the edge of the existing patio to define your first row of new pavers. If the existing edge is straight, use it directly. If it's irregular or angled, decide whether you want to follow the irregular edge (which means cutting pavers to fit) or establish a new straight line and fill the gap with cut pavers. For a cleaner look, most people prefer to establish a straight line and cut the first row of new pavers to fill any gap between the straight line and the irregular edge.
Laying, cutting, and setting pavers next to the existing patio
Now the satisfying part. Once your sand bed is screeded and your layout lines are set, paver laying goes faster than you'd expect.
Lay pavers hand-tight from the existing edge outward
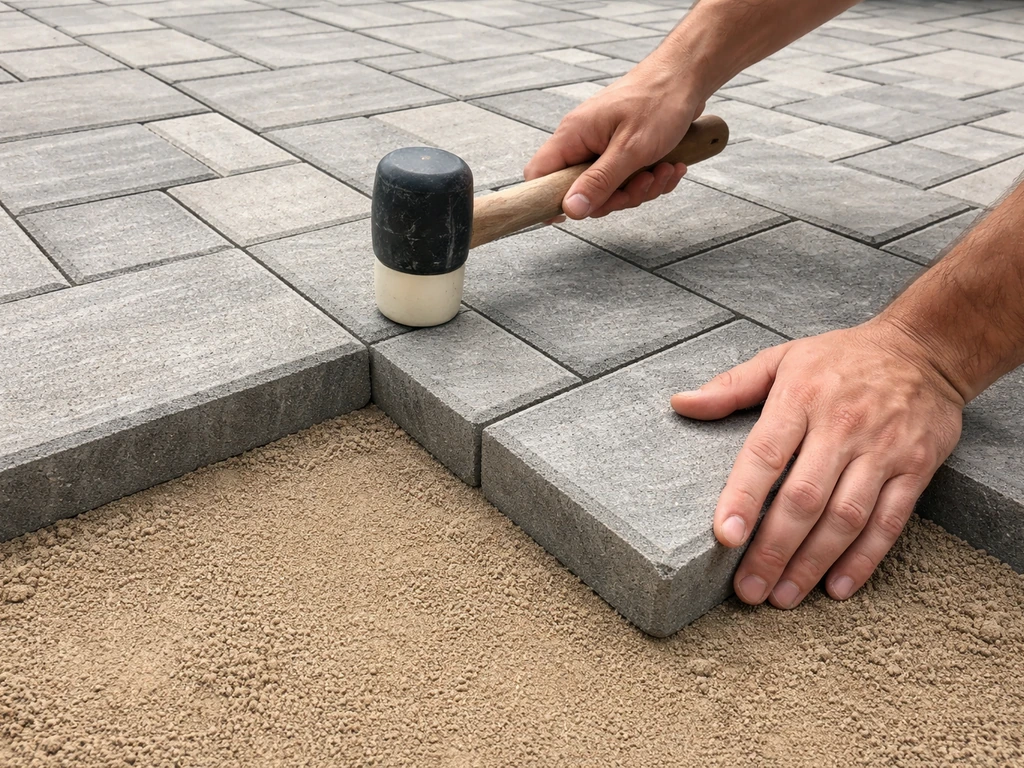
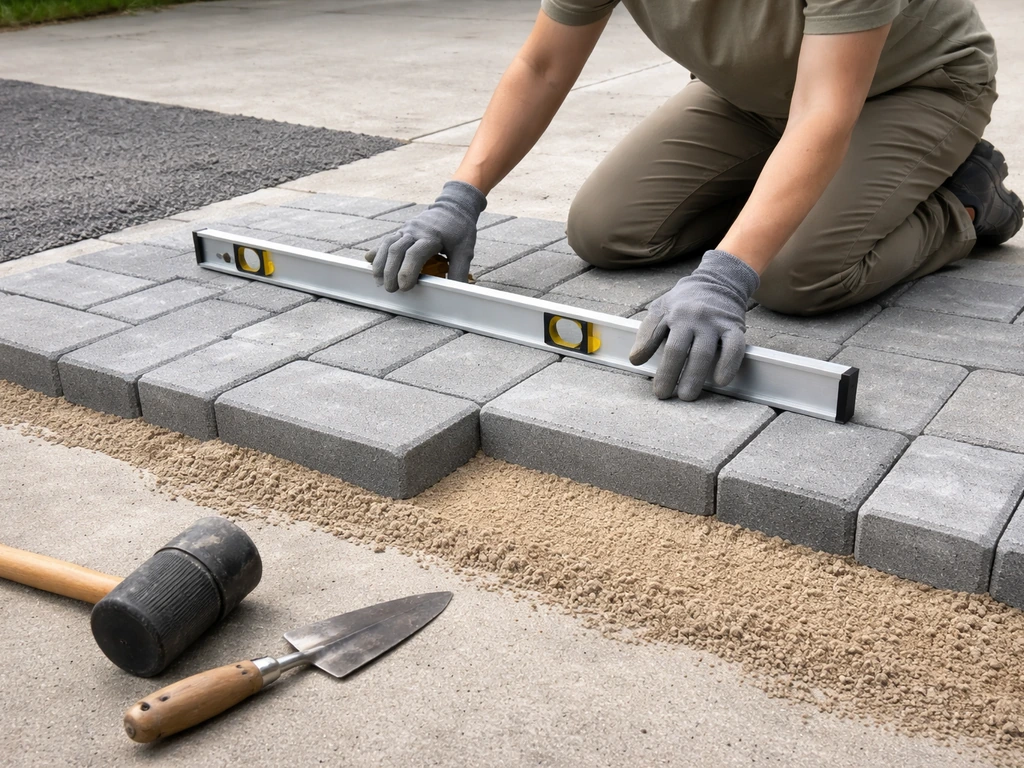
Start laying pavers at the existing patio edge and work outward toward the exterior edge restraints. Set each paver down straight without sliding it (sliding disturbs the screeded sand). Place pavers hand-tight with consistent spacing, typically about 1/8 to 3/16 inch between them for joint sand. Check every few rows with a string line across the top to confirm they're flat and consistent.
Use a rubber mallet to tap pavers that sit slightly high. If a paver sits low, lift it, add a pinch of sand underneath, and reset it. Never try to tap a low paver up with the mallet. Once you've laid a manageable section (say, 20 to 30 square feet), run the plate compactor over it (with a rubber pad attached to protect the paver faces) to fully seat the pavers into the sand bed. This compaction step drives the pavers down about 3/8 inch into the sand and creates a firm, interlocked surface.
Cutting pavers to fit the edges
You'll almost always need to cut pavers along at least one edge of a new section, whether it's to fit an irregular existing edge, make a clean corner, or fill a gap in the last row. A wet saw with a diamond blade gives you the cleanest cuts and handles the silica dust issue better than a dry angle grinder. For straight cuts, a rented paver splitter (guillotine) is faster but less precise. Mark cuts with a pencil or chalk, wear eye protection and gloves, and cut away from your body.
For the first row next to an irregular existing edge, hold each paver in place, scribe the cut line with a pencil following the contour of the existing edge, then cut and test-fit before setting in sand. A gap of up to about 1.5 inches at the seam between new and old is acceptable since polymeric sand can fill it. Try to keep the gap consistent and as narrow as possible for the best appearance.
Handling height mismatches
If your new pavers are coming in slightly lower than the existing patio edge (less than 3/8 inch difference), you can add a touch more bedding sand in that row to bring them up. If the mismatch is larger, you need to re-evaluate your base depth. Pulling up a row of freshly laid pavers and adjusting the base is annoying, but it's far better than a trip hazard at the seam. If the existing patio sits significantly higher due to paver thickness differences (for example, you're adding 60mm pavers next to older 80mm pavers), you'll need to build up your base accordingly. In extreme cases, a thin mortar setting bed or adjustable pedestal system can split the difference, but those are more advanced approaches.
Jointing, sealing, and cleanup
Joints are what hold the whole surface together and keep weeds, ants, and water from undermining your work. Don't treat this step as an afterthought.
Polymeric sand vs. regular jointing sand
| Feature | Regular Sand | Polymeric Sand |
|---|---|---|
| Weed resistance | Low — seeds germinate easily | High — polymer binders resist growth |
| Ant resistance | Low | Better — harder surface to displace |
| Joint stability | Can wash or erode out | Sets firm, resists erosion |
| Application complexity | Simple — sweep and wet | Moderate — requires precise wetting steps |
| Joint width range | Any | Best between 1/4 inch and 1.5 to 2 inches |
| Temperature requirement | Any | Above 35°F for at least 12 hours after install |
| Best for tie-in seams | Not recommended | Yes — locks the seam between old and new |
| Cost | Low | Moderate (worth it) |
For the seam between new and existing pavers, use polymeric sand. It locks the joint and reduces the chance of sand washing out of that critical seam over time. Polymeric sand works best in joints between 1/4 inch and about 1.5 to 2 inches wide. If your tie-in gap is wider than 2 inches, you'll need to address that with a cut paver rather than trying to fill it with joint sand alone.
Applying polymeric sand
- Make sure paver surfaces are completely dry before starting.
- Sweep polymeric sand across the entire surface, working it into all joints with a stiff push broom.
- Run the plate compactor (with rubber pad) over the area one more time to work sand deeper into joints.
- Sweep again to fill any joints that settled during compaction.
- Blow off all excess sand from paver surfaces with a leaf blower — this is critical. Any sand left on surfaces will haze after wetting.
- Mist the surface with water using a garden hose on the mist/rain setting. Don't flood it. Wet it thoroughly, let it absorb, then mist again. Follow the manufacturer's instructions for your specific product.
- Keep foot traffic off for 24 hours and protect from rain for the same period while the polymers activate.
Don't apply polymeric sand in temperatures below 35°F or if rain is expected within 24 hours. Both will prevent the polymers from setting correctly and you'll end up with unstable, muddy joints.
Should you seal the new (and existing) patio?
Sealing is optional but worth doing, especially when you've just added a new section. A penetrating paver sealer enhances color, adds a layer of stain resistance, and helps lock the polymeric sand. The key issue when adding new pavers next to old ones: the new pavers may be a different shade even if they're the same product, because new pavers are brighter. Sealing both the new and existing sections with the same product and applicator at the same time will help blend the appearance. Wait at least 30 days after installation before sealing to let the polymeric sand fully cure and the pavers settle. Use a low-pressure pump sprayer or roller and follow the manufacturer's instructions on coverage rate.
When things don't go perfectly: troubleshooting
Even well-executed paver work can throw you a curveball. Here are the most common issues and what to do about them.
Gap opening at the seam between old and new
A gap at the tie-in seam usually means one of two things: the new section's base wasn't compacted firmly enough and has settled, or the edge restraints on the new section allowed lateral movement. If the gap is less than about 3/4 inch, refill with polymeric sand and compact. If it's wider or growing, you'll need to pull the pavers nearest the seam, check and re-compact the base in that zone, then reset and re-joint.
Rocking or uneven pavers
Rocking pavers usually mean an uneven sand bed beneath them. Pull the affected pavers, add or remove sand as needed, screed flat, and reset. A paver that rocks diagonally (high on two opposite corners) may just need to be rotated 90 degrees in its opening. Individual uneven pavers near the seam can also result from a nearby paver not being fully seated. Run the plate compactor over the area and check again.
Poor drainage or pooling water at the seam
Water pooling at the seam between old and new is almost always a slope problem. Either the new section's slope is too shallow, the wrong direction, or the seam is sitting in a low spot created by height mismatch. If it's a minor issue (the new section is just barely flat at the seam), you may be able to pull the pavers along the seam and rebuild the bedding sand layer with a slight slope correction. For a larger drainage issue, the base may need to be regraded. This is the fix that requires the most work, which is why getting the slope right from the excavation stage is so important.
Weeds growing through joints
If weeds appear in the joints shortly after installation, the polymeric sand either wasn't applied correctly, wasn't wetted properly, or wasn't fully worked into the joints. Weeds also love regular sand joints. Pull existing weeds by hand, let joints dry, and re-apply polymeric sand to affected areas following the full application process. Geotextile fabric under the base (which you installed) will prevent weeds from pushing up from below, but airborne seeds landing in joints is a separate issue that polymeric sand handles.
Existing patio edge was settled or uneven when you started
If the existing patio edge has a settled or dipped section, correct it before laying the new section. For paver patios, pull and reset the pavers along the troubled edge. For a concrete slab, a settled edge less than 1 inch can sometimes be addressed by building up your bedding sand slightly in that zone for a gradual transition (a chamfer effect), but be aware this compromises the uniformity of your sand bed depth. Significant concrete settling (1 inch or more) should be evaluated before you invest in a new section next to it, since the cause of the settling may continue to affect your new work.
Pavers are a different color or size than the existing ones
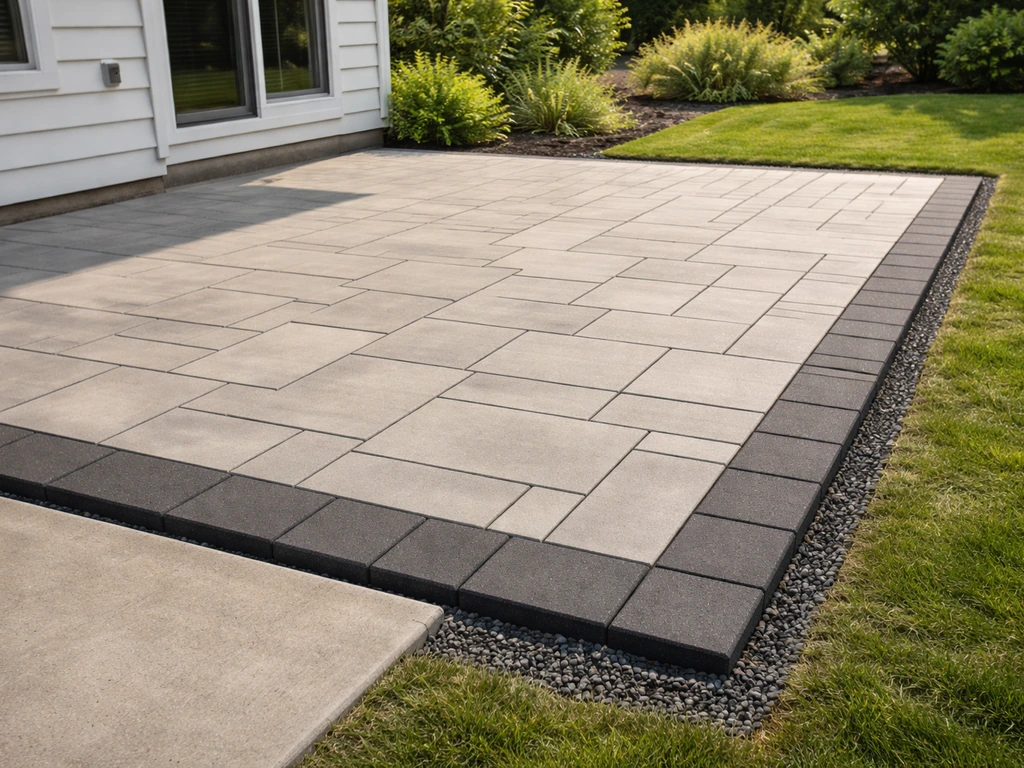
Try to source the same brand, style, and thickness of paver as the original installation if you can. If you can't match exactly, a contrasting pattern (like using a border paver in a different color intentionally) can look intentional and clean. Avoid nearly-matching but slightly-off pavers, as that looks accidental. Thickness differences of more than about 3/8 inch need to be addressed at the base level, not the sand level.
After the job: inspection, cleanup, and ongoing maintenance
Once the polymeric sand has cured (24 to 48 hours), do a full walk of the new section. Step on every paver. Feel for any that rock or feel hollow. Check the tie-in seam for consistency. Look at the surface from a low angle (crouch down and look across it) to spot any high or low spots you might have missed. Address anything that feels or looks wrong now, before the installation fully settles.
For cleanup, sweep off any polymeric sand haze with a dry brush. If haze has cured on the surface, a light scrubbing with water and a stiff brush usually removes it. Avoid pressure washing a new installation for at least 60 days, as the force can dislodge newly set joint sand.
Maintenance schedule to keep the new section from separating
- At 6 months: inspect the seam between old and new for any gap development or sand loss. Top up with polymeric sand if needed.
- Annually: check that edge restraints are still flush and firmly spiked. Replace any loose spikes.
- Every 2 to 3 years: inspect the joint sand throughout the surface and re-apply polymeric sand to any joints that have thinned or eroded.
- Every 3 to 5 years: consider re-sealing if you sealed at installation. Clean the surface first, check that joints are in good condition, then apply a fresh coat.
- After any hard winter: inspect for frost heave, which can cause individual pavers near the seam to rise. Re-set heaved pavers in spring by pulling, adjusting the sand bed, and re-compacting.
Laying pavers next to an existing patio is genuinely a project most careful DIYers can tackle in a weekend, assuming the area is under about 150 square feet. The work is physical but not complicated. The thing that separates a result you're proud of from one that separates and sinks is the prep work: getting the height right, building the base in lifts, compacting properly, and taking the time to set edge restraints at the correct level. Do those things right, and the seam between your old patio and new section will be something you have to point out to people rather than something they can't help but notice.
FAQ
Can I lay pavers next to an existing patio without cutting the old edge at all?
Sometimes, but only if the existing edge is solid, straight, and at the height you need for the finished paver surface. If the edge is jagged, spalled, or overhanging into the new zone, leaving it uncut usually creates an uneven starting line that later turns into a visible step or widening joint. In that case, cut a clean, straight line first so your new first row lands where your height and spacing plan say it should.
What gap between the new pavers and the existing patio is safe for polymeric sand?
Polymeric sand works best when the tie-in gap is roughly 1/4 inch up to about 1.5 to 2 inches. If the gap is wider than that, filling it with joint sand alone will not lock properly. Instead, plan to reduce the gap by cutting and fitting pavers (or adjusting the base) so the seam stays within the polymeric sand’s effective width.
How do I handle a height mismatch when the old patio is noticeably higher than the new pavers?
If the difference is small, you can fine-tune with bedding sand in that first or second row. If the mismatch is more than about 3/8 inch, it is usually a base problem, not a sand problem, because sand bed thickness affects stability and joint behavior. For larger differences, re-check your excavation depth and base thickness early, before you lay many rows, so you do not create a trip hazard at the seam.
Should I install edge restraints between the new pavers and the existing patio edge?
No. Edge restraints are for the open exterior sides of the new section. The seam next to the existing patio should be handled by the paver fit against the old surface and by joint locking with polymeric sand. Installing restraints between old and new can force movement in an unintended way, which can lead to rocking pavers or a growing seam.
Why do my pavers feel solid in the field but start cracking or shifting near the seam later?
Most often the compacted base was not built and seated consistently right up to the tie-in zone, or the sand bed was disturbed while you were laying the pavers. Another common cause is stopping the compaction too far from the existing edge, leaving a loose strip that later settles. To prevent this, compact in thin lifts, keep the base slope aligned from the start, and hand-tamp the final strip rather than vibrating it with the compactor too close.
Do I need geotextile fabric under the new paver section when adding next to an existing patio?
It is strongly recommended, especially near the seam. Fabric separates subgrade soil from base aggregate, helps stop sand migration upward, and reduces weed intrusion that can undermine joints over time. If you skip fabric, joints can fail sooner because water and fine particles can work their way into the base/subgrade interface.
What’s the best way to verify slope continuity with a laser level, not just measure once?
After setting your target finished height at multiple points along the existing edge, use the laser to confirm the elevation change through the entire planned run, not just at the seam. Re-check the direction away from the house and look for places where the old patio may have settled, since your new section must mirror the actual drainage path. If the existing patio has dips, plan your new base so water still flows outward at the same rate.
Can I use standard sand instead of polymeric sand at the seam?
You can, but it usually leads to faster joint washout and more weeds at the critical tie-in line. The seam is where water concentrates during storms and where freeze-thaw cycles can work. Polymerically locking joints are designed to reduce washout and stabilize the seam, especially when the gap is within the recommended width range.
When is it too cold or too wet to install polymeric sand?
Avoid applying polymeric sand when the temperature is below about 35°F, and do not apply it if rain is expected within about 24 hours. Cold and rain prevent the polymers from setting correctly, leaving joints weak or muddy and more prone to washing out. If weather changes after you lay pavers, delay jointing until conditions are suitable.
Is sealing necessary, and can it help hide the seam between old and new pavers?
Sealing is optional. It can improve stain resistance and help blend color, especially because newly installed pavers often appear brighter and slightly different from older ones. If you seal, apply the same sealer to both the new and existing sections using the same product and timing, and wait long enough for the polymeric sand to fully cure before sealing.
Why do weeds appear in the joints shortly after the job is finished?
Weeds usually show up when polymeric sand was not applied correctly, not wetted properly, or not worked fully into the joints. Another cause is airborne seeds that land in joints and germinate, even if the under-base fabric is correct. If weeds appear, remove them by hand, let the joints dry, then re-apply polymeric sand to the affected areas following the full application and wetting process.
After installation, what quick checks should I do before calling the job done?
Walk every paver and step on them to feel for rocking or hollow spots. Check the tie-in seam closely from both eye level and a low angle across the surface to spot subtle high or low areas. If anything feels wrong while everything is still fresh, fix it before the base fully locks and settles, since adjustments later are much more disruptive.
Next Articles
Can You Lay Patio Pavers Over Concrete? How to Do It Right
Learn when you can lay patio pavers over concrete, how to prep, add base, ensure drainage, and avoid rocking or pooling.
How to Lay Patio Pavers on Concrete: Step-by-Step DIY
Step-by-step DIY for laying patio pavers on concrete, from prep and base choice to leveling, jointing, sealing, and fixe
How to Extend a Patio With Pavers: Step-by-Step DIY
Step-by-step guide to extend a patio with pavers, including base prep, cutting, leveling, and drainage on concrete or ex