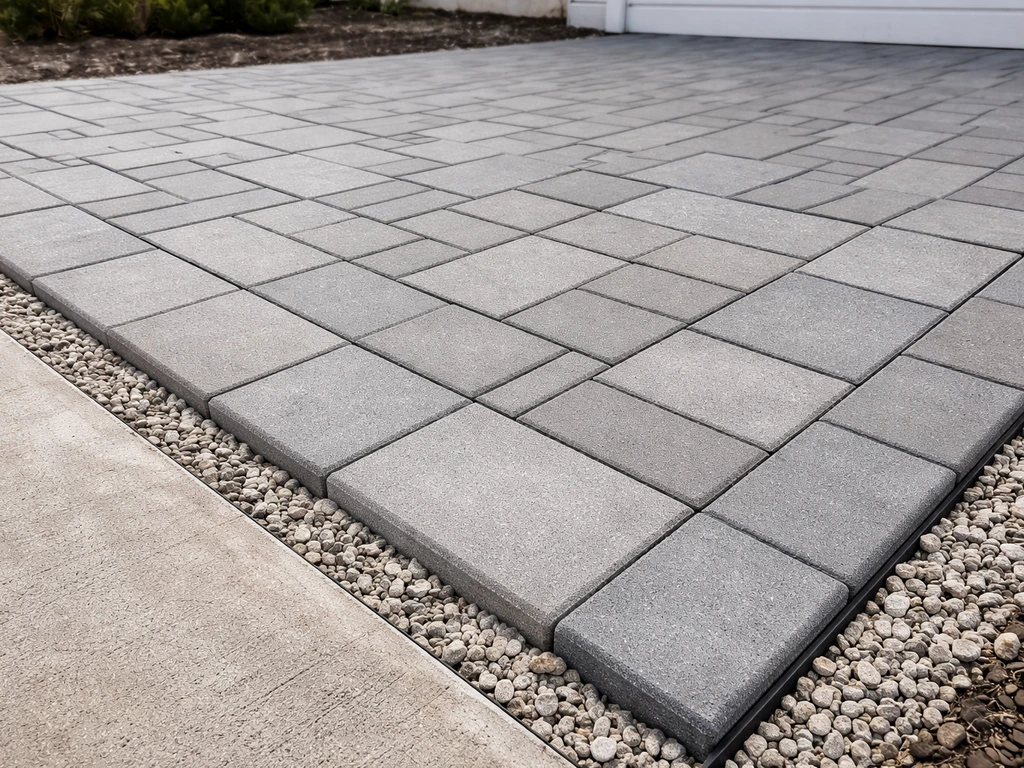
Yes, you can lay patio pavers over an existing concrete slab, and it's one of the most popular ways homeowners refresh a tired or cracked patio without the cost and mess of full demolition. The key conditions are that the concrete must be structurally sound (no major heaving or deep cracking), the slab must slope away from the house at roughly 1/8 inch per foot for drainage, and you need to choose the right installation method for your situation. Get those three things right and you'll end up with a stable, attractive paver surface that lasts for years.
Can You Lay Patio Pavers Over Concrete? How to Do It Right

Felix Rowe
27 May 2026
When it actually makes sense to overlay pavers on concrete
Not every slab is a good candidate. Before you buy a single paver, walk the entire slab and be honest about what you see. The concrete underneath is going to be your permanent base, so anything wrong with it will eventually show up through your finished pavers.
Your slab is a good candidate if it meets all of these criteria: it's stable underfoot with no soft spots, it slopes away from your house (you can check this with a 4-foot level and a tape measure), surface cracks are hairline or cosmetic rather than structural, and there's no significant heaving from tree roots or freeze-thaw damage. If you've got a few small cracks and some surface staining, you're in good shape. Those are prep problems, not dealbreakers.
On the other hand, if you see large sections where the slab has shifted vertically against each other, deep cracks running across the full width of the slab, or areas that flex or feel spongy when you walk on them, overlaying pavers is just going to hide the problem temporarily. Those issues will telegraph through over time, causing your pavers to rock, shift, or become uneven. In those cases, you either need to address the slab first (grinding high spots, filling voids, repairing cracks properly) or consider removing and replacing the concrete entirely.
One thing worth noting: some people search for "pouring concrete over patio pavers," which is the reverse of what we're covering here. That approach, where you pour a new concrete layer on top of existing pavers, is almost never recommended because concrete doesn't bond well to a paver surface and the result is prone to cracking and delamination. Overlaying pavers on top of concrete is the far more reliable and widely supported method.
Prep work: cleaning, assessing the slab, and bonding options

Good prep is the difference between a paver overlay that looks great ten years from now and one that starts rocking and pooling water in the second summer. Don't rush this part.
Clean the concrete thoroughly
Start with a pressure washer. You need to remove dirt, algae, oil stains, paint, and any previous sealers. A pressure washer will also dislodge loose material in any existing cracks. If there's a painted or sealed surface, you may need a chemical stripper before pressure washing, because sand and mortar won't bond reliably to a coated surface. Give the slab at least 24 to 48 hours to dry completely before you do anything else.
Inspect and repair cracks
Fill hairline to medium cracks with a concrete crack filler or polymer-modified patching compound. For cracks wider than about 1/4 inch, use a caulk-style polyurethane or epoxy filler and allow it to cure fully. High spots on the slab surface can be ground down with an angle grinder. The goal is a surface that's as flat and level as possible, because every bump or dip will affect how level your finished pavers sit.
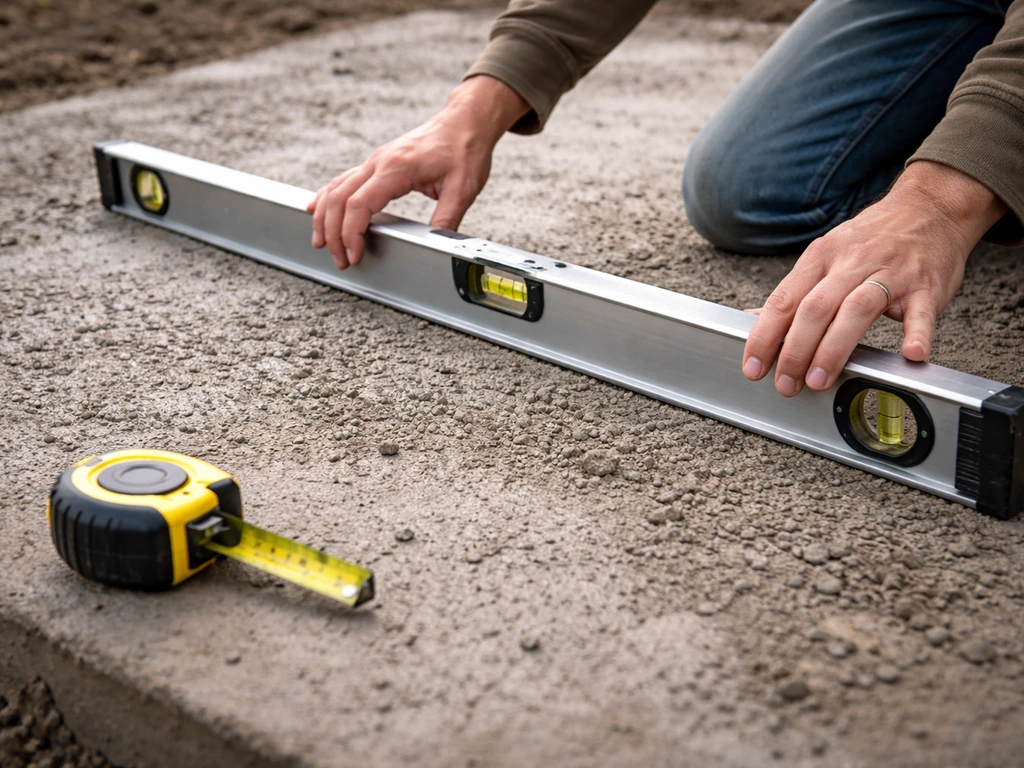
Check and document the slope
Place a 4-foot level on the slab with a tape measure under one end. You want to confirm there's at least 1/8 inch of drop per foot running away from your house. If the slab is flat or, worse, slopes toward the structure, you'll have drainage problems once pavers are on top. Water pooling between the pavers and the concrete surface is one of the most common failures in overlay projects, especially in climates with freeze-thaw cycles. If your slope is inadequate, a drainage mat system or a carefully planned sand layer can help redirect water flow, but it requires more planning than a slab that already drains correctly.
Bonding options
For border or edge pavers that you want locked firmly in place, a liquid bonding fortifier mixed with a dry-pack mortar adhesive (products like BorderBond mixed with DriBond are specifically designed for this) can anchor those pavers directly to the concrete. Always test the adhesive product on a small area of about 4 square feet before committing to the full perimeter, since adhesion can vary based on slab surface condition. Interior field pavers can be bedded on sand, which doesn't require any chemical bonding.
Choosing the right paver system: direct install vs. sand-set over concrete
There are two main approaches to overlaying pavers on concrete, and each has real advantages depending on your slab condition and goals. To learn the full process of covering an existing concrete patio with pavers, follow the step-by-step guidance for prep, base, and installation overlaying pavers on concrete.
| Method | How it works | Best for | Tradeoffs |
|---|---|---|---|
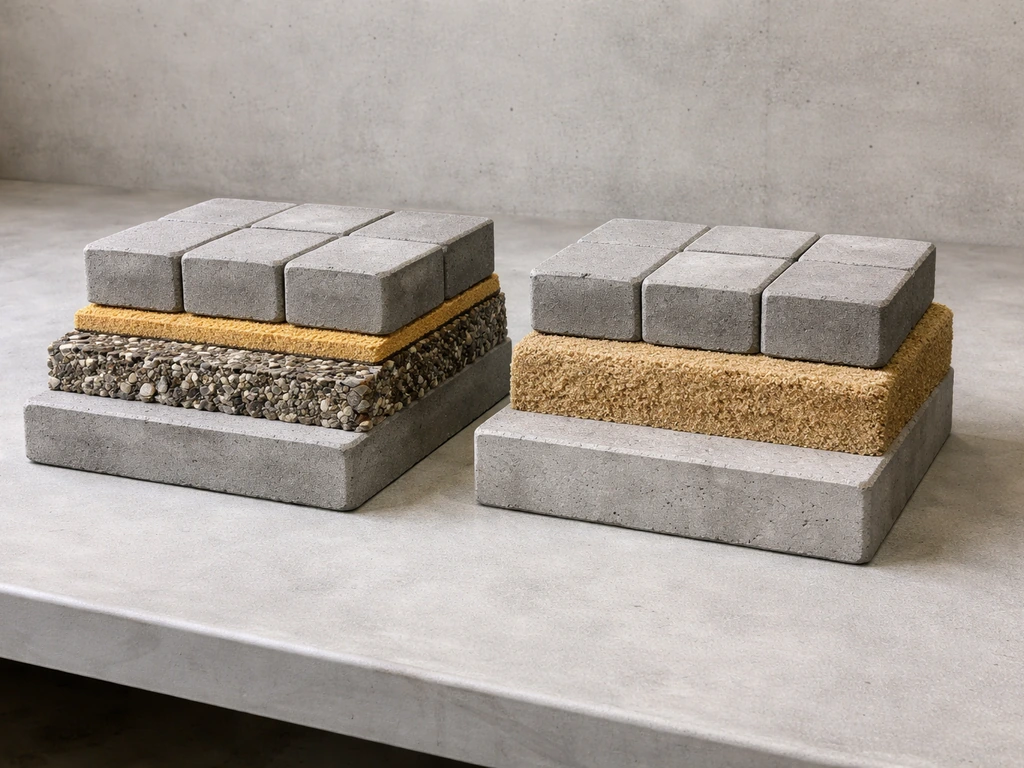
| Sand-set over concrete | A 3/4 to 1-1/2 inch layer of coarse concrete sand (ASTM C-33) is spread over the slab; pavers are set into the sand and joints are filled with polymeric sand | Slabs in good condition with adequate slope; DIY-friendly; allows some adjustment after laying | Adds height to the finished surface; needs solid edge restraints to hold sand in place; drainage planning is critical |
| Mortar-set overlay | Pavers are set directly into a mortar bed (thin-set) bonded to the concrete slab | Slabs with very good condition; areas with limited height clearance; used for premium or irregularly shaped pavers | Less forgiving of slab movement; cracks in slab can telegraph through mortar into pavers; more permanent and harder to repair |
| Drainage mat system | A plastic drainage mat is laid over the slab first, then sand and pavers on top | Slabs with marginal slope or drainage concerns | Adds more height; slightly more material cost; excellent for freeze-thaw climates |
For most DIYers working over a sound residential concrete patio, the sand-set method is the most practical choice. It's forgiving, widely documented, and allows you to make adjustments as you lay. The mortar-set system is more common in commercial applications or where a specific paver manufacturer (like Belgard) supports a defined mortar-set overlay product system. If you're installing brick pavers specifically, which tend to be thinner and more variable in thickness, a mortar-set approach often gives cleaner results.
Step-by-step: how to install pavers over concrete
- Clean, repair, and dry the slab completely. Address cracks, remove coatings, grind any high spots. Allow 24 to 48 hours drying time after pressure washing.
- Mark the perimeter and set string lines. Use stakes and string lines to establish your layout and confirm your pattern will work with full pavers at the most visible edges. Plan your pattern to minimize cuts at walls, drains, and doorways.
- Install edge restraints on all open edges. Any edge not bounded by a wall or structure needs a pre-manufactured polyethylene or concrete edge restraint pinned into the concrete with masonry anchors. This is non-negotiable: without restraints, your sand bed will migrate and pavers will shift laterally over time.
- Spread and screed the sand bed. Use coarse concrete sand (ASTM C-33) and spread it to a consistent depth of 3/4 to 1-1/2 inch across the slab. Use screed rails and a straight board to create an even surface. Do not compact the sand before laying pavers.
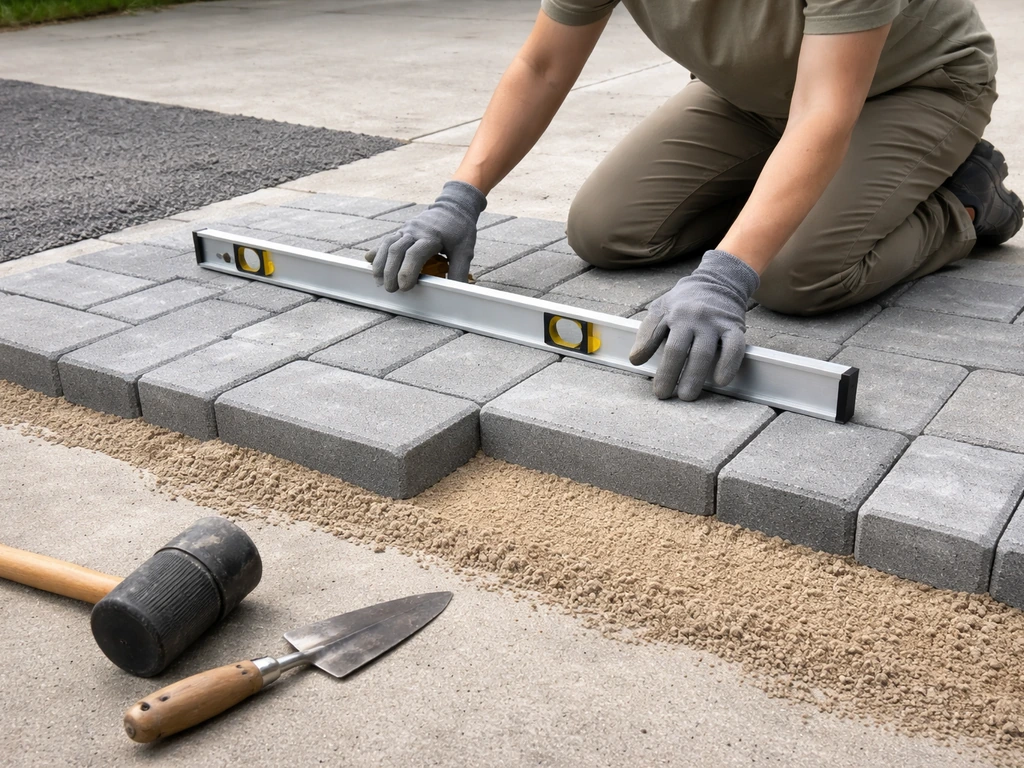
- Lay pavers in your chosen pattern, working from a corner or a straight edge outward. Set each paver with a firm downward press (don't slide them). Use spacers or rely on the paver's built-in lugs for consistent joint gaps. Check your level frequently across the surface.
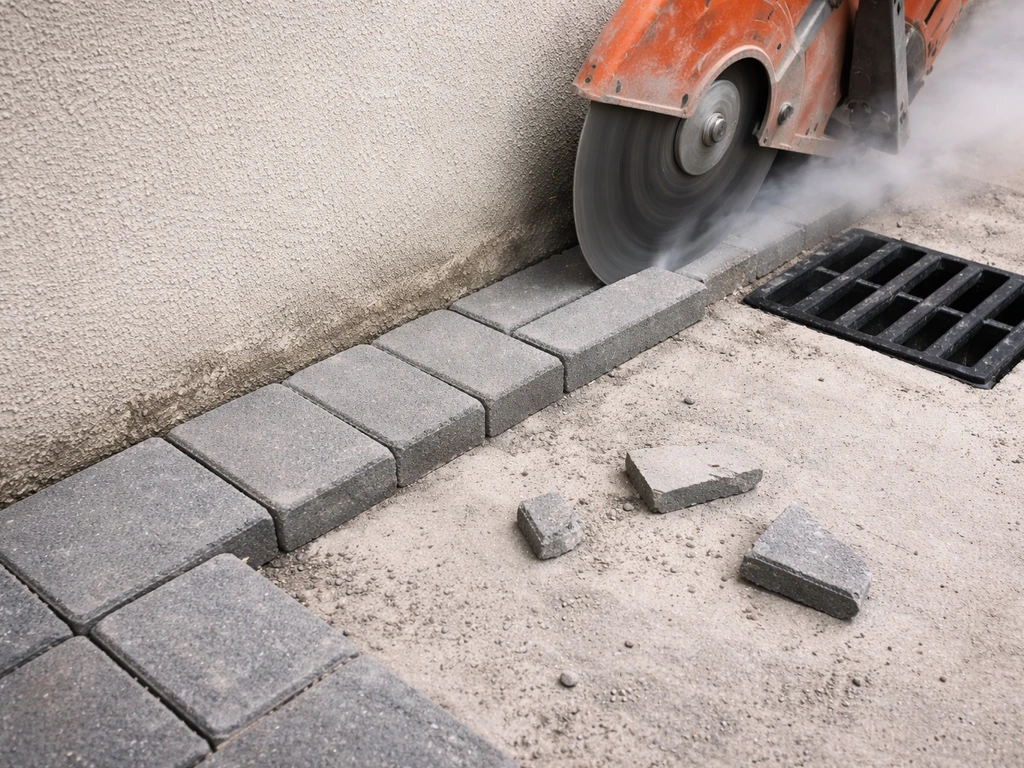
- Cut pavers to fit edges, corners, and around drains. Use a wet saw or angle grinder with a diamond blade. Always dry-fit cuts before setting them in sand.
- Compact the installed pavers. Use a plate compactor with a rubber or foam pad to protect the paver surface. Make two to three passes in different directions to seat the pavers firmly into the sand bed.
- Sweep in polymeric sand. Pour dry polymeric sand over the surface and sweep it into all joints until they're filled to within about 1/8 inch of the top. Blow off any residue from the paver surfaces before wetting.
- Activate the polymeric sand with water. Follow the specific manufacturer's instructions for your product. Generally this means a fine mist first, waiting for absorption, then a second pass. Do not apply during rain or when pavers are wet. Residue left on the surface before watering can cause a cloudy haze, so clean surfaces carefully before activating.
- Allow the polymeric sand to cure fully before use, typically 24 hours minimum.
Edge restraints, base thickness, and drainage: the details that make or break it
Edge restraints
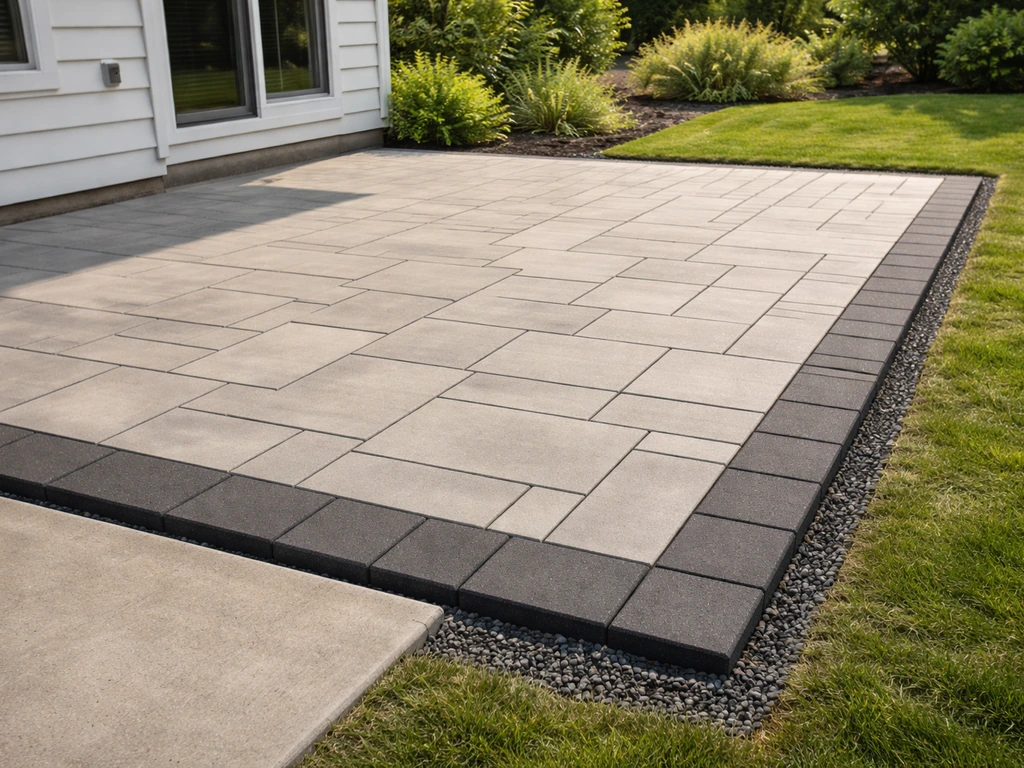
This is the most skipped step in DIY paver overlays, and the most consequential. Without a solid edge restraint holding the sand bed in place, the entire system can creep outward over time, causing gaps, rocking pavers, and an uneven surface. If your patio is bounded on all sides by walls or structures, you may have enough natural restraint. On any open side (a lawn edge, a step, or a free-standing edge), install a manufactured polyethylene restraint and pin it into the concrete with masonry spikes or concrete anchors. Position the restraint so the paver face butts up snugly against the inside edge.
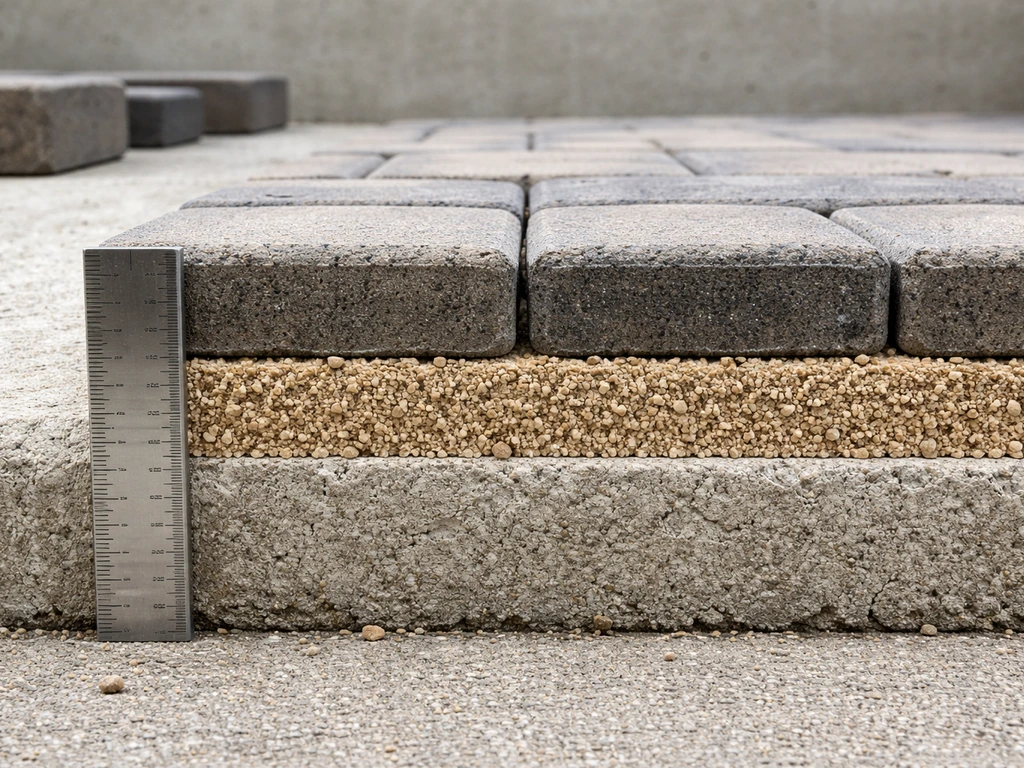
Sand thickness and height
The ICPI-recommended sand bed thickness for pavers over concrete is 3/4 inch (20 mm) to 1-1/2 inches (40 mm). Thinner than 3/4 inch doesn't give you enough material to level the pavers properly. Thicker than 1-1/2 inches becomes unstable under load. Keep in mind that your finished surface will be raised by the sand bed thickness plus the paver thickness, which is typically 2-3/8 to 3-1/8 inches depending on paver type. Account for this at doorways, steps, and any transitions where the new height matters.
Drainage planning
Drainage is where overlay projects most commonly go wrong. Water that gets under the pavers and can't escape will pool in the sand bed, erode joints over time, and in freezing climates will expand and heave your pavers. Make sure your finished paver surface maintains the same slope as the original slab (minimum 1/8 inch per foot away from the house). Home Depot also emphasizes planning for proper drainage by maintaining the correct slope and using the right base and paver sand setup as you mark lines and prepare the patio maintains the same slope as the original slab. If there are existing drains, plan your layout so they remain accessible and functional, and make sure the sand bed around them doesn't block water flow to the drain opening. Some installers use a drainage mat layer directly on the concrete before the sand bed specifically to handle situations where slab drainage is imperfect.
Finishing details: cuts, patterns, and sealing
Cutting pavers near walls and drains
Plan your layout from the center or most visible edge outward so cuts fall at the least visible spots (usually near walls or the far edge). When you’re laying pavers next to an existing patio, plan your layout so the joint lines and height transitions match cleanly and stay stable over time. For cuts near walls, measure each gap individually since walls are rarely perfectly straight. Around circular drains, score the curve with a pencil and use a grinder to make gradual cuts in segments rather than trying to cut a smooth curve in one pass. Always wear eye protection and a dust mask when cutting.
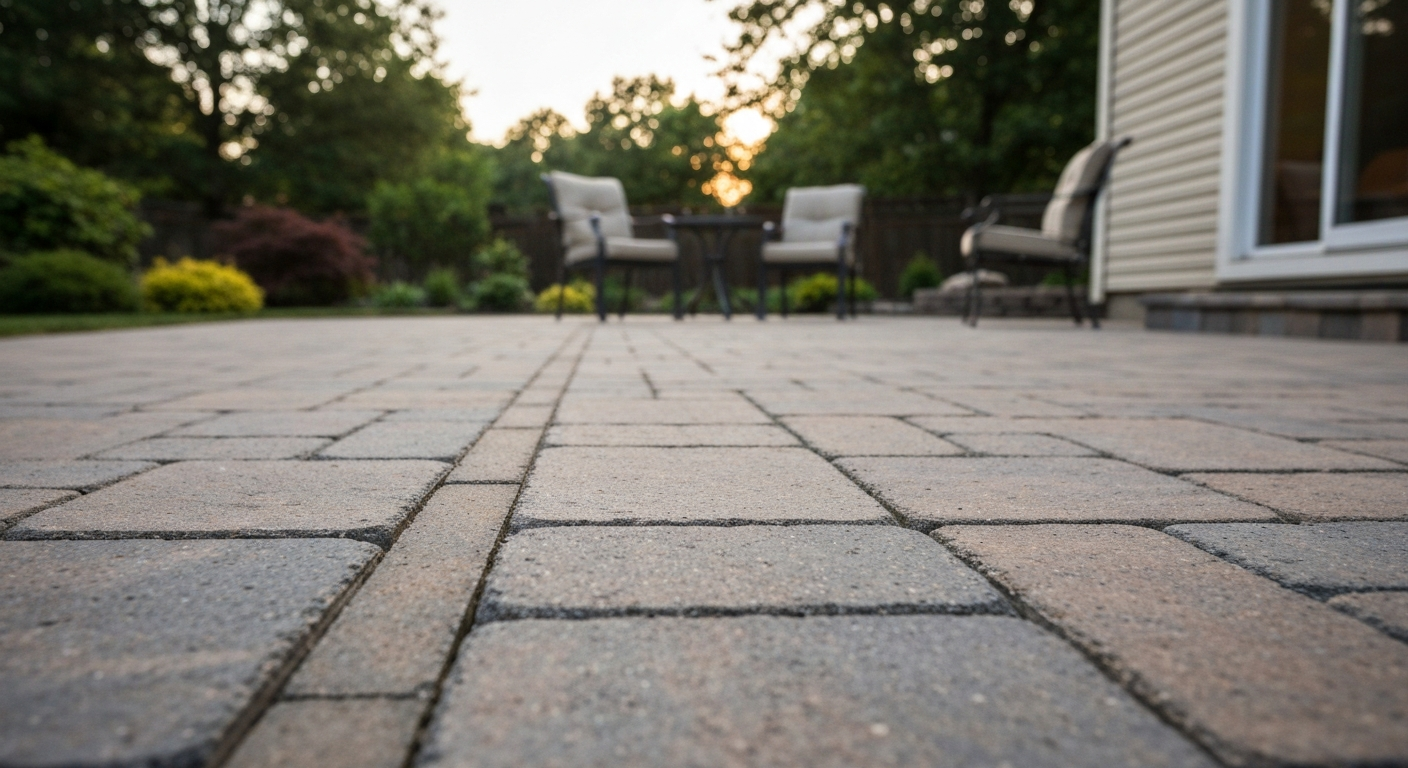
Pattern selection
Running bond (brick-style offset) and herringbone are the most popular patterns for overlays. Herringbone at 45 degrees is actually one of the most structurally stable patterns for interlocking pavers because the angled joints distribute load in multiple directions. It does require more cuts at the perimeter, so factor that into your time estimate. Straight grid patterns are easiest to lay but show any out-of-square imperfections in your slab boundaries more obviously.
Sealing
Sealing isn't mandatory, but it adds significant protection against staining, weed growth in joints, and UV fading, and it helps lock polymeric sand in place. Wait at least 30 days after installation before sealing to allow the polymeric sand to fully cure and any efflorescence (white mineral deposits) to work itself out. Use a sealer rated for your specific paver material: concrete pavers, brick, and natural stone all have different porosity and may need different products. Apply in two thin coats rather than one heavy coat to avoid a gummy surface.
Common problems and how to fix them

Rocking or unstable pavers
This almost always means one of two things: the sand bed is uneven (usually from a high or low spot in the slab below), or the sand has migrated out from an edge without proper restraint. To fix a rocking paver, lift it out, scrape and re-screed the sand underneath, and reset. If multiple pavers are rocking in the same area, check whether your edge restraint is intact. Don't ignore rocking pavers because they become a trip hazard and the problem tends to spread.
Water pooling on the surface
If water is sitting on top of the pavers rather than running off, you have a slope problem. In a sand-set system, you may be able to reset sections of pavers with the sand built up slightly on the low side to correct the grade. If the underlying concrete slab itself is the source of poor slope, this is harder to fix after installation and is one of the reasons it's so important to verify slope before you start. A drainage mat under the sand layer can help water move laterally toward an edge even on a nearly flat slab.
Polymeric sand haze or cloudiness
This is caused by polymeric sand residue left on the paver surface when water is applied. The binders in the sand activate and bond the residue to the surface. Prevent it by blowing all surface residue off with a leaf blower before any water contacts the sand. If haze has already formed, a polymeric sand haze remover or a diluted acid-based cleaner may remove it, but this can vary by paver type, so test a small area first.
Lifting or heaving pavers in winter
Freeze-thaw damage happens when water infiltrates the sand bed and freezes, expanding and pushing pavers upward. The best prevention is good drainage (so water doesn't sit in the sand) and properly activated polymeric sand (which resists water infiltration into joints). If heaving does occur, wait until spring when the ground has fully thawed, then reset the affected pavers and check that drainage is working correctly.
Failed adhesion on bonded border pavers
If bonded border pavers are lifting, the slab surface was likely not clean enough or still had residual sealer when the adhesive was applied. Lift the paver, clean the slab surface thoroughly, and reapply with fresh bonding product. Make sure the surface is completely dry before re-bonding.
What it costs, what you need, and how long it takes
Rough cost estimate
For a typical DIY overlay project on an existing concrete slab, budget roughly $8 to $20 per square foot for materials depending on paver type and quality. You can use the same prep and drainage checks described here to guide how to install pavers over an existing concrete patio how to install pavers over existing concrete patio. Standard concrete pavers are on the lower end; premium natural stone or specialty brick pavers push toward the higher end. This estimate includes pavers, sand, polymeric sand, edge restraints, and adhesive for borders. Labor costs for a professional installation of a similar scope typically run $15 to $30 per square foot, so doing it yourself can save a meaningful amount on a 200 to 400 square foot patio.
Materials checklist
- Pavers (add 10% to your square footage for cuts and waste)
- Coarse concrete sand (ASTM C-33), approximately 0.5 to 1 cubic foot per square foot of surface for a 3/4 to 1-1/2 inch bed
- Polymeric joint sand (enough to fill all joints, check manufacturer's coverage calculator)
- Pre-manufactured polyethylene edge restraints and masonry spikes or concrete anchors
- Bonding adhesive and fortifier for border pavers (BorderBond-type products)
- Concrete crack filler and patching compound for slab prep
- Paver sealer (optional but recommended)
Tools checklist
- Pressure washer
- 4-foot level and tape measure
- Chalk line and string line with stakes
- Plate compactor (rent this; don't buy unless you have future projects)
- Rubber mallet
- Screed rails and a straight 2x4 for leveling sand
- Wet saw or angle grinder with diamond blade for cutting pavers
- Leaf blower for clearing polymeric sand residue
- Safety glasses, dust mask, and knee pads
Realistic time estimate
For a 200 to 300 square foot patio, plan for two full weekends: one for prep (cleaning, crack repair, edge restraint installation, layout planning) and one for laying, cutting, compacting, and finishing. If this is your first paver project, don't try to rush the layout phase, because a pattern that goes in slightly out of square at the start gets noticeably worse by the time you reach the far edge. Give yourself time to dry-run a few rows before committing to the sand bed.
If you're planning to extend the new paver surface beyond the existing concrete slab, or add pavers alongside an existing patio, the base preparation changes significantly since you'll need a compacted gravel sub-base for those areas rather than being able to rely on the concrete. That's a different scope of work from a straightforward overlay, and worth planning separately from the beginning so the two sections meet cleanly at the slab edge.
FAQ
What signs on the concrete mean I should repair or replace the slab instead of overlaying?
Usually, no. If the slab has moved badly enough to create steps between neighboring areas or deep, cross-pattern cracks, the paver overlay cannot stop that movement, it only hides it. In those cases, treat the concrete first (stabilize and repair or replace) or expect rocking and joint washout later.
Can I make the overlay lower by using less sand so it fits under my door or step?
If you want to keep the same look and avoid blocking doors, reduce the sand bed thickness only if the chosen system allows it. Since the recommended sand bed is tied to stability under load, the safer move is to keep the bed within the normal range and adjust transitions by building up adjacent steps, threshold ramps, or reworking door clearance.
If my concrete is sealed, can I just pressure wash and lay pavers anyway?
Not reliably. The sand and paver system is designed to sit on the concrete and use restraint and proper slope, not to bond to coated surfaces. If the slab is sealed, strip it, then pressure wash, and do a small adhesion test or pour-water test to ensure the surface is no longer hydrophobic before installing.
How do I handle drainage pipes or an existing patio drain when overlaying pavers?
Yes, but plan for it during layout. You need to keep the full system’s slope toward drainage (minimum 1/8 inch per foot). If you have existing drains, dry-fit your pavers around them so sand does not cover the drain opening, and keep the slope path open even under the cutting joints.
When should I add polymeric sand, especially if the patio is damp or cool?
Avoid applying polymeric sand immediately after cutting or installing in damp conditions. Let the paver surface dry, then spread polymeric sand only after joints are fully set and debris is removed, and mist lightly per the product instructions. Over-wetting increases residue and haze.
Can I overlay pavers over concrete that has minor sponginess or movement in one spot?
You should address it before overlaying. If the slab has soft spots, those locations will crush the sand bed first, creating future rocking even if the rest of the patio is stable. Check by pressing hard with your foot and by looking for voids, rising cracks, or areas that flex.
Does the answer change if I’m using brick-style or thinner pavers over concrete?
If you cut brick or specialty pavers, you can still use the sand-set approach, but expect more variation. Use the manufacturer’s recommended bedding thickness range, dry-lay several rows to confirm consistent elevations, and use extra attention on leveling because thin spots can dip and telegraph after compaction.
Can you pour concrete over existing patio pavers to lock them in place?
No. It’s a common mistake that leads to premature failure. Concrete over pavers generally lacks a dependable bond and can crack at the interfaces, while also trapping water. Stick with sand-set or an approved mortar-set system designed for paver overlays on concrete.
My pavers look okay at first but start spreading or developing gaps later. What usually causes that?
To prevent that, pay special attention to edge restraint and joint cleaning. On open sides, install manufactured restraint and pin it into the concrete so the sand bed cannot creep outward, and keep polymeric sand residue off the faces so joints stay locked.
What should I do first if water is pooling on top of the pavers?
If it’s spreading or pooling, check both the slope and what’s happening under the pavers. A localized fix often means resetting the affected area after re-screeding and re-leveling sand. If water pools at multiple points, the underlying slab slope likely needs a drainage mat solution before you do large repairs.
Do I need to seal, and what’s the main risk of sealing too soon?
Sealing can be helpful for many paver types, but you must match the sealer to your specific material and wait long enough for joints and any efflorescence to settle. If you seal too early, you can trap moisture and make haze or staining harder to remove later.
Next Articles
How to Lay Patio Pavers on Concrete: Step-by-Step DIY
Step-by-step DIY for laying patio pavers on concrete, from prep and base choice to leveling, jointing, sealing, and fixe
How to Extend a Patio With Pavers: Step-by-Step DIY
Step-by-step guide to extend a patio with pavers, including base prep, cutting, leveling, and drainage on concrete or ex
How to Use Quikrete Patio Paver Jointing Sand: Guide & Tips
How to use Quikrete Patio Paver Jointing Sand: step-by-step application, tools, timing, coverage, and care.