
You can build a solid, beautiful paver patio using materials and rental equipment from Home Depot or Lowe's in a single weekend for most projects under 200 square feet, and two to three weekends for larger ones. The process follows a predictable sequence: plan and mark the area, excavate and compact a 4-inch aggregate base, screed a 1-inch bedding sand layer, lay your pavers in your chosen pattern, cut borders, install edge restraints, compact the surface, and sweep in jointing sand. Get those phases right and the patio will last decades. Skip or rush any of them and you will be relaying pavers sooner than you want.
How to Build a Paver Patio with Home Depot: Step-by-Step DIY Guide

Felix Rowe
8 Aug 2026
Who this guide is for and what you'll walk away with
This guide is written for homeowners doing their first or second hardscape project. You do not need construction experience, but you do need the willingness to move a lot of material and follow a sequence carefully. By the end you will have a complete plan, a retailer-ready shopping list, a tool plan with buy-versus-rent decisions, and a clear step-by-step installation workflow covering every phase from ground marking through final sealing. I also cover the most common variations people ask about: laying pavers over grass, over existing concrete, on a slope, and adding a fire pit to the patio design.
Planning your patio before you buy anything
Site assessment and measurements
Walk your yard and look at how water currently moves across it. After rain, where does water pool? Where does it run toward the house? Your patio needs to shed water away from the structure, not toward it. The IRC (R401.3) requires at minimum a 6-inch drop in the first 10 feet away from a foundation. Industry practice for paver patios recommends a finished surface slope of at least 1 percent, and ideally about 2 percent (roughly 1/4 inch per foot), to keep water moving off the surface without making the patio feel tilted when you are sitting on it.
Measure the area you want to pave. Sketch it on paper with actual dimensions. If your shape is irregular, break it into rectangles and triangles so you can calculate square footage. Add 10 percent to your square footage number for waste before you order anything. Write down the distance from the nearest corner of the patio to your house foundation, any trees, and the property line.
Shape and layout decisions
Rectangular and square patios are the easiest to build and minimize paver cuts. Curved edges look great but require more cutting and more labor on the edge restraint installation. If this is your first project, a clean rectangle connected to the house is the right starting point. Whatever shape you choose, plan your layout so that full pavers are visible in the most prominent areas and cut pieces are pushed to the edges or hidden against walls.
Permit checklist
Most municipalities do not require a permit for a ground-level paver patio that does not alter drainage toward neighboring properties or involve structural changes. However, rules vary significantly by jurisdiction, so check with your local building department before you start. A permit is more likely to be required if you are: building a raised patio with retaining walls over a certain height (often 30 inches), adding outdoor electrical or gas connections, significantly changing drainage that affects neighbors, or building near a property line setback. Fire pits also have their own rules covered later in this guide.
- Call 811 (USA) at least 3 business days before digging to have underground utilities marked at no cost
- Check your local building department website for patio permit thresholds
- Review HOA covenants if applicable before finalizing size or materials
- Confirm property line setbacks with your municipality or surveyor
- If adding a fire pit, check local fire code and any active burn bans
Drainage, slope, and grading: how to avoid a patio that floods
Poor drainage is the number-one reason DIY patios fail or become annoying to use. The good news is that getting drainage right is entirely about setting your grade correctly during excavation, not something you fix after the fact. Before you break ground, decide where water will go when it leaves the patio surface. Common options include draining onto a lawn area, into a planted bed, toward a yard drain, or along a gravel drainage channel at the patio edge.
During excavation, you are creating your finished grade in reverse. If the patio slopes away from the house at 1/4 inch per foot, your excavation floor should mirror that slope. Set your string lines at the correct slope before you dig and check your excavation floor against those lines constantly. Do not try to use extra bedding sand to compensate for a flat or incorrect base grade. The ICPI specification is clear: the bedding layer (3/4 inch to 1 inch) is a setting bed, not a grading tool. If the base is wrong, fix the base.
If your yard has a natural slope toward the house, you may need to install a channel drain at the back of the patio (between the patio and the house) to intercept water before it reaches the foundation. This adds cost and complexity but is the right solution for that situation. A 2 percent finished slope going across the patio rather than away from the house can also work if the lateral drainage path is clear.
Choosing pavers: types, sizes, styles, and patterns
Paver types available at Home Depot and Lowe's
Both Home Depot and Lowe's carry a solid range of concrete pavers from brands like Pavestone, Belgard, and their house-brand equivalents. For a residential pedestrian patio, you want pavers that are approximately 60 mm thick (about 2-3/8 inches). That is the ICPI-recommended thickness for pedestrian applications. The Pavestone Holland paver (7.87 x 3.94 x 2.36 inches) is a classic example and one of the most widely stocked SKUs. Belgard Cambridge Cobble (available in a 3-piece set, approximately 2.25 inches thick) is a popular upgrade choice with more visual texture. Neither product is rated for vehicular traffic, so if part of your patio will be driven over, confirm with the manufacturer's technical data sheet that the paver is rated for that use.
| Paver Type | Common Thickness | Best For | Relative Cost | Availability |
|---|---|---|---|---|
| Concrete Holland / Brick pavers | 60 mm (2.36 in.) | Clean, classic look; easy to cut and lay | Low to moderate | Home Depot, Lowe's — both stock year-round |
| Tumbled/Cambridge Cobble concrete | 57–60 mm (2.25–2.36 in.) | Textured, old-world look; multi-piece kits | Moderate | Home Depot (Belgard); Lowe's (various) |
| Large-format concrete slabs | 1.5–2 in. | Modern, minimal joint look; fewer cuts on simple shapes | Moderate to high | Seasonal at major retailers; verify thickness |
| Natural stone (flagstone/bluestone) | 1–2.5 in. variable | Premium look; irregular or cut-to-size shapes | High | Home Depot and Lowe's carry limited selection; stone yards for full range |
| Permeable/perforated pavers | 60–80 mm | Stormwater management; specialty installs | Moderate to high | Special order at most retailers |
Pattern selection tips
The pattern you choose affects both the visual result and how much cutting you will do. Running bond (brick-style offset rows) and stack bond (grid) are the simplest patterns to execute. Herringbone (45-degree or 90-degree) is structurally the strongest interlocking pattern and is recommended by ICPI for driveways, but it requires significantly more cuts on the perimeter. A basketweave pattern works well with square pavers and produces a classic look with moderate cutting. If you are using a multi-piece kit like Belgard Cambridge Cobble, the kit itself dictates the pattern, which simplifies your decision.
- Running bond: easiest to lay, fewest cuts, good for rectangular patios
- Stack bond: very clean and modern but requires precise alignment throughout
- 45-degree herringbone: most cuts, best interlock, excellent for high-traffic areas
- 90-degree herringbone: fewer cuts than 45-degree, still strong interlock pattern
- Basketweave: works with square pavers, classic look, moderate cutting
- Multi-piece random: kit-based, pre-determined layout, efficient for beginners
Complete materials list
Here is every material category you need for a standard residential paver patio. Quantities depend on your specific project size, covered in the calculation section below.
| Material | Specification / Product Example | Where to Buy | Notes |
|---|---|---|---|
| Pavers | 60 mm concrete pavers (e.g., Pavestone Holland, Belgard Cambridge Cobble) | Home Depot, Lowe's | Order on pallets for projects over ~50 sq ft; add 10% waste |
| Compactable aggregate base | Crusher-run / dense-graded aggregate (3/4 in. minus); bagged: SAKRETE or NorthRock Paver Base | Home Depot, Lowe's, or bulk from a landscape supplier | 4 in. compacted depth for pedestrian patio; bulk is cheaper for large projects |
| Bedding sand | Coarse concrete sand (ASTM C33); bagged: QUIKRETE All-Purpose Sand | Home Depot, Lowe's | 1 in. maximum screeded depth; do not use play sand or fine mason sand |
| Geotextile fabric | Nonwoven needle-punched geotextile (e.g., Mirafi 140N/160N or equivalent) | Home Depot, Lowe's, landscape suppliers | Use on silty or clay-heavy subgrades to prevent fines migration into base |
| Edge restraints | Plastic snap-together paver edging with 12 in. spikes (e.g., Dimex, EasyFlex) | Home Depot, Lowe's | Space spikes 6–10 in. on straight runs; 6 in. on curves |
| Jointing sand | Polymeric jointing sand (e.g., QUIKRETE Polymeric Jointing Sand) or standard QUIKRETE Patio Paver Jointing Sand | Home Depot, Lowe's | Polymeric locks joints and resists weeds; must be applied to dry pavers |
| Paver sealer (optional) | Penetrating or film-forming paver sealer (water-based recommended for DIY) | Home Depot, Lowe's | Apply after jointing sand is fully set; enhances color and protects surface |
| Landscape fabric (weed barrier) | Woven or nonwoven landscape fabric under base or at soil interface | Home Depot, Lowe's | Optional but helpful; do not substitute for geotextile on unstable soils |
Tools list: what to buy and what to rent
You do not need to own every tool for this project. A plate compactor and a wet saw are the two items I always recommend renting rather than buying for a one-time patio. Both Home Depot and Lowe's tool rental departments carry these, and daily rental rates are far more sensible than purchase prices for tools you may use once. Call your local store's rental desk before the project weekend to reserve equipment, especially in spring and summer when demand is high.
| Tool | Buy or Rent? | Where to Get It | Notes |
|---|---|---|---|
| Plate compactor (vibratory) | Rent | Home Depot Rental, Lowe's Tool Rental, or local rental yard | Essential for base compaction and post-lay compaction; do not skip this |
| Wet-cut diamond blade saw / masonry saw | Rent | Home Depot Rental, Lowe's Tool Rental | Needed for clean cuts on borders and curves; keep blade wet |
| Angle grinder with diamond blade | Buy or borrow | Home Depot, Lowe's | Good for occasional cuts; not ideal for high-volume border cutting |
| Paver splitter / guillotine | Rent | Home Depot Rental, local rental yards | Fast for straight cuts on standard brick-size pavers; no water needed |
| Landscape tamper (hand tamper) | Buy | Home Depot, Lowe's (~$30–$50) | Useful for small areas plate compactor can't reach |
| Rubber mallet | Buy | Home Depot, Lowe's (~$15–$25) | For seating individual pavers without cracking them |
| Screed pipes (1 in. diameter conduit) | Buy | Home Depot electrical department (~$5 each) | Use two lengths as screed rails for bedding sand |
| Screed board (2x4 or aluminum) | Buy/have on hand | Home Depot, Lowe's | Drag across screed pipes to level bedding sand |
| Mason's string and line level | Buy | Home Depot, Lowe's (~$10–$20) | Critical for establishing slope and layout lines |
| Marking paint or chalk line | Buy | Home Depot, Lowe's (~$5–$15) | Mark excavation boundaries on grass or soil |
| Tape measure (25 ft minimum) | Buy/have on hand | Home Depot, Lowe's | Standard layout tool |
| Wheelbarrow | Buy or borrow | Home Depot, Lowe's (~$80–$150) | Necessary for moving aggregate, sand, and pavers |
| Shovel and spade | Buy/have on hand | Home Depot, Lowe's | Both a square-nose and pointed shovel are useful |
| Broom (stiff bristle) | Buy/have on hand | Home Depot, Lowe's | For sweeping jointing sand into joints |
| Safety glasses, work gloves, knee pads | Buy | Home Depot, Lowe's (~$20–$40 total) | Knee pads are one of the best investments on a paver project |
| Landscape paint or marking flags | Buy | Home Depot, Lowe's | Mark utility lines after 811 call |
One note on the angle grinder: it is a capable tool for occasional cuts, but it creates a lot of dry dust. Always use it outdoors and wear an N95 or P100 dust respirator when cutting concrete pavers. Silica dust is a serious respiratory hazard. A wet saw eliminates nearly all airborne dust and is the right tool for any project with more than a dozen cuts.
How to calculate materials and build your shopping list
The math here is straightforward once you break it into layers. Let's walk through an example: a 12 x 16 foot patio (192 square feet). I will show you every calculation so you can substitute your own dimensions.
Step-by-step material calculations (12 x 16 ft example)
- Patio square footage: 12 x 16 = 192 sq ft. Add 10% waste = 192 x 1.10 = 211 sq ft of pavers to order. Most pallet listings state coverage per pallet, so divide 211 by coverage per pallet to get your pallet count.
- Compactable base aggregate (4 in. compacted depth): Convert depth to feet: 4 in. / 12 = 0.33 ft. Volume = 192 x 0.33 = 63.4 cubic feet = about 2.35 cubic yards. Order 3 cubic yards (loose material compacts down, so the loose volume needed is roughly 1.3x the compacted volume: 2.35 x 1.3 = 3.05 cubic yards). For bagged product, one 0.5 cu ft bag covers 0.5 cu ft; you need ~83 bags — bulk delivery is far cheaper above ~50 sq ft.
- Bedding sand (1 in. screeded depth): 1 in. / 12 = 0.083 ft. Volume = 192 x 0.083 = 15.9 cubic feet = 0.59 cubic yards. Order 1 cubic yard or approximately 32 bags of 0.5 cu ft sand.
- Edge restraint linear footage: Measure the full perimeter of your patio. For 12 x 16 ft: (12 + 16) x 2 = 56 linear feet. Buy 60 linear feet of edging plus a box of 12-inch spikes (typically sold separately).
- Jointing sand: Coverage varies by product, but a standard 50-lb bag of jointing sand covers approximately 30–50 sq ft depending on joint width and paver type. For 192 sq ft, plan on 4–7 bags. Check the product coverage listed on the bag.
- Geotextile fabric: Buy enough to cover the excavation floor plus 12-inch overlaps at seams. For 192 sq ft, one roll of 4 x 50 ft (200 sq ft) is sufficient.
- Sealer (optional): Coverage varies widely (100–200 sq ft per gallon is typical). For 192 sq ft, one gallon with a little left over is usually sufficient for one coat.
Home Depot's website includes a paver calculator tool on some product pages that lets you input dimensions and get a paver count. It is a useful cross-check but always verify the paver dimensions you are using match what is listed. Lowe's has similar tools. For aggregate quantities, your local landscape supply yard can also help you calculate bulk delivery amounts if you give them your square footage and depth.
Waste factors to build into your order
- Pavers: 10% waste minimum; 15% for complex patterns or lots of curves
- Aggregate base: order 30% more than your calculated compacted volume to account for compaction and over-excavation
- Bedding sand: order 10–15% extra; you will lose some during screeding and post-lay adjustments
- Edge restraint: buy 10% more than your perimeter measurement to cover corners and adjustments
- Jointing sand: buy one extra bag beyond your calculated need — you will want to top up joints after the first rainstorm
Site prep and staging: setting yourself up before the first shovel hits the ground
Good site prep is what separates a smooth project weekend from a frustrating one. Before any digging, you need to think through three things: where your excavated soil will go, where your materials will be staged, and how people and equipment will move around the site without creating chaos.
Mark the area and call 811
Call 811 at least three business days before you plan to dig. This is free, required by law in all US states, and prevents you from hitting buried gas, electric, water, or cable lines. Once utilities are marked with flags or spray paint, transfer your patio outline to the ground using marking paint or stakes and mason's string. Mark 6 inches beyond your finished patio edge in every direction to give yourself working room during edging and base installation.
Excavation depth calculation
Your total excavation depth is the sum of: compacted base (4 inches) + bedding sand (1 inch) + paver thickness (approximately 2.4 inches for a 60 mm paver) = 7.4 inches total. If you want the finished patio surface to sit slightly above grade (which helps drainage), subtract 1/2 inch from your excavation depth. If you want it flush with the lawn, use the full depth. I typically aim for the patio surface sitting about 1/4 to 1/2 inch above the surrounding turf level, which looks clean and helps water run off naturally.
Spoil staging and material flow
Excavated soil needs somewhere to go before you haul it away. If you are excavating a 12 x 16 foot patio to 7.5 inches, you are removing roughly 4.5 cubic yards of soil, which is a significant pile. Plan for a dump trailer rental or coordinate with a landscaping company to remove it, or use it to build up low spots elsewhere in your yard. Do not pile it directly next to the excavation area or it will interfere with your work and compact the adjacent soil in ways that cause drainage problems later.
Stage your aggregate and sand deliveries as close to the work area as possible, but not so close that they block access for the plate compactor or wheelbarrow. A driveway or side yard is ideal. If bulk material is being delivered, request a tarp under the pile if it is sitting on a driveway to protect the concrete surface. Paver pallets are heavy (often 2,000 to 3,000 lbs each), so discuss pallet placement with the delivery driver in advance. You want pallets where the forklift can reach them but where they are not blocking your work flow.
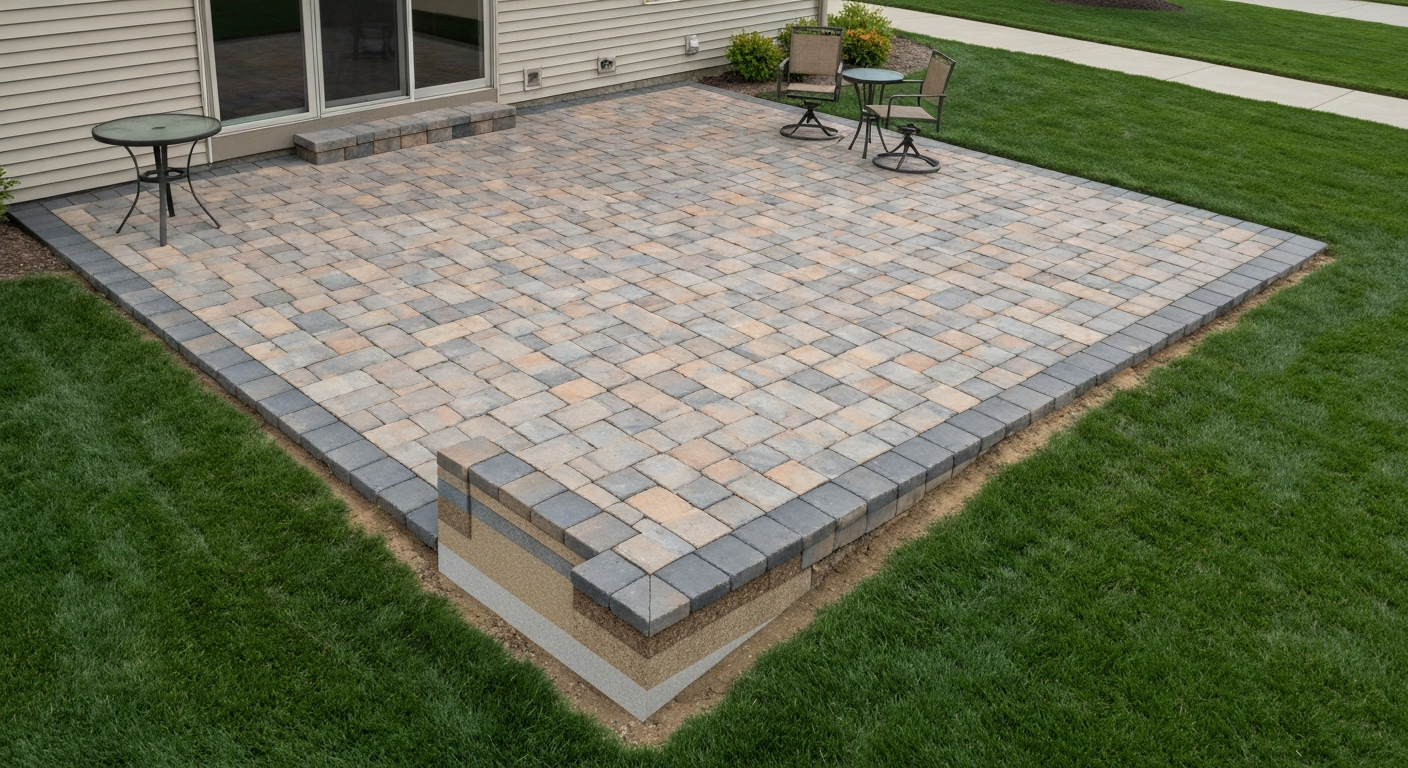
Diagram notes: what your cross-section should look like
Imagine a vertical slice through your finished patio from top to bottom. From the surface down, you should see: pavers (approximately 2.4 inches), bedding sand (1 inch, screeded flat), compacted aggregate base (4 inches, placed in two 2-inch lifts and compacted between lifts), geotextile fabric (if used on silty soil), and undisturbed or compacted native subgrade. blank" rel="noopener noreferrer">ICPI Guide Specification / Tech Spec references (construction guide) specify subgrade compaction to approximately 98% of Standard Proctor where called for and recommend compacting aggregate base in lifts (typically 2–3 in. lifts) rather than in a single deep lift to avoid bottom-layer under‑compaction. ICPI and industry practice recommend compacted base depths vary by use, pedestrian patios 4 in., residential driveways 6–8 in., and commercial/heavier traffic 8–12+ in.; see blank" rel="noopener noreferrer">Concrete Masonry & Hardscapes Association – Proper Concrete Paver Base and Depth for guidance. The surface of your pavers should be sloped at 2 percent away from any structures. This cross-section is the target you are building toward at every stage of the project.
Step-by-step installation: from excavation to finished surface
Phase 1: Excavate and prepare the subgrade
- Set string lines at the correct slope (1/4 inch per foot away from any structures) using stakes and a line level. These are your reference throughout the project.
- Excavate to your calculated depth, keeping the floor as uniform as possible. Check your depth against the string lines frequently.
- Remove all grass, roots, and organic material from the excavation floor. Organic material decomposes and causes settling.
- If the native soil is silty, clay-heavy, or soft (your foot sinks noticeably when you walk on it), lay your geotextile fabric across the entire floor before adding base. Overlap seams by 12 inches.
- Compact the native subgrade with the plate compactor before adding any base material. Two passes in perpendicular directions is standard.
Phase 2: Build the compacted aggregate base
- Add your first 2-inch lift of crusher-run aggregate and spread it evenly with a rake.
- Compact with the plate compactor in overlapping passes. Cover the entire area twice, once in each direction.
- Add your second 2-inch lift and repeat compaction. Do not dump all 4 inches at once — compacting in lifts is how you achieve a stable, consistent base throughout the depth.
- Check your final compacted base depth and slope against your string lines. The base surface should mirror your intended finished surface slope.
- Correct any low or high spots now. It is much easier to add or remove aggregate at this stage than to fix problems later.
Phase 3: Screed the bedding sand layer
- Lay two 1-inch diameter metal conduit pipes parallel across the base, spaced about 6 feet apart, as screed rails. These set your bedding thickness to exactly 1 inch.
- Pour coarse concrete sand (ASTM C33) between and around the pipes.
- Drag a straight 2x4 or aluminum screed board across the pipes to pull sand to a uniform 1-inch depth. Fill low spots and re-screed.
- Do not walk on the screeded sand after this point. Move the screed pipes forward as you go and fill the pipe channels with sand as you work.
- The screeded sand surface should be smooth and consistent. Any bumps or hollows will telegraph through to the finished paver surface.
Phase 4: Install edge restraints
Install your plastic or aluminum edge restraints along at least two sides of the patio before laying pavers (the sides where you will start laying from). This gives you a hard reference edge to work against. Spike the restraint into the compacted base every 6 to 10 inches on straight runs and every 6 inches on curves. The top of the restraint should sit just below where the finished paver surface will be. Install remaining edges after all pavers are laid but before jointing sand.
Phase 5: Lay the pavers
- Start at a corner or along a straight edge (like a house wall) and work outward. Never work toward yourself from the middle or you will disturb the screeded sand.
- Set each paver by placing it against the previous one and pressing it straight down. Do not slide pavers or you will push sand and disturb your level surface.
- Use a rubber mallet to seat pavers that sit slightly high. Do not hit them hard — a gentle tap is enough.
- Check your surface level every few rows with a long level or straightedge. Small misalignments add up quickly.
- Maintain consistent joint spacing (typically 1/8 to 3/16 inch). Some pavers have built-in spacer nubs; if yours do not, you can use plastic tile spacers.
- Work from completed paver sections, not from the screeded sand. Lay a piece of plywood over finished pavers to kneel on if needed.
Phase 6: Cut border pavers
Once the field is laid, measure and cut your border pieces. Mark cuts with a pencil or chalk line directly on the paver. Use your rented wet saw for clean, straight cuts. For curves, a paver splitter (guillotine cutter) works well for straight cuts through standard concrete pavers but cannot follow a curve. For curved borders, score the cut line with an angle grinder first, then break along the score, or use the wet saw freehand. Always wear safety glasses, hearing protection, and a dust respirator when cutting. Wet cutting reduces dust dramatically but still creates slurry splash.
Phase 7: Compact the paver surface
Run the plate compactor over the entire paved surface to seat all pavers firmly into the bedding sand. Make two to three passes in different directions. Some installers put a rubber pad attachment under the compactor plate to prevent surface scratching on textured or tumbled pavers, check your rental unit for this option or bring a piece of carpet to lay under the plate. After compaction, your surface should feel solid underfoot with no rocking or movement.
Phase 8: Sweep in jointing sand and finish
- Make sure all paver surfaces are completely dry before applying jointing sand. Even light moisture can cause polymeric sand to clog and crust on the surface instead of settling into joints.
- Pour jointing sand across the surface and sweep it into all joints with a stiff broom. Sweep diagonally across the joint pattern.
- Run the plate compactor over the surface one more time to vibrate sand down into joints.
- Sweep in another layer of sand and compact again. Repeat until joints are filled to within 1/8 inch of the paver surface.
- If using polymeric sand: follow manufacturer instructions precisely for misting/activation. Typically you blow or sweep off all surface sand dust, then gently mist the surface until water is absorbed but not pooling. Do not overwater.
- Allow jointing sand to cure per manufacturer instructions before heavy use (typically 24 hours for regular sand; 24–48 hours for polymeric, or until fully hardened).
Phase 9: Sealing (optional but recommended)
Sealing is not required but extends the life of your patio and makes maintenance easier. Wait at least 30 to 90 days after installation before sealing to allow the pavers to cure and any efflorescence (white salt deposits) to wash off naturally. Apply sealer on a dry day when temperatures are above 50 degrees Fahrenheit. Penetrating sealers are the most forgiving for DIY application and do not leave a surface film that can peel. Film-forming sealers provide a wet look and more surface protection but require more careful application. Both types are carried at Home Depot and Lowe's.
Special cases: grass, concrete, slopes, raised patios, and fire pits
Installing pavers over grass
Never lay pavers directly on grass or soil without removing the organic material first. Grass and roots decompose, creating voids and causing the surface to settle unevenly. Excavate completely: strip the sod, remove roots, and excavate to your full base depth. Then follow the standard base, bedding, and paver sequence. There is no shortcut here that does not cost you significantly more in repairs within a few years.
Installing pavers over existing concrete
If you have an existing concrete patio in good condition (no heaving, no major cracks, no standing water issues), you can lay pavers directly over it using a 1-inch bedding sand layer. The existing concrete acts as your base, which saves significant excavation labor. Check that the existing concrete slopes away from the house at the required grade. If it does not, you may need to add a thin mortar leveling coat in low spots before screeding sand. If the concrete is cracked, heaving, or water is sitting on it, the problems will transfer to your paver surface. In that case, removal and a fresh installation is a better long-term answer.
Patios on a slope
A gentle slope (under 2 percent cross-slope) is manageable with a standard installation. Steeper slopes require either a terraced/stepped layout with retaining walls at each tier, or a raised patio with a retaining structure at the low end. Retaining walls over 30 inches typically require a permit and engineered design. For slopes, your string lines are especially important because you need to control where slope runs and where it does not. Water management becomes more complex, so plan your drainage channels before you start excavating.
Raised patios
A raised patio uses a retaining wall or paver border wall to create a level platform above the surrounding grade. The paver installation inside the raised area follows the same base-bedding-paver sequence, but the structural requirements for the wall are significant. For walls over 18 to 24 inches, you are entering territory where a pro or engineer review is genuinely worth the money. Below that height, a segmental retaining wall block system (like Allan Block or Versa-Lok, both available at Home Depot and Lowe's) is well within DIY range if you follow the manufacturer's instructions carefully.
Adding a fire pit to your paver patio
A fire pit is one of the most popular patio additions, and pavers are an ideal base material for the area around it. Before you build, check your local fire code. NFPA 1 (Fire Code) specifies that recreational fires must be located at least 25 feet from any structure or combustible material unless contained in an approved manner. Many municipalities have adopted this language or have their own setback rules. Check with your local fire authority and verify whether any active burn bans apply in your area. For the fire pit area itself, use non-porous pavers rather than standard concrete, as standard concrete can spall and crack from repeated heat exposure. Natural stone or fire-rated pavers are better choices for the immediate surround.
Realistic time and cost estimates
These numbers are honest ranges based on typical conditions. Your project will vary based on site access, soil type, and local material pricing.
| Project Size | Estimated DIY Time | Estimated Material Cost (2025–2026) | Estimated Tool Rental Cost |
|---|---|---|---|
| Small (under 100 sq ft) | 1–2 days (1–2 people) | $400–$900 | $100–$200 for plate compactor + saw |
| Medium (100–300 sq ft) | 2–3 days (2 people) | $900–$2,500 | $150–$300 for 2-day rental |
| Large (300–600 sq ft) | 3–5 days (2–3 people) | $2,500–$6,000 | $200–$400 for multi-day rental |
| Over 600 sq ft | 1–2 weekends | $6,000+ | $300–$600+; consider pro consultation |
The biggest cost variable is pavers themselves. Basic concrete Holland pavers run roughly $0.50 to $1.50 per square foot at retail. Belgard Cambridge Cobble and similar premium products range from $3 to $6 per square foot. Natural stone can exceed $10 per square foot. Material costs in the table above assume mid-range concrete pavers. Labor savings versus hiring a contractor typically range from $8 to $20 per square foot, so a 200-square-foot patio could save you $1,600 to $4,000 in labor costs by doing it yourself.
When to hire a pro instead
- The project is over 600 square feet and you have a hard deadline
- Your site has significant drainage issues that require engineered solutions
- Retaining walls over 24 inches are needed
- The ground has significant soft spots, high water table, or expansive clay soils
- You need to integrate outdoor electrical, gas, or drainage plumbing
- Local code requires permits with inspections that specify contractor licensure
Troubleshooting and long-term maintenance
Common problems and how to fix them
| Problem | Likely Cause | Fix |
|---|---|---|
| Pavers settling or becoming uneven | Inadequate base compaction or base too thin | Lift affected pavers, add or recompact base, relay pavers |
| Weeds growing through joints | Organic debris in joints or failure of jointing sand | Remove weeds, re-sweep polymeric sand into joints; consider sealing |
| Standing water on surface | Insufficient slope or low spot in base | Lift pavers in affected area, correct base grade, relay |
| Efflorescence (white deposits) | Natural salt migration from concrete pavers, especially when new | Allow to weather naturally; use efflorescence cleaner if persistent |
| Joints washing out | Standard jointing sand with no binder; heavy rain | Re-sweep and compact joints; switch to polymeric sand |
| Edge restraints popping up | Too few spikes or spikes not long enough | Re-spike with longer 12-inch spikes at closer intervals |
| Pavers cracking | Improper base, frost heave, or vehicular load on pedestrian-rated pavers | Replace cracked pavers; investigate and fix root cause before replacing |
Seasonal maintenance
In freeze-thaw climates, inspect your patio each spring for any settled or heaved pavers. Lift and relay any problem areas before they worsen. Avoid using rock salt as a deicing agent on concrete pavers, it accelerates surface spalling and degrades the finish. Sand-based ice melt products are safer for the surface. Blow out or sweep joints in the fall and top up jointing sand if any joints have gone shallow over the season. If you sealed the patio, plan on reapplying sealer every 2 to 4 years depending on traffic and sun exposure.
Weed control over time
Weeds grow in paver joints when organic material (dust, dirt, decomposed leaves) accumulates and seeds find a place to root. Polymeric jointing sand significantly reduces this compared to standard sand, but no jointing sand is weed-proof forever. Annual sweeping of joints and topping up with fresh polymeric sand every two to three years is the most effective maintenance strategy. A pre-emergent herbicide applied in spring can also help, but check the product label to confirm it is safe for use around paver joints and near any plants you want to keep.
Using retailer and video resources alongside this guide
This guide gives you the technical foundation and step-by-step workflow, but there is real value in watching the physical techniques in action. Home Depot's project guides and YouTube channel include video walkthroughs of paver installation that show exactly how screeding, compacting, and jointing look in real time. Watch the YouTube tutorial 'How to Install a Paver Patio' for a concise, step-by-step visual demonstration of the key techniques How to Install a Paver Patio (YouTube tutorial). Lowe's has similar content. Lowe's 'how to paver patio' guide is another useful retailer resource for planning, product selection, and tool rental details (see internal ref 28164c7e-0318-498d-96ba-77b821548e82). Home Depot also publishes a retailer-specific guide called how to install patio pavers home depot that provides step-by-step, store-focused instructions and product recommendations. This Old House has some of the most thorough video coverage of paver patio installation available, covering base preparation and pattern layout in detail. Searching YouTube for paver patio installation produces hundreds of project videos that range from quick backyard patios to elaborate multi-level designs. For hands-on demonstrations, search YouTube for youtube how to build a paver patio to find many practical build videos that walk through each step visually. Use those resources for visual reinforcement of the steps covered here, and use this guide as your technical reference for specifications, calculations, and troubleshooting. For a step-by-step visual walkthrough, watch a how to make a paver patio video that demonstrates screeding, compacting, and cutting techniques in real time. For step-by-step retailer guidance, see Lowe's how to install patio pavers Lowe's project page.
FAQ
What planning and layout details must I cover before starting a paver patio?
Measure the area and sketch to scale (include house, doors, utilities). Decide finished elevation and slope for drainage (target 1–2% away from house; check local code requiring 6 in. drop in first 10 ft for foundation protection). Check property setbacks, utility locations (811 call), and local permits—permits may be required if grade is changed, excavation near utilities, or a permanent structure (steps, large retaining walls). Choose a paver pattern and confirm paver dimensions to calculate cuts. Identify site soil type and drainage issues; plan geotextile and base depth accordingly. Note any fire-pit setback requirements (many jurisdictions follow NFPA 1: 25 ft setback for recreational fires) and HOA rules.
What exact materials are required (and retailer-friendly options)?
Core materials: concrete/brick pavers (60 mm typical for pedestrian patios—Home Depot/Lowe’s stock Pavestone, BELGARD and manufacturer SKUs), edge restraint (plastic/aluminum/resin or poured concrete curb), compacted base aggregate (dense-graded crusher-run or bulk DG), bedding sand (ASTM C33 coarse concrete sand, 3/4–1 in. screeded), joint sand (standard coarse sand or polymeric jointing sand like QUIKRETE polymeric jointing sand), geotextile (nonwoven Mirafi 140/160N or equivalent), sealers (solvent or water-based paver sealers sold by brands at retailers), and concrete for steps/curbs if used. Retailer notes: Home Depot/Lowe’s carry bagged paver base (SAKRETE/NORTHROCK) for small jobs, bulk aggregate delivery is more cost-effective for larger patios.
Which tools are needed, and what should I buy vs. rent?
Essential hand tools to buy: shovel, rake, wheelbarrow, mason’s trowel, mallet/rubber hammer, plate compactor pad (compactor rental recommended for medium-plus jobs), measuring tape, string line, level, broom, paver splitter or masonry saw (rent for one-off large cuts), safety gear (glasses, gloves, hearing protection). Rent for efficiency: plate compactor (vibratory compactor) and masonry saw or wet saw for many cuts; larger patios may justify renting a skid-steer or mini-excavator for excavation/haul. Home Depot and Lowe’s rental centers list compactors and wet saws.
What are the technical base, bedding, and paver thickness specifications I should follow?
Follow ICPI guidance: compacted structural base depth usually ~4 in. for pedestrian patios (dense-graded aggregate compacted in 2–3 in. lifts), 6–8 in. for residential driveways, deeper on weak soils or freeze zones. Bedding course: uniform screeded coarse concrete sand about 3/4–1 in. thick (do not use bedding to fix grade errors). Use pavers of ~60 mm (2.36 in.) for pedestrian patios; 80 mm recommended for vehicular use. Subgrade compaction target ~98% Standard Proctor where specified; base compact in lifts to achieve density and avoid settlement.
How do I calculate materials quantities (basic calculators and tips)?
Calculate patio area (ft2) and add 5–10% for waste/cuts. Base: for 4 in. compacted base, volume = area × 0.333 ft. Convert to cubic yards for bulk orders (divide ft3 by 27). For bagged base, use coverage per bag from product page. Bedding sand: area × bedding thickness (in ft) = ft3; for 3/4 in. use area × 0.0625 ft. Pavers: use manufacturer sq ft per pallet and pieces per pallet; order full pallets when possible. Joint sand: follow product coverage per bag on manufacturer page. Retail product pages at Home Depot/Lowe’s list bag/pallet coverage; use their calculators and cross-check with an ICPI-derived approach.
What is a step-by-step installation workflow I should follow?
1) Mark layout and set string lines. 2) Call 811 and remove topsoil/vegetation to design depth (subgrade + base + bedding + paver thickness + 1/4 in/ft drainage). 3) Install geotextile over poor/wet soils if needed. 4) Place and compact dense-graded aggregate base in 2–3 in. lifts to the required depth, achieving uniform compaction. 5) Install edge restraints (spiked plastic/aluminum or cast-in-place curbs) securely. 6) Screed a uniform 3/4–1 in. bedding layer of coarse sand using pipes/rails and screed board. 7) Lay pavers in chosen pattern tightly to maintain joint widths; use spacers if desired. 8) Cut pavers to fit edges with a wet saw or splitter. 9) Compact pavers with a plate compactor using a protective pad to seat them into the bedding and produce even joints. 10) Sweep joint sand (or polymeric sand) into joints, compact again, remove excess, and if polymeric, activate per manufacturer directions (dry pavers, mist). 11) Allow recommended cure time, then optionally apply sealer per manufacturer instructions.
Next Articles
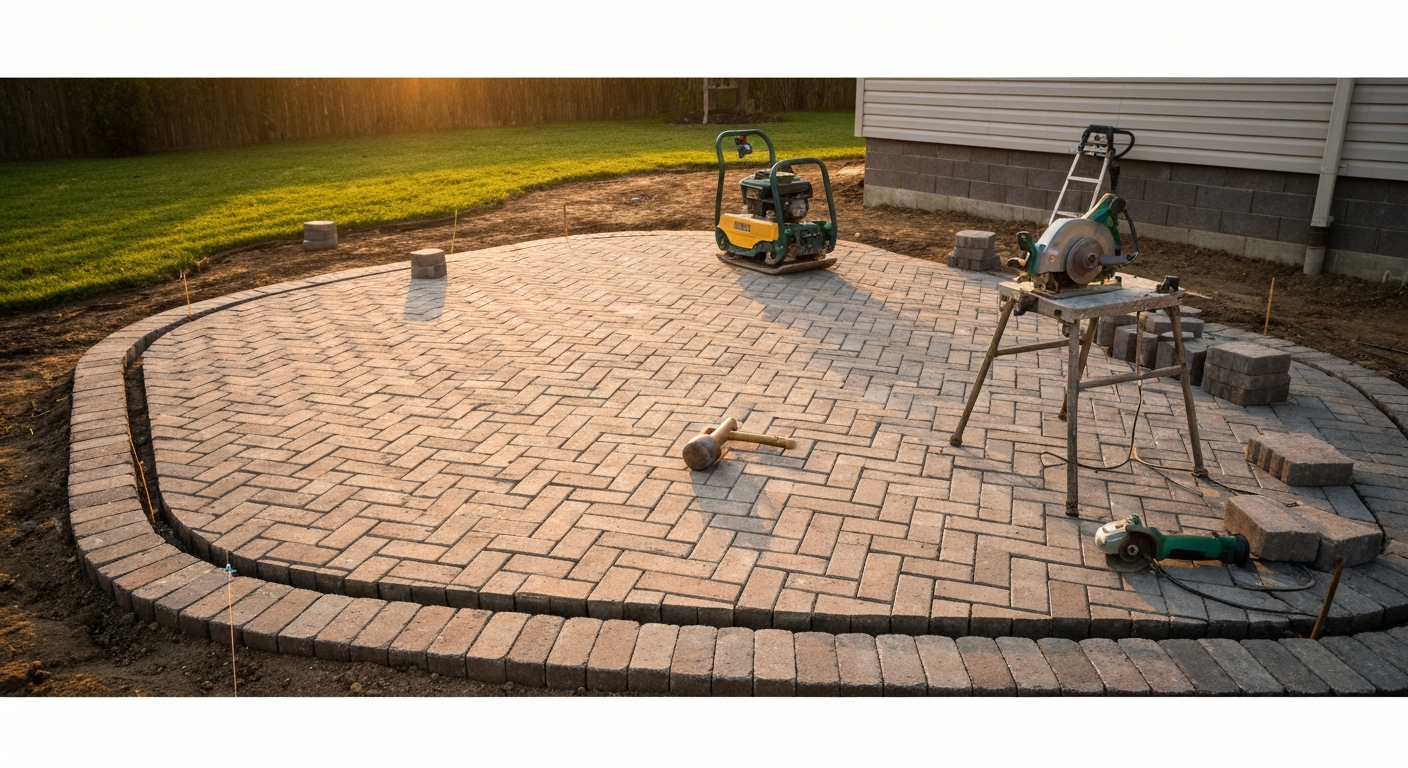
YouTube How to Build a Paver Patio: DIY Step-by-Step Guide
YouTube how to build a paver patio, DIY step-by-step with video picks, tools, base specs, patterns, sealing, costs
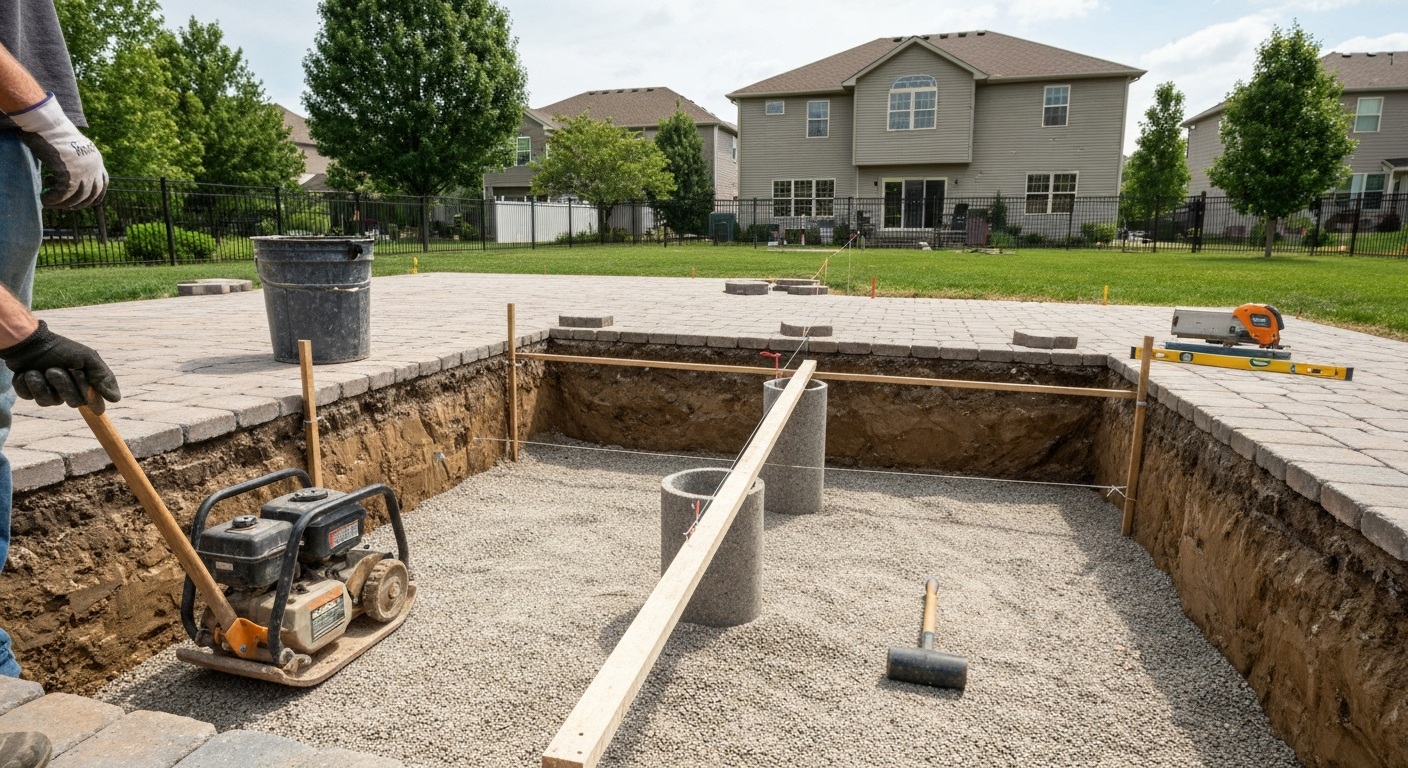
How to Install a Paver Patio YouTube Guide: Step-by-Step
Step-by-step DIY paver patio: top YouTube walkthroughs, complete tools checklist, techniques, timing, and fixes.
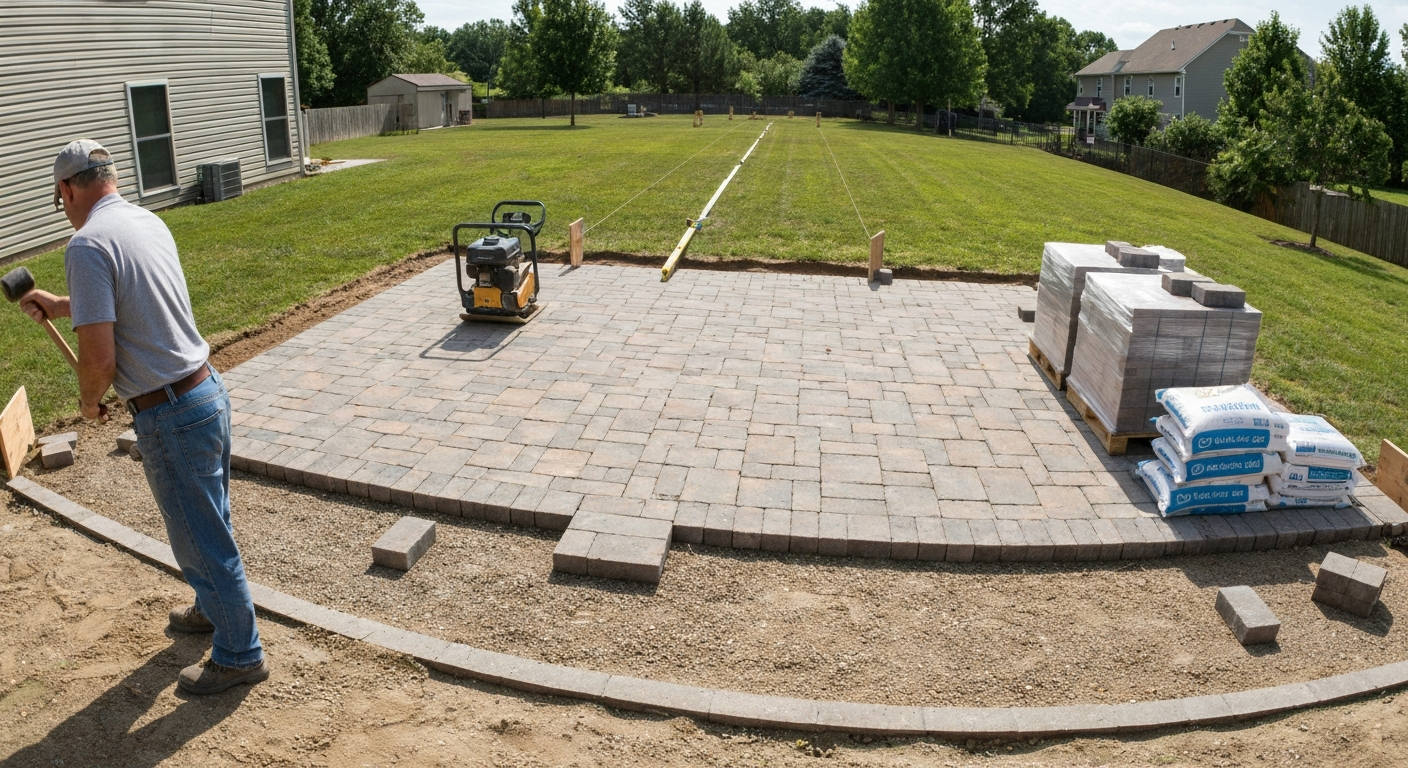
Lowe’s How to Paver Patio: Complete DIY Guide for Homeowners
Lowes how to paver patio: step-by-step DIY with Lowe's materials, tool checklist, time & cost estimates, and fixes.