
You can build a solid, beautiful paver patio using materials and tools from Lowe's, even without professional experience. The process takes a long weekend to a full week depending on patio size, and the biggest factors in success are getting the base right, maintaining the correct slope for drainage, and using edge restraints to keep everything locked in place. This guide walks you through exactly what to buy at Lowe's, how to calculate quantities, and how to install pavers step by step, including common tricky situations like uneven ground, sloped yards, and installing over existing concrete.
Lowe’s How to Paver Patio: Complete DIY Guide for Homeowners

Felix Rowe
14 Jul 2026
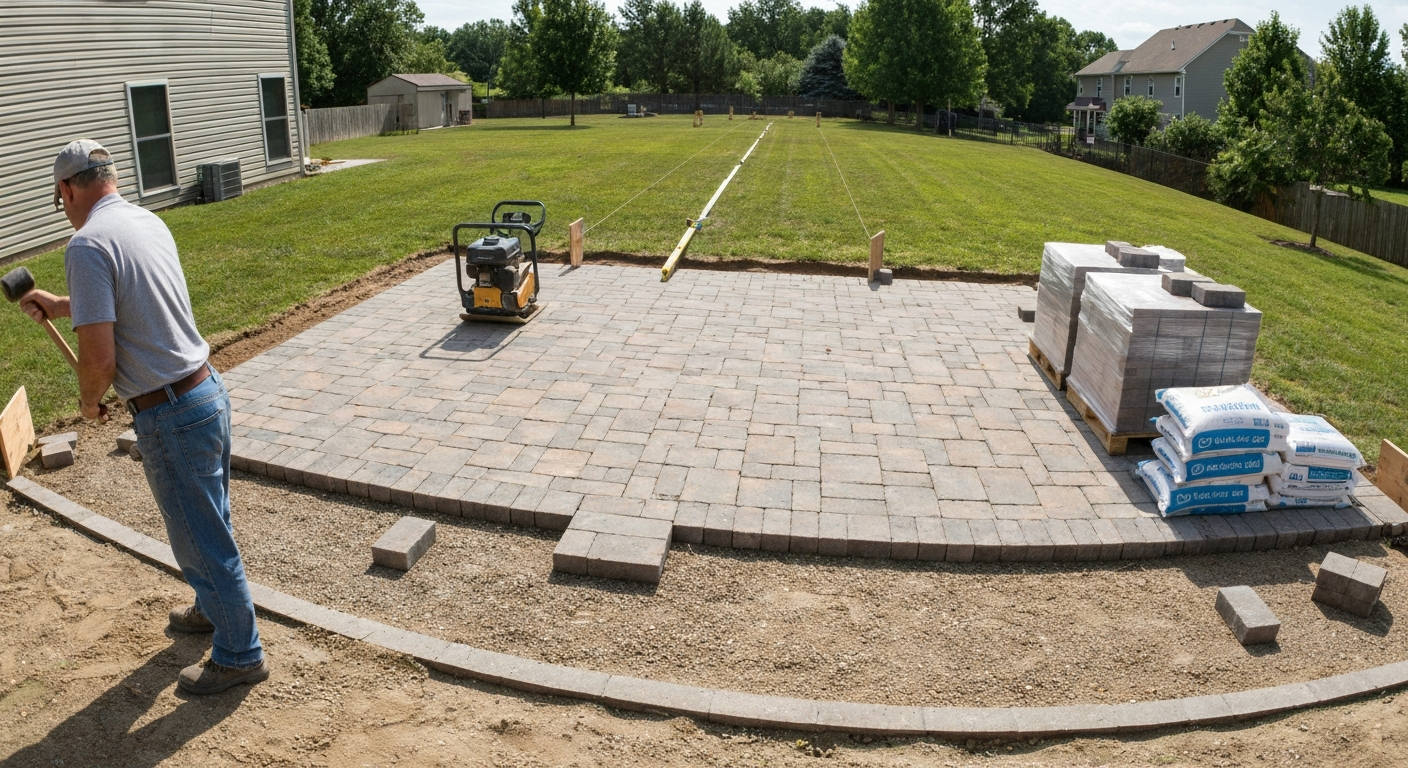
What this guide covers and who it's for
This article is written for homeowners tackling a paver patio project on their own and wanting to lean on Lowe's as their primary supply source. Whether you've never laid a single paver or you've done a small walkway and are ready to scale up, this guide gives you a complete picture: planning, measuring, buying the right materials, and installing them correctly. It covers Lowe's-specific product options, tool rental, delivery, and services, so you can plan your entire project around one store. It also covers common variations like fire pit surrounds, raised patios, and sloped-site drainage, plus a troubleshooting section for the problems most DIYers run into after the patio settles in.
Quick project overview
A standard sand-set paver patio on a residential lot is a beginner-to-intermediate DIY project. You don't need masonry experience, but you do need patience and a willingness to do physical work, especially during excavation and base compaction. The finished result is a stable, attractive outdoor surface that can last 20 or more years with basic maintenance. Here's a realistic timeline and skill breakdown.
| Phase | Estimated Time (100–150 sq ft patio) | Skill Level |
|---|---|---|
| Planning, measuring, and ordering | 2–4 hours | Beginner |
| Excavation and site prep | 4–8 hours | Moderate (physical labor) |
| Base material delivery and compaction | 3–6 hours | Moderate |
| Screeding bedding sand | 1–2 hours | Beginner |
| Laying pavers | 3–6 hours | Beginner–Moderate |
| Cutting pavers for edges | 2–4 hours | Moderate (tool use required) |
| Installing edge restraints | 1–2 hours | Beginner |
| Jointing sand and final compaction | 1–2 hours | Beginner |
| Sealing (optional) | 1–2 hours (after 24–48 hr cure) | Beginner |
Plan on two full days minimum for a 100–150 square foot patio, with a possible third day for cutting, sealing, or any unexpected base issues. Larger patios (300+ sq ft) realistically take 4–6 days, especially if you're working solo. Renting a plate compactor and wet saw from Lowe's Tool Rental makes those phases far faster and safer.
Permits, local codes, and when to hire a pro
Most ground-level paver patios do not require a building permit, but that's not universally true. Rules vary by municipality, HOA, and whether the patio is attached to or within a certain distance of the house. Some localities require permits for any impervious surface over a certain area (often 200–500 sq ft) because of stormwater runoff concerns. Before you dig anything, call your local building department or check their website to confirm permit requirements. It's a 10-minute call that can save you from having to tear out finished work.
Also call 811 (the national 'Call Before You Dig' line) at least 3 business days before excavation. Utility locators will mark underground lines for gas, electric, water, and telecom at no cost. This is not optional: hitting a buried line is dangerous and exposes you to significant liability. If you find utilities running through your planned patio area, adjust the layout or hire a pro to assess the situation.
You should seriously consider hiring a contractor for: patios over 500 sq ft on difficult terrain, sites with significant drainage problems that need engineered solutions, patios attached to the house that may affect the foundation, or any project where the soil is unstable (expansive clay, fill soil, or areas with a history of settling). Lowe's also offers a Pro Referral service in-store and online, connecting you with local contractors if you decide you'd rather have professional help for part or all of the project.
Site assessment: know what you're working with before you dig
Walking the site carefully before doing anything else saves a lot of problems later. Here's what to evaluate.
Soil type and stability
Sandy or loamy soil is ideal because it compacts predictably and drains well. Clay soil holds water and shifts with freeze-thaw cycles, which can heave your pavers out of place over time. If you dig down and the soil is heavy clay, plan to excavate an extra 2–3 inches and add more compacted aggregate base to compensate. You can do a rough soil test by squeezing a handful of damp soil: if it ribbons between your fingers and holds its shape like modeling clay, you're dealing with high clay content. If it crumbles, it's sandy loam and much easier to work with.
Slope and drainage
Your finished patio needs to slope away from any structures at a minimum of 1% to 2% (roughly 1/8 inch per foot) to prevent water from pooling against your house. Use a long level and a tape measure to map the existing slope of your site. A site that slopes toward the house requires more excavation on the far end and careful grading to redirect drainage. If water naturally flows toward your planned patio area from surrounding lawn or hardscape, you may need a channel drain or French drain at the patio's low edge. Plan this before you order materials.
Obstructions and utilities
Look for tree roots, buried irrigation lines, downspout drain lines, and low spots where water collects after rain. Mark all of these on a rough sketch of your yard. Tree roots close to the patio area are a long-term problem: roots will eventually push under pavers. A safe general rule is to keep the patio edge at least as far from the trunk as the tree's current canopy spread, though this varies by species.
Designing your patio: size, shape, patterns, and drainage
Size and shape
A patio for two chairs and a small table needs at least 100 square feet (roughly 10 x 10 ft). A dining table for 6 with chairs pulled out needs closer to 180–225 square feet. The standard recommendation is to allow at least 3 feet of clearance around furniture. If you're adding a fire pit, build a separate defined zone at least 10 feet from the house and any overhead structures. Simple rectangular patios are easiest to lay and minimize cutting. Curves and irregular shapes look great but add significant cutting time and material waste (budget 10–15% extra pavers for non-rectangular layouts).
Pattern choices
Pattern affects both appearance and structural interlock. Running bond (offset brick-style rows) is easy to lay and provides good interlock. Herringbone (45-degree or 90-degree) is the strongest interlocking pattern and is especially good for areas with vehicular or heavy foot traffic, though it creates more cuts at the edges. Basketweave is straightforward and looks great with square pavers. Ashlar (random-looking multi-size pattern) works well with natural stone or large-format concrete pavers but requires planning to avoid lining up joints. For a first patio, running bond or 90-degree herringbone is the best balance of looks and ease.
Borders and accent courses
A soldier course border (pavers laid end-to-end along the perimeter) defines the patio cleanly and reduces cuts on the field pavers. Use a contrasting color or a slightly larger paver size for the border to frame the design. Budget for this separately in your material calculation.
Measuring, layout, and marking the site
Calculating area and establishing grade
For a rectangle, area = length x width in feet. For an L-shape, break it into two rectangles and add the areas. Mark the perimeter using batter boards (2x4 stakes driven into the ground outside the patio corners) and mason's string lines. Batter boards let you remove and re-run string as you work without losing your reference points. Use a line level or a water level to set the string at your intended finish height, accounting for the drainage slope. Set the string slope at 1/8 inch per linear foot away from the house: for a 12-foot-deep patio, the far edge string should sit 1.5 inches lower than the house-side string.
Check your layout for square by measuring diagonally corner to corner in both directions. If the measurements match, the layout is square. This is critical: a patio that's even slightly out of square will cause your paver joints to fan out or converge by the far edge, creating gaps or tight spots that are hard to fix late in the job.
Calculating excavation depth
For a residential pedestrian patio on stable, well-drained soil, the ICPI-recommended base for a sand-set installation is: 4 inches of compacted aggregate base, plus 1 inch of bedding sand (which compacts down slightly), plus the paver thickness (typically 2 3/8 inches or 60 mm for residential concrete pavers). That's roughly 7.5 inches of total depth below your intended finish height. On clay soils or in freeze-thaw climates, increase the base to 6 inches, bringing total excavation to about 9.5 inches.
Lowe's materials and tools checklist
Lowe's carries the full range of materials for a sand-set paver patio, from the pavers themselves to base stone, bedding sand, polymeric sand, edge restraints, and sealers. For a focused step-by-step tutorial on how to install patio pavers using Lowe's products and services, see how to install patio pavers at Lowe's. Here's a complete shopping list organized by category, with notes on what to look for in the store or on Lowes.com.
Pavers
Lowe's stocks concrete pavers, natural stone pavers, brick pavers, and porcelain patio slabs. In-store and online availability varies by region. The Pavestone Rumblestone line (example: Item #2885469, 7 in x 7 in x 1.75 in, ~6.9 lb per piece, 0.34 sq ft per piece) is a commonly stocked concrete paver with a tumbled, slightly textured edge. For residential pedestrian patios, look for pavers at least 60 mm (2 3/8 inches) thick, which is the standard for foot-traffic applications. Belgard's Product Installation Guide and Technical Resource Guide list 60 mm (2 3/8") and 80 mm (3 1/8") paver thickness classes and their recommended uses; see blank" rel="noopener noreferrer">Belgard Product Installation Guide / Technical Resource Guide (Belgard). ASTM C936 is the Standard Specification for Solid Concrete Interlocking Paving Units blank" rel="noopener noreferrer">ASTM C936 is the Standard Specification for Solid Concrete Interlocking Paving Units.. Pavers sold as individual units at Lowe's often note coverage per piece or units per square foot on the product page, so use those numbers in your calculator (see the next section). Check your local Lowe's inventory before ordering; many SKUs vary by store.
Base and bedding materials
You need two separate aggregate materials: a crushed-stone compactable base, and a concrete bedding sand. For the base, look for crushed stone or compactable gravel (sometimes labeled road base or paver base). Lowe's sells this in bag sizes (typically 0.5 cu ft bags) and in larger bulk units such as palletized 2,000 lb bags. A 2,000 lb bulk bag covers roughly 18 square feet at a 2-inch depth, so for a 4-inch base you'd cover about 9 square feet per bag. For most patios, ordering a pallet of bags is far more practical than buying individual 0.5 cu ft bags. For bedding sand, you need coarse concrete sand conforming to ASTM C33 gradation, not fine play sand. KolorScape paver leveling sand (sold in approximately 0.5 cu ft, 44–50 lb bags) is one option at Lowe's, but confirm the product is labeled for paver bedding use. ICPI specifically cautions against using mason's sand or fine sand as bedding material because it migrates under load.
Polymeric sand and jointing materials
Once the pavers are laid, the joints are filled with either regular concrete sand (swept in and left to harden over time) or polymeric sand, which contains a binder that activates with water and hardens the joints to resist weeds and erosion. Polymeric sand is highly recommended for DIY patios because it dramatically reduces long-term weed and washout problems. Lowe's carries polymeric sand in 50 lb bags. Coverage varies depending on joint width and paver thickness: narrow 1/8-inch joints on a smooth paver might cover 80 sq ft per bag, while wider joints on a thick paver might only cover 20 sq ft. Check the product label (or technical data sheet on the product page) for coverage guidance specific to your joint size. Key installation rules: the pavers must be completely dry when you apply polymeric sand, and the temperature must stay above 32°F during application and for at least 48 hours after watering in.
Edge restraints
Plastic or aluminum edge restraints are available at Lowe's in 8 ft sections. They are spiked into the compacted base to hold the perimeter pavers in place. Without edge restraints, the outside pavers will slowly spread outward over time, opening the joints and eventually causing the whole patio to lose stability. ICPI requires a minimum 1-inch vertical contact surface against the paver side. Buy enough linear feet to go around the entire perimeter of the patio, minus any sides bordered by a wall or concrete curb.
Landscape fabric
Some installers lay woven landscape fabric on the compacted subgrade before the aggregate base to prevent fine soil from migrating up into the base layer over time. This is especially useful on clay soils. Lowe's carries several grades of woven geotextile fabric. Do not use landscape fabric between the base and the bedding sand, and do not use it between the bedding sand and the pavers.
Sealers and adhesives
Sealing is optional but worth doing: it enhances color, protects against staining, and slows joint erosion. Lowe's sells paver sealers in wet-look (glossy) and natural-look (matte) formulas. Coverage is typically 100–200 sq ft per gallon depending on paver porosity. Apply sealer at least 24–48 hours after the polymeric sand has cured. For step edges, raised patio caps, or fire pit surrounds, Lowe's also sells landscape construction adhesive for bonding capstones or stacked block layers.
Tools to rent or buy at Lowe's
Lowe's Tool Rental operates at select store locations and offers rental periods of 4 hours, 24 hours, one week, and four weeks. You'll need a valid ID and a credit card for prepayment, and optional damage protection is available. Reservations and exact pricing are store-specific. For this project, the two most important rental items are a plate compactor and a wet masonry saw. A plate compactor rents for roughly $60–$115 per day at most rental locations (prices vary by market and model). A wet tile/masonry saw runs approximately $40–$100 per day. If you're doing a larger patio, a rented jumping jack or vibratory tamper (roughly $80–$250/day) is useful for compacting tight areas near walls. You can also buy angle grinders with diamond blades from Lowe's if you prefer ownership over rental for cutting work. Call your local Lowe's or check the Lowe's Rental page to confirm availability at your specific store before you plan your project schedule around it.
| Tool / Material | Buy or Rent | Notes |
|---|---|---|
| Plate compactor | Rent (Lowe's Tool Rental) | ~$60–$115/day; confirm local availability |
| Wet masonry saw | Rent or Buy | ~$40–$100/day rental; or buy angle grinder + diamond blade |
| Rubber mallet | Buy | Used throughout paver laying |
| Screed pipes (1" diameter) | Buy (or improvise with PVC) | Used to set bedding sand depth |
| Line level / water level | Buy | Critical for setting slope accurately |
| Tape measure (25 ft) | Buy | Already own; bring it |
| Batter boards and mason's line | Buy (lumber + string) | Set up at corners outside the dig area |
| Hand tamper | Buy | For edges and areas plate compactor can't reach |
| Landscape rake and shovel | Buy / already own | Spreading base and bedding materials |
| Stiff push broom | Buy | Sweeping polymeric sand into joints |
| Garden hose with mist nozzle | Already own | Activating polymeric sand |
| Safety glasses and ear protection | Buy | Required during cutting and compaction |
| Knee pads | Buy | Strongly recommended for laying phase |
Lowe's ordering, delivery, and pickup services
For bulk and heavy materials like palletized pavers and aggregate bags, use Lowe's truck or LTL freight delivery rather than hauling yourself. Lowe's has expanded same-day delivery in many markets (in partnership with OneRail), and larger palletized or freight items can be scheduled for truck delivery. Product pages list delivery options and fees for specific items. Palletized returns are generally accepted within 90 days, but policies vary by product and store, so read the returns and exchanges section on each product page before ordering. If you need pavers cut to a specific dimension and don't want to do it yourself, ask the Lowe's store associate about in-store cutting availability (availability varies by location). For large, complex, or custom projects, use the in-store or online Pro Referral service to find a local contractor.
How to calculate materials: simple formulas with worked examples
Getting materials right before delivery day saves you multiple trips and avoids holding up the project. Here are the formulas and a worked example using a 12 ft x 14 ft patio (168 sq ft).
Pavers
Pavers needed = (patio area in sq ft) / (sq ft per paver), then add 10% for cuts and waste. Example: 168 sq ft / 0.34 sq ft per paver (7x7 Pavestone Rumblestone) = 494 pavers. Add 10%: 494 x 1.10 = 544 pavers. Always round up to the nearest full box or pallet sold increment. For non-rectangular layouts or complex patterns, increase the waste factor to 12–15%.
Compactable aggregate base
Volume of base needed (in cubic feet) = patio area (sq ft) x base depth (ft). For a 4-inch base, depth = 4/12 = 0.333 ft. Example: 168 x 0.333 = 55.9 cubic feet. Add 10–15% for compaction loss: 55.9 x 1.15 = 64.3 cubic feet. Each 0.5 cu ft retail bag covers 0.5 cu ft uncompacted, so you'd need about 129 bags, which is why ordering a bulk/pallet unit is strongly preferred. A 2,000 lb palletized bag at roughly 1 cubic yard (27 cubic feet) would mean you need about 2.4 yards, or approximately 3 bulk bags (rounding up for safety). Confirm the coverage spec on the specific Lowe's product page for the aggregate you choose.
Bedding sand
Bedding sand volume = patio area (sq ft) x 1 inch depth (0.083 ft) = 168 x 0.083 = 14 cubic feet. At 0.5 cu ft per bag, that's 28 bags. Add a 10% buffer: 31 bags. If ordering in larger units, 14 cubic feet equals roughly 0.52 cubic yards.
Edge restraints
Edge restraint length = perimeter of patio (in linear feet), minus any sides abutting walls or existing hard edges. For the 12 x 14 ft example: perimeter = (12 + 14) x 2 = 52 linear feet. If one 14 ft side is against the house, you need 52 - 14 = 38 linear feet. Sold in 8 ft sections, that's 5 sections (40 ft). Always round up.
Polymeric sand
Coverage per 50 lb bag varies widely: plan on 20–40 sq ft per bag for typical 3/16-inch joints with standard 2 3/8-inch pavers. For 168 sq ft: 168 / 25 (conservative midpoint) = 6.7 bags, so order 8 bags. Check the specific product label at Lowe's for coverage at your actual joint width and paver thickness, since this varies significantly between brands.
Sealer
Sealer coverage is typically 100–200 sq ft per gallon (first coat on a porous concrete paver absorbs more). For 168 sq ft, plan on 1–2 gallons for a single coat, and double that if applying two coats. Check the specific product page for coverage guidance.
| Material | Formula | 168 sq ft Example (4" base) | Order Amount |
|---|---|---|---|
| Pavers | Area / sq ft per paver x 1.10 | 544 pavers (7x7 Rumblestone) | Round up to nearest pallet |
| Compactable base | Area x 0.333 ft x 1.15 | ~64 cu ft (~2.4 cu yd) | 3 bulk bags or equivalent pallet |
| Bedding sand (1") | Area x 0.083 ft x 1.10 | ~15.3 cu ft | 31 bags at 0.5 cu ft each |
| Edge restraint | Perimeter minus fixed edges | 38–52 linear ft | 5–7 sections (8 ft each) |
| Polymeric sand | Area / 25 (conservative) | ~7 bags (50 lb) | 8 bags |
| Sealer | Area / 150 x number of coats | 1.1–2.2 gallons | 2 gallons |
Step-by-step installation: phase by phase
Phase 1: Excavation
With your layout strings in place and utilities marked, excavate to the required depth below your finish grade. For a 60 mm paver with a 4-inch base and 1-inch bedding sand, excavate to about 7.5 inches below finish height. For clay soil or freeze-thaw climates, go to 9.5–10 inches. Remove all sod, roots, and organic material. The subgrade should be firm native soil or compacted fill. If you hit soft, spongy areas, dig out an extra 3–4 inches and fill with compactable aggregate before moving on. Slope the excavated subgrade at the same 1–2% gradient as your planned finished surface, working away from the house.
Phase 2: Landscape fabric (optional but recommended on clay)
If you're installing on clay soil, lay woven geotextile fabric on the compacted subgrade before adding base stone. Overlap seams by at least 12 inches and fold the fabric up the sides of the excavation. This prevents clay fines from migrating up into your base over time, which is one of the main causes of long-term settling and unevenness on clay sites.
Phase 3: Base installation and compaction
Add compactable aggregate base in lifts of 3–4 inches maximum, compacting each lift with a plate compactor before adding the next. Do not dump all the base in at once and compact it in a single pass: you'll get an adequately compacted surface layer over a loose, unstable lower layer. ICPI recommends compacting the base to at least 98% of Standard Proctor density (ASTM D698) for pedestrian areas. You can't measure this at home, but the practical checkpoints are: the surface does not move or rut under the plate compactor's weight, and a steel rod pushed by hand does not penetrate the surface. Make at least 3–4 overlapping passes with the plate compactor in both perpendicular directions. Use a hand tamper along the edges of the excavation where the plate compactor can't reach. Check the grade with your string lines after compaction: the top of the compacted base should be exactly 1 inch (the bedding sand layer) plus paver thickness below your finish grade strings.
Phase 4: Screeding bedding sand
Set two parallel screed pipes (or 1-inch diameter steel conduit) on top of the compacted base, spaced so you can reach across them with a straight 2x4 or screed board. The screed pipes set the final bedding sand depth at exactly 1 inch. Spread bedding sand between the pipes, then drag the screed board across them to create a perfectly flat 1-inch layer. Remove the pipes carefully and fill in the shallow channels they leave with sand, smoothed by hand. Do not walk on the screeded sand before laying pavers, and do not re-compact the bedding sand after screeding: it needs to remain loose so the pavers can settle slightly into it during final compaction.
Phase 5: Laying the pavers
Start from a fixed straight edge (a wall, a door threshold, or a string-lined chalk line across the patio). Work away from yourself so you're kneeling on already-laid pavers, not the screeded sand. Set each paver down without sliding it; sliding disrupts the bedding sand and creates low spots. Keep joints at 1/8 to 3/16 inch by eye or with plastic paver spacers. Check your lines every few rows with a string or long straightedge. If the joint lines are drifting, correct it over 3–4 rows rather than forcing an abrupt adjustment. Use a rubber mallet to nudge pavers into alignment, not a hammer. Leave the cutting for after all full pavers are laid.
Phase 6: Cutting pavers
A rented wet masonry saw (or angle grinder with a diamond blade) handles all standard cuts. Mark the cut line with chalk or a pencil. For the wet saw, make slow, steady passes without forcing the blade. Keep the water flowing at all times to cool the blade and suppress silica dust. Wear eye protection, hearing protection, and an N95 or P100 respirator when cutting: concrete dust contains fine silica particles that are a serious respiratory hazard. For curved cuts (around a post or along a curved border), make a series of straight relief cuts, then break off the segments and smooth with the blade. Test-fit each cut piece before committing to the next cut.
Phase 7: Edge restraints
After all pavers (including cuts) are laid, install plastic or aluminum edge restraints tight against the perimeter pavers. Drive the spikes through the restraint base flange and into the compacted aggregate base below. Space spikes every 12 inches on straight runs and every 6 inches on curves. The restraint must contact the paver side with at least 1 inch of vertical surface (per ICPI guidance). Do not skip this step even if the patio looks stable: without lateral restraint, the field pavers will creep outward within 1–2 freeze-thaw cycles.
Phase 8: Final compaction and joint sand
Run the plate compactor over the entire paved surface 2–3 times in perpendicular directions. This seats the pavers firmly into the bedding sand and closes any high spots. Check that the surface tolerance is within 3/8 inch over a 10-foot straightedge (the ICPI-recommended screed tolerance). Then spread the first layer of jointing sand (either regular concrete sand or polymeric sand) over the surface and sweep it into the joints with a stiff push broom. For polymeric sand specifically: verify the surface and the sand are completely dry, the temperature is above 32°F, and no rain is forecast for at least 24 hours. Sweep the sand into joints until they are filled to within 1/8 inch below the paver top. Blow off or carefully remove any remaining sand from the paver faces (a leaf blower on low works well). Then lightly mist the entire surface with water per the polymeric sand manufacturer's instructions to activate the binder, being careful not to wash sand out of the joints. Allow to cure per the label (typically 24 hours before foot traffic).
Phase 9: Sealing (optional)
Wait at least 24–48 hours after polymeric sand has cured before applying sealer. The surface must be clean and completely dry. Apply sealer with a low-pressure sprayer or roller in thin, even coats. Avoid puddling. One coat is often sufficient; two coats provide better protection on porous concrete pavers. Apply a second coat perpendicular to the first. Allow to dry fully before foot traffic (check the label: typically 2–4 hours for light traffic, 24 hours for full use).
Common scenarios: grass, concrete, uneven ground, and slopes
Installing over grass
Do not lay pavers directly over sod or topsoil. Organic material compresses and decomposes over time, causing settling. Remove all sod and at least 2 inches of topsoil below the sod line before starting your base installation. If the topsoil layer is deep (6+ inches), excavate all of it and replace with compactable aggregate base.
Installing over existing concrete
If the existing concrete is in good condition (no major cracks or upheaval), you can lay pavers on top of it using a dry-set mortar or a thin-set bed rather than the full aggregate base system. The concrete slab acts as your base, so excavation is minimal. However, the concrete must be structurally sound and must already have adequate drainage slope. Any pavers installed this way will be permanently bonded and cannot be reset individually the way sand-set pavers can. If the concrete has heaved or cracked significantly, either remove it or build over it with a proper lifted paver system using a pedestal support system (sold at paver specialty suppliers and sometimes at Lowe's).
Sloped sites and drainage designs
On a sloped site, step down the base in level tiers rather than following the slope continuously; this keeps the bedding sand layer uniform across the entire patio. For significant slopes, consider a raised patio design with retaining walls at one or more edges, stepping the patio into the hillside. Any patio with a significant uphill catchment area will benefit from a channel drain or French drain at the low edge to intercept surface runoff. Plan the drain outlet location before you excavate, since the drain pipe needs a clear path to daylight or to a drywell.
Fire pit surrounds
For a fire pit area within or adjacent to the patio, use pavers rated for heat exposure; many concrete pavers are not designed for direct flame contact and will spall over time if exposed to fire repeatedly. Use a steel fire pit ring to contain the fire above the paver surface, or build a raised fire pit with heat-rated retaining wall block using construction adhesive between courses. Keep the fire pit at least 10 feet from any structure. Lowe's sells fire pit blocks (typically retaining wall block in a circular or semi-circular profile) and landscape construction adhesive suitable for stacking and bonding capstone courses.
Realistic time and cost expectations
For a 150 square foot concrete paver patio in 2026, DIY material costs typically fall in the range of $700–$1,800 depending on paver choice, base depth, and regional pricing. Natural stone and porcelain pavers are significantly more expensive than concrete pavers. Tool rental adds $150–$300 for a two-day project. If you hire out excavation only (a common approach for large projects), add $300–$700 depending on site access and local labor rates. A full professionally installed paver patio typically runs $15–$25 per square foot in materials and labor combined, so DIY on a 150 sq ft patio can save you $1,500–$3,000 in labor alone. That's real money, but the savings come with the investment of your time and physical effort.
Troubleshooting common problems
Pavers settling unevenly
Uneven settling almost always traces back to inadequate base compaction or inconsistent bedding sand depth. To fix: remove the affected pavers (they lift out cleanly in a sand-set installation), add or remove bedding sand to level the spot, re-screed if needed, and relay the pavers. Then run the plate compactor over the repaired area again. This is one of the great advantages of a sand-set installation over a mortared one: individual pavers are easy to reset.
Weeds growing through joints
If you used regular sand in the joints rather than polymeric sand, weeds and moss will eventually establish in the joints. The fix is to clean the joints thoroughly, dry them completely, and re-fill with polymeric sand. Pull visible weeds first, then use a stiff brush or an oscillating joint cleaning tool to remove old sand. Polymeric sand prevents most weed growth by hardening the joint, but it is not a 100% weed barrier, especially where seeds settle on top of the patio surface. Annual treatment with a patio-safe weed preventer is a good maintenance step.
Sand washing out of joints
If you notice sand eroding from the joints after heavy rain, the joint width may be too wide, the patio may lack adequate slope for quick drainage, or you used a sand that's too fine. Top up the joints with fresh polymeric sand after cleaning and drying the surface. Make sure the polymeric sand activation step (watering in) is done correctly: misting, not flooding, so the binder sets before the sand can wash out.
Rocking or loose pavers
A paver that rocks usually has a high spot of bedding sand directly under its center and is bridging two lower points, or it was placed over a screed pipe channel that wasn't properly filled. Lift the paver, identify the problem, correct the bedding sand, and relay it. A paver near the perimeter that feels loose may indicate edge restraint failure: check that the spikes are still driven firmly and that the restraint flange is still contacting the paver.
White haze or staining on pavers
Efflorescence (white chalky haze) is caused by soluble salts migrating to the paver surface with water. It is very common on new concrete pavers and usually fades with weathering over one to two seasons. You can accelerate removal with an efflorescence cleaner (available at Lowe's in the masonry cleaning aisle) applied per the product directions. Sealing the pavers after the first season, once efflorescence has largely run its course, helps prevent recurrence.
Routine maintenance to keep your patio looking great
- Sweep off debris regularly to prevent organic material from decomposing in the joints and feeding weed seeds.
- Rinse with a garden hose and a stiff brush annually; avoid high-pressure washing directly into joints, which can erode joint sand.
- Inspect joints in spring after freeze-thaw season and top up any that have eroded with fresh polymeric sand.
- Re-apply sealer every 3–5 years depending on traffic and sun exposure; clean the surface thoroughly before resealing.
- Check edge restraints after hard winters to make sure spikes haven't worked loose; re-drive or replace as needed.
- Reset any individual pavers that have settled or heaved; the sand-set system makes this straightforward.
How this guide compares to other resources
Lowe's own project guides and website give you a solid starting point, especially for material selection and product availability. If you prefer video walkthroughs, there are detailed YouTube tutorials that show the physical techniques (screeding, compaction, cutting) in real time, which can be a useful complement to a written guide. For step-by-step video demonstrations, search how to install a paver patio YouTube to find detailed walkthroughs that complement this written guide. Home Depot offers a very similar range of materials and has its own set of project guides if you want to price-compare or if your local Lowe's doesn't have a specific product in stock. For a Home Depot–focused walkthrough and product guidance, see how to install patio pavers home depot. For an alternative retailer guide, see Home Depot's how-to on how to build a paver patio (reference: 53ec6710-011b-4b54-a168-05c785b08deb) how to build a paver patio Home Depot. Resources like This Old House go deeper on the structural and engineering side of paver installation, which is worth reading if your site has unusual drainage challenges or you're installing a large-scale project. This guide is specifically built around what's available through Lowe's and how to make the most of their materials, tool rental, and services for a DIY patio project. For detailed, step-by-step structural guidance, see This Old House's How to Install a Paver Patio (how to install a paver patio this old house). For step-by-step visual guidance, see a YouTube tutorial playlist titled "how to build a paver patio" that walks through the full installation process YouTube tutorial playlist: how to build a paver patio.
FAQ
What Lowe’s products and materials do I need to build a standard 10' x 12' paver patio?
Core Lowe’s-focused materials: concrete or natural-stone pavers (choose 60 mm / 2 3/8" thickness for pedestrian patios; example SKU: Pavestone 7x7 1.75" style—check local availability), bedding sand (concrete/play sand or KolorScape paver sand bags), polymeric joint sand (50 lb bags for joints), crushed stone base (pallets, 2000-lb bags or bulk/yard options), edge restraints (aluminum/plastic/steel restraint kits), landscape fabric (optional under base on poor soils), and sealer (Lowe’s paver sealers). Tools from Lowe’s: plate compactor (rental or buy), screed rails/board, shovel, rake, tamper, wheelbarrow, 4–7" angle grinder or wet masonry saw with diamond blade (rental/purchase), joint broom, measuring tape, string line, stakes, level/straightedge, and safety gear (glasses, gloves, ear protection). Use Lowe’s Rental for plate compactors and wet saws when available.
How do I calculate how much material I’ll need (simple homeowner calculator approach)?
Step 1: Area = length × width (10' × 12' = 120 ft²). Step 2: Pavers: divide area by coverage per paver (use manufacturer coverage; example Pavestone lists ~4 pavers/ft²) → 120 ft² × 4 = 480 pavers (+5–10% waste for cuts) = ~504–528 pavers. Step 3: Bedding sand: 1" sand layer ≈ 0.0833 ft × area → 120 × 0.0833 = 10 cu ft (~20–24 0.5 cu ft bags). Step 4: Base stone: for 4" base (typical pedestrian) → 4/12 ft × 120 ft² = 40 cu ft ≈ 1.48 cu yd (~1.5 cu yd). Convert to 2000-lb bag coverage per product (check product page; many 2000-lb bags show coverage at 2"; adjust). Step 5: Polymeric sand: coverage per 50-lb bag depends on joint width/depth; estimate 1 bag per 20–80 ft²; start with ~2–6 bags for 120 ft² depending on joint size. Always confirm specific product coverage on Lowe’s item page and add 5–10% extra for waste.
What are Lowe’s-specific purchasing and logistics tips (ordering, delivery, rental, in-store cutting)?
Check product pages for store-level inventory and SKU specifics (items sold singly, by pallet, or in 2000-lb bags). Use Lowe’s online cart to reserve pallet or bulk orders and choose truck/LTL delivery for heavy items—expect scheduled delivery and possible pallet fees. Reserve rental tools (plate compactor, wet saw) via Lowe’s Rental page; rental rates and availability vary by store. Many Lowe’s stores will cut pavers with an in-store saw for smaller volumes—call ahead. For bulk stone, consider pallet/tote purchase or local yard delivery through Lowe’s freight options. Keep product returns policy and lead times in mind for special-order pallets.
What is the step-by-step installation workflow (concise) using Lowe’s materials?
1) Plan & permits: confirm local permits and utilities. 2) Site prep: mark layout, remove turf/soil to required depth (paver + 1" bedding + base depth). 3) Subgrade compaction: proof-roll and compact native soil. 4) Base: place and compact crushed stone in 4" lifts (typical for patios) until required depth achieved per ICPI guidance. 5) Edge restraints: install rigid edge restraint secured to compacted base. 6) Bedding sand: screed a uniform ~1" bedding sand layer using screed rails and straightedge. 7) Lay pavers: start at fixed edge, maintain pattern, use spacers if needed. 8) Cut pavers: cut to fit with wet saw or angle grinder. 9) Compact: use plate compactor with neoprene pad to seat pavers and vibrate sand into joints. 10) Jointing: sweep polymeric or joint sand into joints to recommended depth (~1/8" below paver top). 11) Final compaction and clean-up: compact again, remove excess sand, and mist polymeric sand per TDS. 12) Sealing (optional): apply sealer per product instructions after 7–30 days depending on sand cure/surface dryness.
How long does each stage take for a 120 ft² patio (realistic time estimates)?
Planning/permits: variable (hours–weeks). Site excavation: 4–8 hours (single homeowner, rental equipment). Base delivery/placement: 2–6 hours (depends on handling). Base compaction and lifts: 2–4 hours. Bedding sand screed: 1–2 hours. Laying pavers: 6–12 hours (single person) — two people can halve this. Cutting and fitting: 2–6 hours depending on pattern/complexity. Compaction and jointing: 2–3 hours. Final clean and sealer: 2–4 hours (sealer dry times add days). Total DIY elapsed working time: ~20–40 person-hours (2–3 weekend days for a homeowner with help).
What are Lowe’s-focused cost expectations (ballpark for homeowner DIY)?
Materials: pavers ~$2–6/ft² (mass-market concrete/basic natural stone varies by SKU), base stone ~ $40–$120 per 2000-lb bag/pallet or $30–$60/ton depending on product and delivery, bedding sand bags ~$3–6 each, polymeric sand ~$10–$25 per 50-lb bag, edge restraints $10–$50 per kit, sealer ~$25–$75. Tool rental: plate compactor ~$60–$120/day; wet saw ~$40–$100/day. For a 120 ft² patio, expect material costs roughly $400–$1,500 depending on paver selection plus $50–$400 in tool rental (or $300–$800 buying tools). Labor is extra if hiring pros (typical installed cost often 2–4× material-only DIY). Prices vary by region—use Lowe’s item pages for accurate SKUs and local pricing.
Next Articles
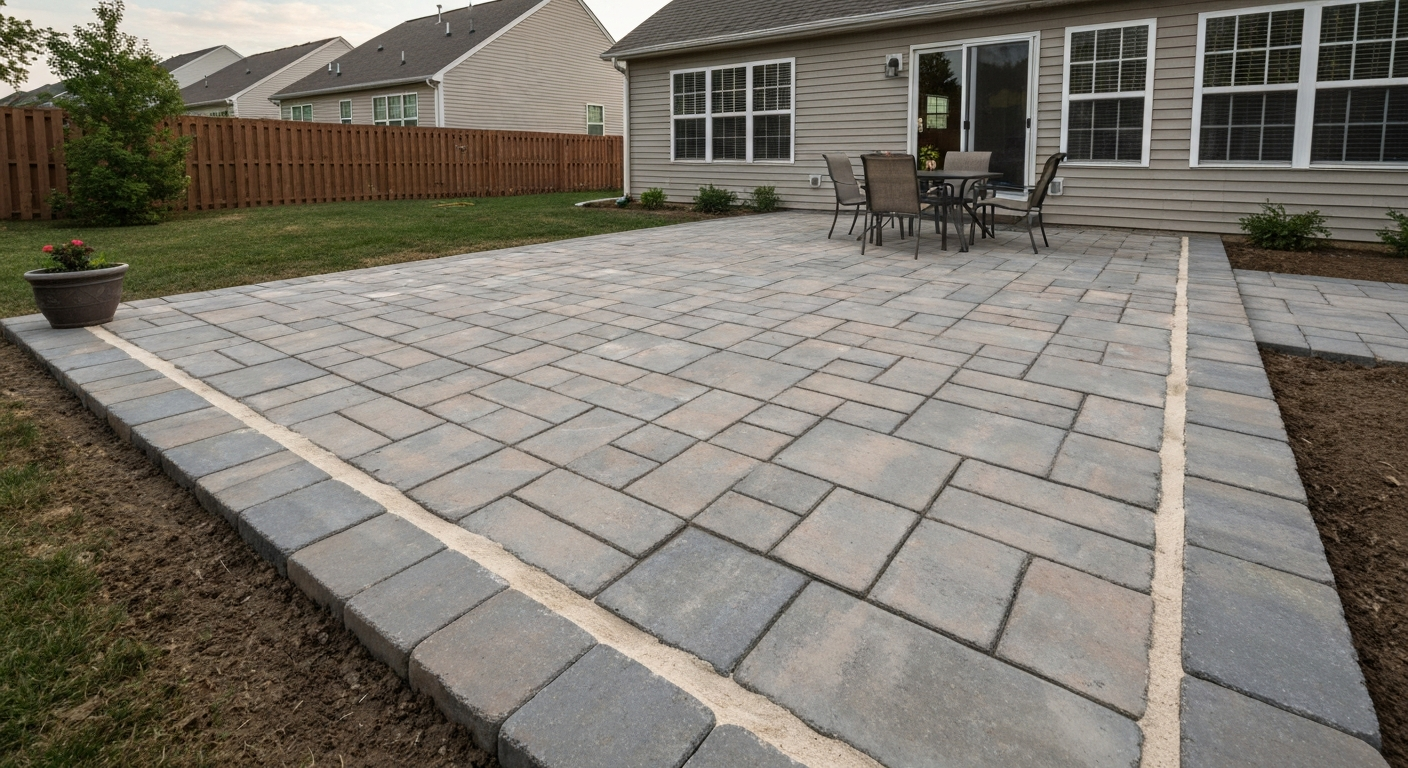
How to Install Patio Pavers (Lowe’s): Complete DIY Guide
How to install patio pavers Lowes: step-by-step DIY using Lowe’s materials, tools, costs, cuts, sealing & tips.
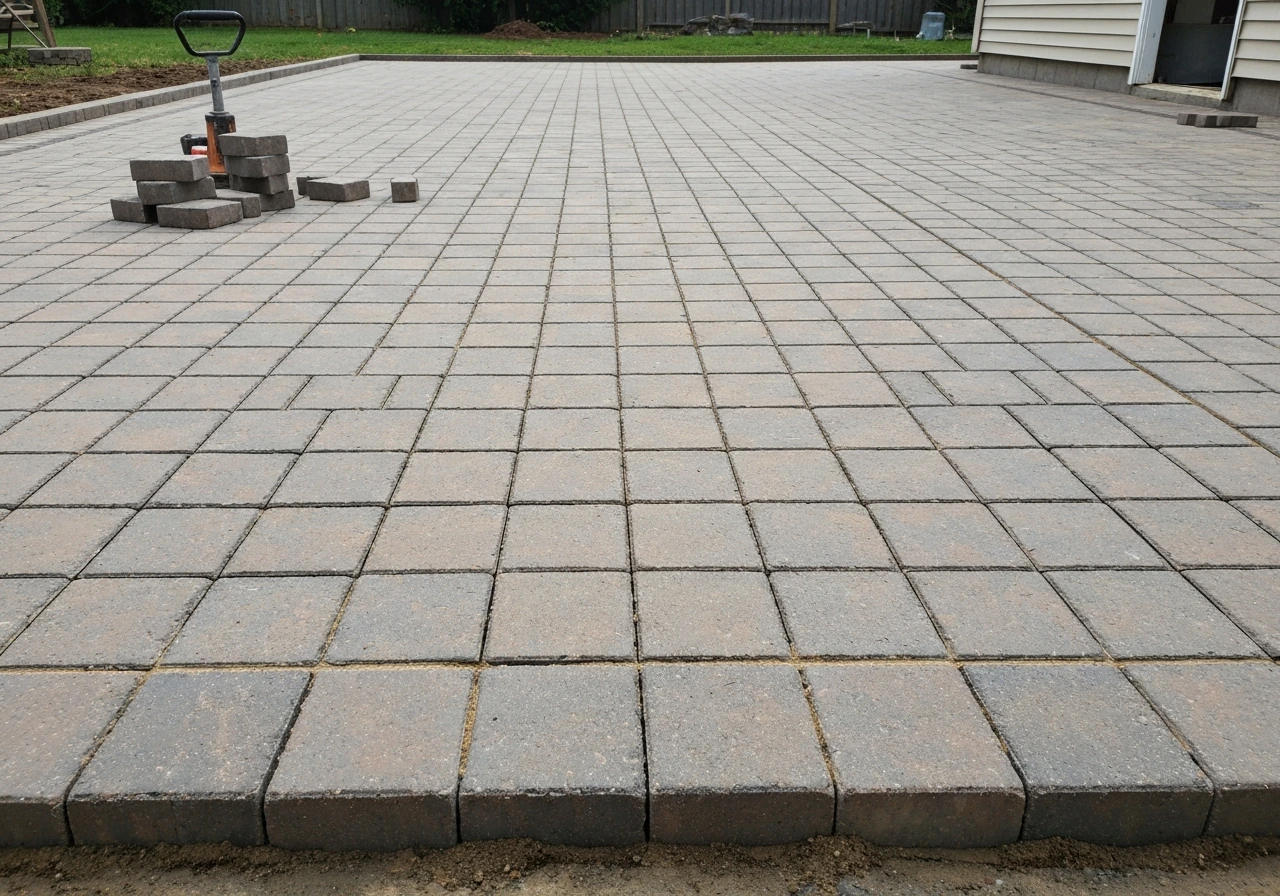
How to Make a Paver Patio Video: DIY Shot List
DIY paver patio video shot list for planning, site prep, base, leveling, cutting, installing, and editing tips.
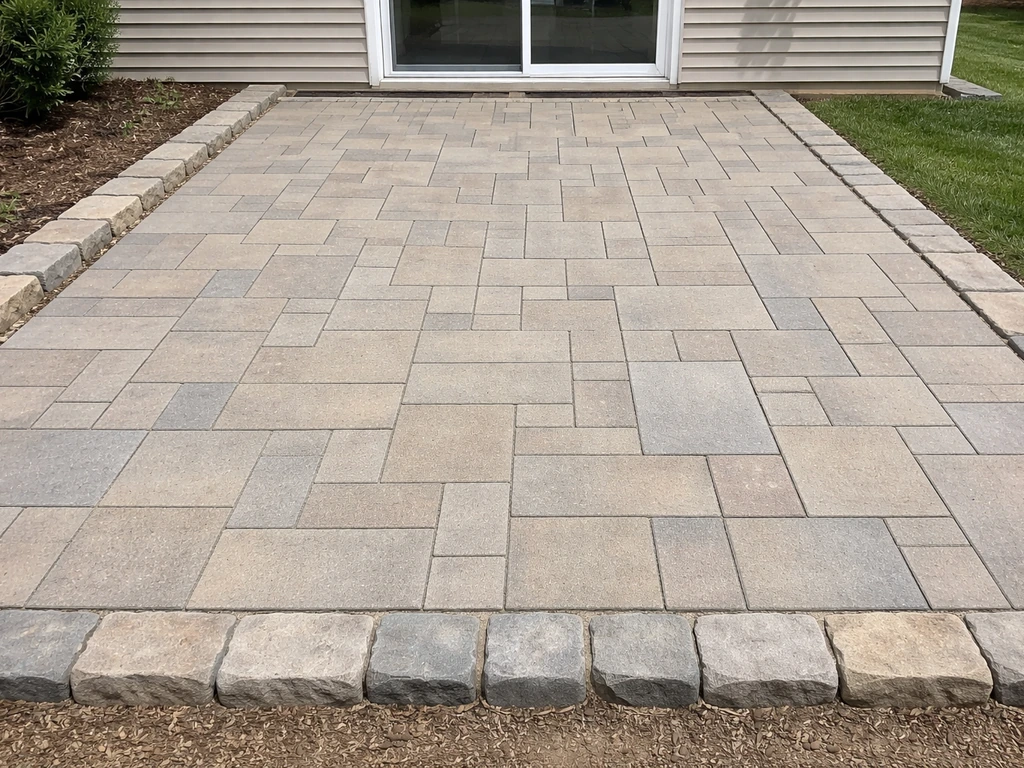
How to Install Patio Pavers with Home Depot Materials
Step-by-step patio paver install using Home Depot materials: base, slope, edging, laying, cutting, joint sand, sealing,