
Title: How to Build a Paver Patio: The Complete YouTube-Ready DIY Guide
YouTube How to Build a Paver Patio: DIY Step-by-Step Guide

Felix Rowe
27 Jul 2026
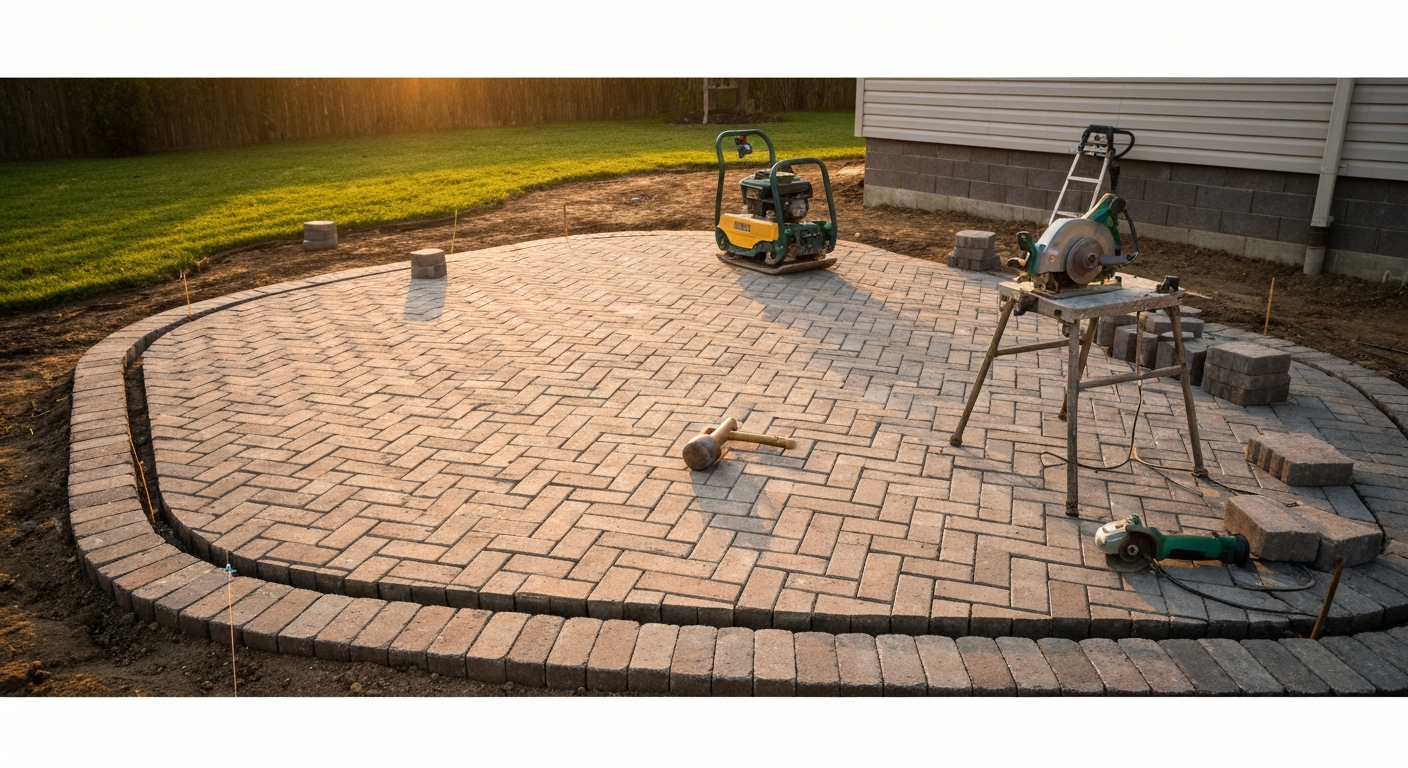
Meta description: Learn how to build a paver patio step by step with measurable specs, tool checklists, pattern guides, and the best YouTube tutorials to follow along.
YouTube is genuinely one of the best places to learn paver patio installation because you can pause, rewind, and watch the exact hand movements involved in screeding sand or cutting a paver on a curve. But most videos cover only one slice of the project. This guide pulls the whole build together: every phase from site planning through sealing, with real specs, tool guidance, and pointers to the best video resources so you can watch and read your way to a finished patio.
Who This Guide Is For
This is written for homeowners who are comfortable with physical outdoor work, can rent or borrow basic equipment, and want to do the job correctly rather than quickly. You do not need prior hardscaping experience. You do need patience, a weekend or two (more on realistic timelines below), and a willingness to do the unglamorous prep work that makes or breaks any patio. If you have been searching YouTube for 'how to build a paver patio' and ended up with ten browser tabs open and no clear starting point, this is where you land and get organized.
Is a DIY Paver Patio the Right Call for You?
A well-built paver patio is absolutely within reach for a capable homeowner. That said, it helps to be honest about the scope before you order materials. A 200 sq ft patio is a solid first project. At that size, excavation is manageable, base material is affordable, and one person with a helper can complete the installation in two to three weekends. A 500+ sq ft patio with steps, curves, and a fire pit is a different animal. You can still DIY it, but plan for three to five weekends and a bigger tool rental budget.
Consider hiring a pro if your site has significant drainage problems that require underground piping, if the ground slopes more than 12 inches across the patio footprint (requiring engineered retaining walls), or if your local permit office requires a licensed contractor for hardscaping over a certain square footage. When in doubt, pull the permit first and ask the inspector what they require.
- DIY-friendly: flat or gently sloped ground (under 6 in drop across patio area), straightforward rectangular or square layout, no underground utilities in excavation zone
- DIY-friendly with extra prep: moderate slope needing basic grading, irregular shapes requiring paver cuts, installation over existing concrete
- Consider a pro consultation: steep slopes requiring engineered retaining walls, sites with poor drainage or high clay content, patios over 600 sq ft with complex features and tight permit requirements
Site Assessment and Planning: Permits, Drainage, and Slope
Before you sketch a layout, walk the site and answer four questions: Where does water go when it rains? Are there buried utilities? Is a permit required? And how much slope does the ground already have? Most municipalities require a permit for permanent hardscape over 200 sq ft, and some require it for any impervious surface. Call your local building department or check online before you break ground. For utility locates, dial 811 (in the US) at least three business days before excavating.
Drainage is the single most important spec to get right. The finished paver surface must slope away from your house and any structures at a minimum of 1/8 inch per foot (roughly 1%), and 1/4 inch per foot (2%) for the first 5 feet adjacent to a foundation wall. That may sound small, but on a 12-foot-deep patio it means the far edge is 1.5 to 3 inches lower than the house-side edge. Mark this grade with string lines and a line level before you excavate. Poor drainage is the number-one cause of paver settlement and is nearly impossible to fix without tearing out the patio.
Also check the soil type. Clay-heavy soils drain poorly and are more susceptible to freeze-thaw heaving, which means you will want to be at the deeper end of the base depth recommendations. Sandy or loamy soils drain well and compact reliably, making your job easier. If you are in a freeze-thaw climate and have heavy clay, add a 4-inch layer of clean angular gravel below your standard base to improve drainage and reduce frost movement.
Tools Checklist: What to Rent vs. What to Buy
You do not need to own every tool for this project. Several of the heaviest hitters are cheap to rent for a weekend and impractical to store otherwise. Here is the full checklist with honest guidance on each.
| Tool | What It Does | Rent or Buy? | Notes |
|---|---|---|---|
| Vibratory plate compactor | Compacts base gravel and seats pavers | Rent | Rent a 5,000 lbf plate for paver seating; heavier plates for base compaction |
| Wet-cut paver saw (masonry saw) | Makes clean straight and angled cuts | Rent | Essential for patterns with cuts; use water to control dust |
| Angle grinder with diamond blade | Curved cuts and notches | Buy (if you don't own one) | Versatile tool; useful beyond this project; always wear a face shield |
| Screeding rails / pipes | Sets bedding sand to uniform 1-inch depth | Buy (cheap) | 1-inch diameter conduit or purpose-made rails work well |
| Hand tamper | Compacts small areas and edges | Buy | Inexpensive; useful after final plate compaction near edges |
| Rubber mallet | Sets individual pavers without chipping | Buy | 4 lb head is standard |
| String line and line level | Establishes grade and layout | Buy | Get fluorescent line; easy to see over long runs |
| Landscape marking spray paint | Marks excavation boundary | Buy | Upside-down spray cans made for ground marking |
| Long straightedge / screed board | Smooths bedding sand | Buy (make it) | A straight 2x4 cut to span your screeding rails works fine |
| Measuring tape (25 ft minimum) | Layout and material calculation | Buy | You likely already own one |
| Torpedo level and 4-ft level | Checks individual pavers and runs | Buy | Both sizes are useful |
| Plate compactor rubber pad | Protects paver surface during final seating compaction | Buy (accessory) | Attaches to compactor plate; prevents surface scratching |
| Safety gear: face shield, ear protection, heavy gloves, knee pads | Personal protection | Buy | Do not skip the face shield when cutting; concrete dust is a serious lung hazard |
A note on the wet saw: many DIYers skip it and use only an angle grinder. An angle grinder handles curved cuts and notches well, but a wet saw gives cleaner straight cuts for borders and patterns that require precise angles. If your design has a lot of straight border cuts, the saw rental is worth every dollar.
Materials Overview: Pavers, Base Components, and Sand
Paver Types and Thicknesses
For a residential patio with foot traffic only, a 60 mm (roughly 2-3/8 inch) concrete paver is the standard choice. It handles pedestrian loads comfortably and is available from every major manufacturer (Unilock, Belgard, Techo-Bloc, EP Henry). If the patio will double as a parking pad or receive occasional vehicle access, step up to 80 mm (3-1/8 inch) pavers and increase your base depth to the driveway spec. Natural stone pavers (bluestone, travertine, granite) are an option for higher-end projects, but they are heavier and less consistent in thickness, which requires more careful bedding work. Brick pavers are the lightest option in terms of appearance and are particularly well-suited to traditional and cottage-style homes.
Base and Bedding Components
The base system is what separates a patio that lasts 25 years from one that sinks and tilts in three. You need three layers: a compacted granular base (crushed stone, also called road base or processed gravel), a thin bedding sand layer, and the pavers themselves. Some installations add a geotextile fabric between native soil and base gravel to prevent mixing and aid drainage, which is smart in clay soils. The bedding layer should never be more than 1 inch (25 mm) uncompacted. More than that and it becomes a sponge that allows pavers to rock and settle unevenly. The ICPI specification calls for ±1/4 inch (6 mm) tolerance in bedding sand depth and anticipates about 3/16 inch (5 mm) of consolidation after final compaction.
Materials Table and Calculator
| Application | Base Depth (Compacted) | Bedding Sand (Uncompacted) | Paver Thickness | Sample: 200 sq ft Base Volume |
|---|---|---|---|---|
| Residential patio / walkway | 6–8 in (15–20 cm) | 1 in (25 mm) max | 60 mm (2-3/8 in) | ~8–11 cu ft gravel per inch of depth = 50–70 cu ft total (roughly 2–3 tons) |
| Pool deck | 6–12 in (15–30 cm) | 1 in (25 mm) max | 60 mm (2-3/8 in) | Varies; use deeper end for pool edge loads |
| Residential driveway | 10–14 in (25–35 cm) | 1 in (25 mm) max | 80 mm (3-1/8 in) | ~85–115 cu ft total base (4–5 tons) |
| Patio on clay or freeze-thaw soil | 8 in + 4 in drainage layer | 1 in (25 mm) max | 60–80 mm | Add 4 in clean angular gravel below standard base |
To calculate materials for your specific patio: multiply the area (sq ft) by the base depth in feet, then multiply by 1.15 to account for compaction and waste. For a 200 sq ft patio with a 6-inch base, that is 200 x 0.5 ft x 1.15 = 115 cubic feet, or roughly 4.3 cubic yards of base gravel. For bedding sand at 1 inch, it is 200 x 0.083 x 1.10 = about 18 cubic feet. For pavers, order the square footage of your patio plus 10% for cuts and breakage.
Design and Layout: Choosing Your Paver Pattern
Pattern choice affects how the finished patio looks, how structurally rigid it is underfoot, and how many cuts you will need to make. This is worth deciding before you order pavers, because some patterns require half-pavers along borders or specific rectangular formats that not every paver line offers.
Running Bond
Running bond (also called stacked bond offset) is the most beginner-friendly layout. Rows of pavers are offset by half a unit, like brickwork on a house wall. Cuts are minimal (only along borders), the pattern reads cleanly, and installation is fast. It works especially well on long, narrow patios or as a path leading to a larger patio area. One limitation: it is slightly less structurally interlocked than herringbone, so it is not the right call if vehicles will ever cross it.
Herringbone (45-Degree and 90-Degree)
Herringbone is the ICPI-recommended pattern for any surface that receives vehicular traffic, because the interlocking angles distribute load exceptionally well. The 45-degree version runs diagonally across the patio and looks dynamic and formal. The 90-degree version runs parallel to borders and is slightly easier to execute. Both require more cuts than running bond, especially at the borders. If you are watching YouTube tutorials, search specifically for herringbone patio install because the starting-point layout and border cutting technique take practice.
Basketweave
Basketweave uses pairs of pavers laid perpendicular to each other in a checkerboard-like pattern. It has an old-world cottage feel and works best with square or near-square pavers (or combinations of three bricks that approximate a square). Cuts are minimal if the patio dimensions align with the module, but awkward if they do not. It is less structurally interlinked than herringbone, so stick to pedestrian-only areas.
Color and Edge Choices
A contrasting border course (soldier course or sailor course) defines the patio edge cleanly, hides cut edges of field pavers, and strengthens the perimeter. Most manufacturers offer complementary border pieces in their paver lines. For color, neutral grays and tans are the most forgiving and age well. Darker colors show efflorescence more visibly in the first year. If you are planning to seal, a film-forming acrylic sealer can enhance color dramatically, so test a sample before committing to a full-patio application.
When following YouTube tutorials for pattern layout, look for videos that show the string-line grid setup before the first paver goes down. The best tutorial creators (search 'herringbone paver patio layout DIY' or 'running bond patio install step by step') will spend five to ten minutes on this step alone. That time investment in your string grid saves hours of re-laying later.
Step-by-Step: The Full Paver Patio Build
Phase 1: Excavation and Subgrade Prep
Mark your patio boundary with spray paint, adding 6 inches on all sides beyond your finished edge (the base needs to extend past the edge restraints). For a standard residential patio with a 6-inch base, 1-inch bedding sand, and 60 mm (2-3/8 inch) pavers, your total excavation depth is approximately 10 to 10.5 inches below finished grade. Add an inch of buffer if your subgrade is uneven. Remove all sod, roots, and organic material. Never leave organic material under the base; it will decompose and cause settlement. Compact the native subgrade with your plate compactor before placing any base material.
Phase 2: Installing the Granular Base
Spread your crushed stone base in layers (lifts) no more than 4 inches loose at a time. Compact each lift with the vibratory plate compactor before adding the next. Make overlapping passes and run the compactor perpendicular to your previous pass direction to achieve even compaction. Target compaction is at least 95% Standard Proctor density, which in practical terms means the base should not deflect visibly under foot traffic before you screed. Check your slope grade with a string line and level after each lift so you are not trying to correct slope errors at the screeding stage.
Phase 3: Edge Restraints
Install plastic or aluminum edge restraints along all free edges before you screed. ICPI Tech Spec No. 3 is clear: sand-set pavers without structural edge restraint will migrate outward over time, opening joints and disrupting pattern alignment. Spike the restraints through the base into the subgrade using the spikes supplied with the product (typically 10-inch spikes on 12-inch centers). If you are installing along a house foundation, the foundation wall itself acts as a restraint on that side.
Phase 4: Screeding the Bedding Sand
Lay two 1-inch-diameter metal conduit pipes parallel to each other across the compacted base, spaced so your screed board can rest on both. Fill the space between them with coarse bedding sand (not play sand or mason sand, which is too fine and compresses unevenly). Draw the screed board across the rails in a sawing motion to produce a flat 1-inch sand bed. Lift the pipes carefully, fill the channels with sand, and smooth them with a trowel. Do not walk on the screeded sand bed. The ICPI spec allows a maximum of 1 inch uncompacted and tolerates only ±1/4 inch variation. If you find low spots in the base under the sand, do not fill them with extra sand; go back and fix the base first.
Phase 5: Laying the Pavers
Start at a straight, fixed edge (a house wall, an established border, or a chalk line) and work outward. Place pavers by setting them at an angle, dropping them into position, and tapping level with a rubber mallet. Do not slide them along the sand, which disturbs the screeded surface. Maintain consistent joint width (most concrete pavers have small spacer nubs built into the sides for this reason). Check alignment every four to five rows with your string line and correct early. Once a section is laid, do not kneel directly on it; use a piece of plywood to distribute your weight.
Phase 6: Cutting Pavers
Mark cuts with a pencil or chalk. For straight cuts, use the wet saw: set the fence, make the cut in one pass, keep water flowing to the blade. For curves and notches, score the line with an angle grinder and diamond blade, then make a series of relief cuts perpendicular to the curve before breaking out the waste with a chisel. Always wear a face shield (not just safety glasses) when cutting. Concrete dust contains crystalline silica, which causes serious lung damage with repeated exposure. Wet cutting dramatically reduces airborne dust. If you are cutting dry with a grinder, wear a properly fitted N95 respirator as a minimum.
Phase 7: Final Compaction
Once all pavers are laid and cuts are fitted, run the plate compactor over the entire surface with the rubber pad attached. Make two perpendicular passes. This seats the pavers into the bedding sand, consolidating it by approximately 3/16 inch and locking the surface into a unified structure. Check for any rocking pavers after compaction and correct them before filling joints.
Phase 8: Joint Sand and Final Sweep
Spread joint sand over the surface and sweep it into the joints with a push broom. For polymeric sand, follow the manufacturer's TDS precisely: joints must be completely dry, ambient and surface temperature must be above 32°F (0°C), and there must be no rain in the forecast for at least 24 to 48 hours after activation (check your specific product). Techniseal EZ Sand installation summary & manufacturer instructions (third‑party guide referencing TDS) documents common polymeric sand failure modes, premature wetting, activating before joints are filled, and low temperatures/high humidity extending cure time, and reiterates following the product TDS and testing a small area. Overfill joints slightly, then blow or sweep off all surface residue before misting with water to activate the polymer binder. One of the most common DIY mistakes is skipping the thorough surface cleanup before activating, which leaves a hazy film on the paver faces that is difficult to remove. For regular joint sand, sweep, compact once more, and repeat until joints are consistently filled.
Site-Specific Methods: Grass, Concrete, and Uneven Ground
Laying Pavers Over Grass
Remove all grass and sod completely. Do not lay base material over live or dead organic matter; it will decompose and cause uneven settlement. Use a sod cutter (rentable) for efficient removal on large areas. After stripping, compact the native soil before adding base gravel. You will see some YouTube videos suggesting a no-dig or shallow-dig approach for small stepping-stone paths, but for a structural patio that will hold furniture and foot traffic, full excavation is the correct approach.
Laying Pavers Over Existing Concrete
If the existing concrete is in good structural condition (no major cracking, heaving, or drainage issues), you can lay pavers directly over it using a thin-set mortar bed instead of sand. Clean the concrete thoroughly, fill any cracks, and apply a polymer-modified thin-set to the back of each paver. This method saves excavation labor but eliminates the ability to adjust individual pavers later without a chisel. If the existing slab is cracked, heaving, or poorly sloped, it is almost always better to break it out and start fresh. Laying pavers over a failing slab just delays the inevitable and makes future repairs harder.
Uneven and Sloped Ground
Gentle slopes (under 6 inches across the patio) are managed entirely through grading the base material. Steeper slopes require either terracing (building two or more level platforms separated by a step or low retaining wall) or a structural retaining wall if the grade change exceeds about 18 to 24 inches. Low retaining walls (under 24 to 30 inches) can be built with retaining wall block and compacted crushed stone backfill by an experienced DIYer. Anything taller typically requires engineering input and a permit. When grading a sloped site, always maintain the finished surface slope of 1/8 to 1/4 inch per foot away from structures regardless of overall site grade.
Popular Variations: Fire Pits, Raised Patios, and Steps
Adding a Fire Pit
A ground-level ring fire pit can be built as part of the patio using retaining wall block or purpose-made fire pit block (which is rated for heat exposure). Standard concrete pavers are not fire-rated and should not be in direct contact with a fire ring. Leave a 12-inch clearance of bare gravel or a non-combustible surface around the fire ring. Check local ordinances before building: many municipalities require a minimum setback from structures (commonly 10 feet) and prohibit open fires in certain zones. Gas fire pit inserts require a permitted gas line and should be run by a licensed plumber.
Raised Patios and Terraces
A raised patio uses retaining wall block to create a level platform above surrounding grade. The retaining wall carries the lateral pressure of the fill inside it, so construction quality matters. Use a segmental retaining wall product (not standard landscape block) rated for structural use, set the base course below grade on compacted gravel, batter (lean back) each course slightly, install drainage aggregate behind the wall, and pin courses together with the fiberglass pins or geogrid specified by the manufacturer. Walls over 24 to 30 inches almost always require a permit and engineered design in most jurisdictions.
Steps and Transitions to the House
Paver steps require a solid concrete footing poured below frost depth. Do not set step blocks on compacted gravel alone; frost heave will shift them. Pour a concrete footing (typically 6 inches deep and 4 to 6 inches wider than the step unit), cure it for at least 48 hours, then set step units in a mortar bed. Step rise should be 6 to 7.5 inches and tread depth at least 11 to 12 inches to meet standard residential code. Check your local building code for exact requirements before pouring.
Sealing Your Paver Patio
Sealing is optional but worthwhile. It inhibits weed growth in joints, resists staining, and (with film-forming sealers) enhances color. Wait at least 60 to 90 days after installation before sealing new pavers to allow the surface to cure and any efflorescence (a white mineral haze common on new concrete products) to work its way out. Sealing over active efflorescence traps it and makes it much harder to remove.
| Sealer Type | Appearance | Breathability | Re-seal Interval | Best For |
|---|---|---|---|---|
| Film-forming acrylic (solvent-based) | Wet/gloss look, enhances color | Low | 1–3 years | Color pop, high-traffic patios, easy cleaning |
| Film-forming acrylic (water-based) | Semi-gloss, moderate color enhancement | Moderate | 2–4 years | Eco-friendlier option, lower VOC |
| Penetrating silane/siloxane | Natural/matte look, no color change | High | 3–7+ years | Patios where natural look preferred, breathable substrates, cold climates |
Clean the patio thoroughly before sealing (pressure wash, let dry completely), apply sealer with a pump sprayer or roller, and follow the product TDS for surface temperature limits (most require 50 to 90°F surface temp) and recoat windows. Brands like Techniseal, Black Diamond, and Miracle Sealants publish downloadable TDS sheets with exact coverage rates per gallon and recoat instructions. Use those numbers, not the label.
Maintenance Schedule and Winter Care
A well-built paver patio is low maintenance but not no maintenance. Here is a realistic annual schedule.
- Spring: Inspect for any pavers that shifted over winter, check joints for sand loss, clean off winter debris and any salt residue (use a pH-neutral cleaner, not bleach or acidic cleaners on colored pavers)
- Early summer: Re-apply joint sand to any depleted joints; re-seal if your sealer is due for renewal
- Fall: Sweep thoroughly before first frost; avoid using metal-blade snow tools on pavers (use a plastic-edge snow shovel or rubber blade); avoid rock salt (use sand or calcium chloride sparingly instead)
- As needed: Pull any weeds that establish in joints (polymeric sand dramatically reduces this but does not eliminate it on older installs); replace cracked or stained individual pavers by lifting them, fixing any base issue, and resetting
Troubleshooting: Common Problems and How to Fix Them
| Problem | Likely Cause | Fix |
|---|---|---|
| Pavers rocking or tilting | Bedding sand too thick, soft spot in base, or base not compacted | Lift affected pavers, diagnose: if base is soft, re-compact or add base gravel; re-screed bedding to 1 in max and re-lay |
| Uneven surface after settling | Base compaction was insufficient before paving | Lift section, add and compact base gravel, re-screed, re-lay |
| Poor drainage / water pooling | Insufficient slope or slope toward house | Unfortunately, this usually requires lifting the affected section and regrading the base to restore slope |
| Efflorescence (white haze) | Natural calcium carbonate migrating to surface on new concrete pavers | Wait; it usually weathers away in first season. Accelerate removal with an efflorescence cleaner (follow label) before sealing |
| Weeds in joints | Joint sand erosion or insufficient polymeric sand cure | Remove weeds, reapply polymeric sand to depleted joints; seal to further deter growth |
| Polymeric sand haze on surface | Surface not fully cleaned before activation, or rain during cure | Try a proprietary polymeric sand haze remover (Techniseal and others make one); wet the surface and scrub with a stiff brush |
| Pavers creeping / edges spreading | No edge restraint or restraint spikes pulling out | Re-install edge restraints with longer spikes or replace with steel/aluminum restraint; re-compact and re-fill joints |
| Cracked individual pavers | Point load impact, freeze-thaw in a void, or manufacturing defect | Pry out the paver, check and repair the base underneath, replace with a matching unit |
Realistic Time and Cost Estimates
A 200 sq ft rectangular patio in a typical residential setting (no major grading, no steps, standard concrete pavers, running bond pattern) takes most two-person DIY teams about two full weekends. Weekend one covers layout, excavation, base prep, and compaction. Weekend two covers screeding, laying, cutting borders, jointing, and sealing prep. Factor in a day of curing before joint sand application if you are using polymeric sand.
| Project Size | Estimated DIY Time (2-person team) | Approximate Materials Cost | Tool Rental (weekend) |
|---|---|---|---|
| 100–150 sq ft (small patio) | 1 weekend | $600–$1,200 | $150–$250 |
| 200–300 sq ft (standard patio) | 2 weekends | $1,200–$2,500 | $250–$400 |
| 400–600 sq ft (large patio) | 3–5 weekends | $2,500–$5,500+ | $400–$600 |
| 600+ sq ft with steps/fire pit | 5+ weekends | $5,000–$10,000+ | $600–$900+ |
These ranges reflect mid-range concrete pavers ($3 to $8 per sq ft for materials), standard base gravel, polymeric sand, and basic sealer. Natural stone and premium paver lines will push materials costs significantly higher. Labor savings versus a contractor installation typically run $8 to $20 per square foot depending on your market, which means a 300 sq ft DIY patio can realistically save $2,400 to $6,000 in labor alone. That is a meaningful number and a realistic reason to take on the project yourself.
The Best YouTube Tutorials and Video Resources
When evaluating a YouTube tutorial, look for a few quality markers: the creator shows base depth measurement and compaction (not just dumping gravel and laying pavers), they use a screed board properly and show the 1-inch bedding sand depth, they demonstrate edge restraint installation, and they address polymeric sand as a separate careful step rather than an afterthought. For a clear retailer-backed walkthrough and materials checklist, see Lowes how to paver patio. For a hands-on walkthrough, watch the recommended how to install a paver patio YouTube video to see the exact techniques described above. Short videos that skip from excavation to finished patio in five minutes are leaving out the steps that matter most.
Here are the most useful search queries to find high-quality, step-by-step video guidance. For a single comprehensive walkthrough, watch how to make a paver patio video.
- YouTube: 'how to install a paver patio step by step' (look for videos over 20 minutes that show all phases)
- YouTube: 'herringbone paver patio DIY full install' (for pattern-specific guidance with layout lines)
- YouTube: 'paver patio base prep compaction DIY' (focused on the make-or-break base work)
- YouTube: 'polymeric sand installation paver patio' (for jointing technique and activation tips)
- Home Depot How-To: search 'Home Depot how to build a paver patio' on YouTube or homedepot.com/c/how_to (their official channel includes base prep, laying, and cutting segments)
- Lowe's How-To: search 'Lowes how to install paver patio' on YouTube (Lowe's publishes step-by-step installation videos on their channel and lowes.com project guides)
- This Old House: search 'This Old House paver patio install' on YouTube (their crew covers traditional and complex installations with professional narration and measurable specs)
- Manufacturer channels: Belgard and Unilock both publish installation series on YouTube covering base prep, pattern layout, and finishing
Home Depot and Lowe's how-to videos are particularly useful for beginners because they are filmed in real backyard conditions, show the specific tools and bags available at those stores, and tend to include the safety steps that creator-focused YouTube videos sometimes skip. For store-specific step-by-step instructions and product lists, see how to install patio pavers Home Depot for guidance on tools and materials available at that retailer. For step-by-step, store-specific guidance, see Home Depot’s how-to on how to build a paver patio for tool and material lists matched to their products how to build a paver patio Home Depot. This Old House goes deeper on structural reasoning, which is worth watching even if their tools are more professional-grade than what you will rent. For a detailed, step-by-step video, see the This Old House tutorial titled “how to install a paver patio this old house” (reference id a154122c-4310-4657-89e5-82e73ed3ec3d).
Go Build It
A paver patio is one of the most satisfying outdoor DIY projects you can complete because the result is visible, durable, and genuinely improves how you use your outdoor space. The key is not to rush the base work. Every hour you spend on proper excavation, compaction, and grading pays off in a surface that stays level and drains cleanly for decades. Take the time to watch a full-length tutorial from one of the sources above before you pick up a shovel, then use this guide to verify every measurement and step as you go. You have got this.
FAQ
What base depth should I use for a DIY paver patio?
For pedestrian patios and walkways use a compacted granular base of 6–8 in (150–200 mm). For areas with heavier loads (occasional vehicle traffic, delivery trucks) increase to 10–14 in (250–350 mm) and consider thicker pavers. Place base in 2–4 in (50–100 mm) loose lifts and compact each lift to ~95% Standard Proctor (or follow local specs). These ranges follow ICPI/manufacturer guidance and must be adjusted for poor soils or frost conditions.
How much slope (drainage) do I need on a patio?
Provide positive drainage away from structures: minimum 1% (≈1/8 in/ft) across the patio, commonly 1–2% (1/8–1/4 in/ft). Near building walls aim for 2% (1/4 in/ft) for the first 3–5 ft. Confirm local codes if you drain toward storm systems or property lines.
How thick should the bedding sand and what tolerance is acceptable?
Bedding sand (screeded layer) should be a maximum of 1 in (25 mm) uncompacted, with a tolerance of ±1/4 in (±6 mm). Expect about 3/16 in (5 mm) consolidation after compaction. Do not use bedding sand to level large depressions—correct the base first.
What compaction equipment should I use and how do I seat pavers?
Use a hand‑guided vibratory plate compactor for base compaction and a low‑amplitude plate (same plate, with rubber mat when recommended) for final paver seating. Compact base lifts in 2–4 in layers. For final seating make two overlapping passes at right angles. Equipment specs from manufacturers and ICPI recommend plates sized to coverage (small plate for tight spots) and seating frequencies ~75–95 Hz—rent a 4,000–5,000 lbf class plate for most patios.
Should I use polymeric sand or regular joint sand?
Polymeric sand contains binders and locks joints when properly applied; pros: reduced weeds and insect intrusion, firmer joints. Cons: requires dry weather, specific temperature limits, precise watering/activation per TDS; risk of haze or washout if activated too early or rained on. Regular concrete sand is more forgiving and easier to rework but needs more maintenance (weed control). Follow manufacturer TDS for polymeric sand application and cure windows.
Can I lay pavers over existing concrete or grass?
Over concrete: You can install pavers over sound, well‑draining concrete by adding a compacted base and bedding—best practice is to provide at least the same base depth as for a normal installation and ensure slope/drainage. For cracked or unstable concrete, remove it or fix underlying issues first. Over grass: Full removal of turf and topsoil is recommended. You can overlay in thin‑fill situations using a compacted aggregate base over the existing surface, but full excavation to the required base depth gives the longest‑lasting result. Always ensure positive drainage.
Next Articles
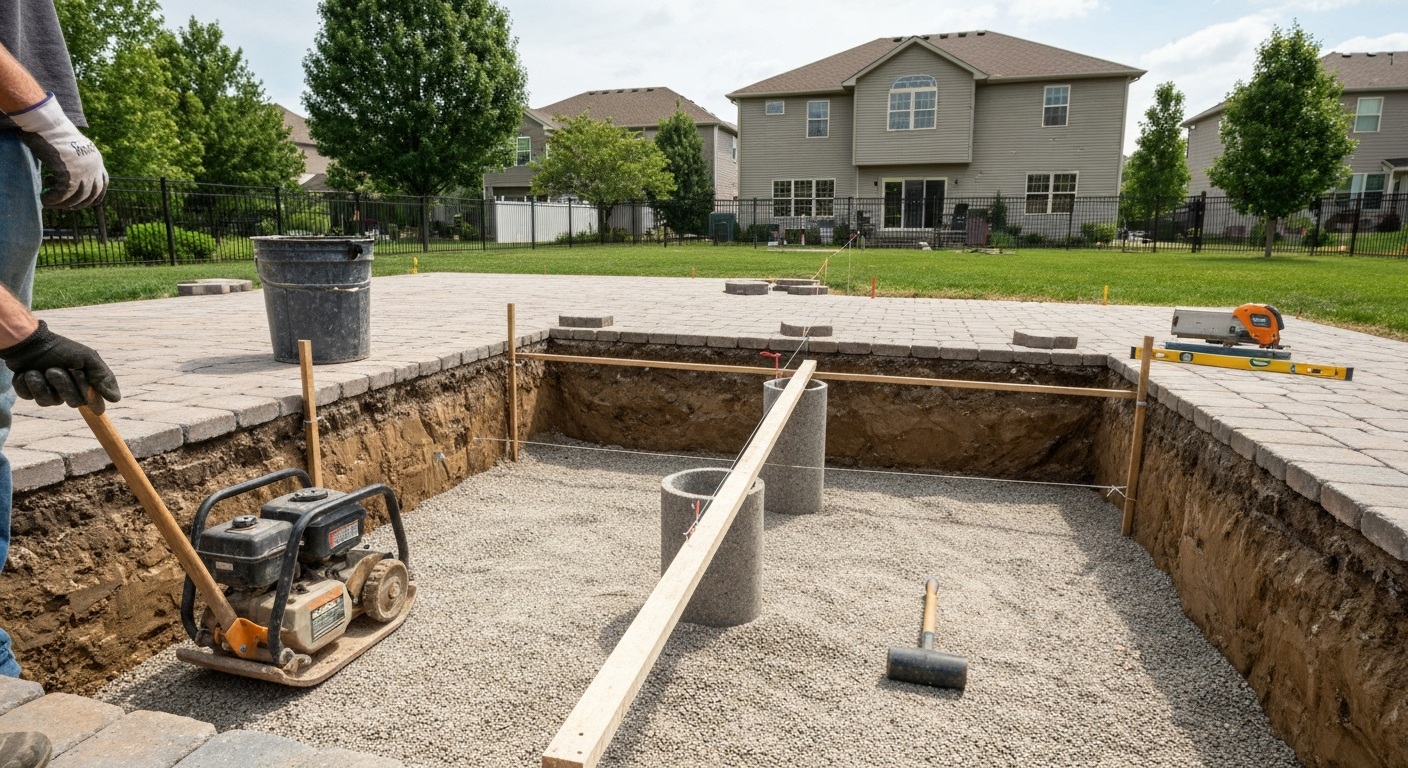
How to Install a Paver Patio YouTube Guide: Step-by-Step
Step-by-step DIY paver patio: top YouTube walkthroughs, complete tools checklist, techniques, timing, and fixes.
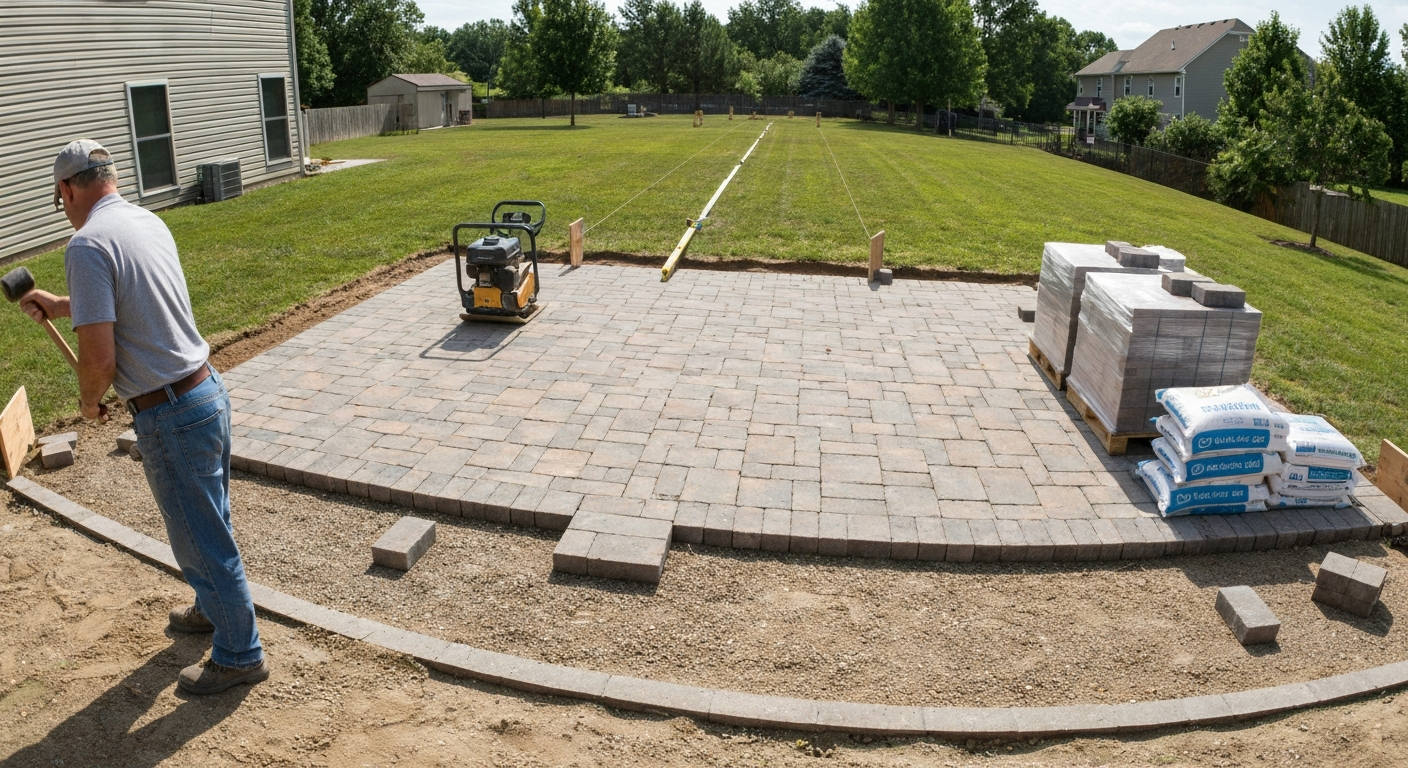
Lowe’s How to Paver Patio: Complete DIY Guide for Homeowners
Lowes how to paver patio: step-by-step DIY with Lowe's materials, tool checklist, time & cost estimates, and fixes.
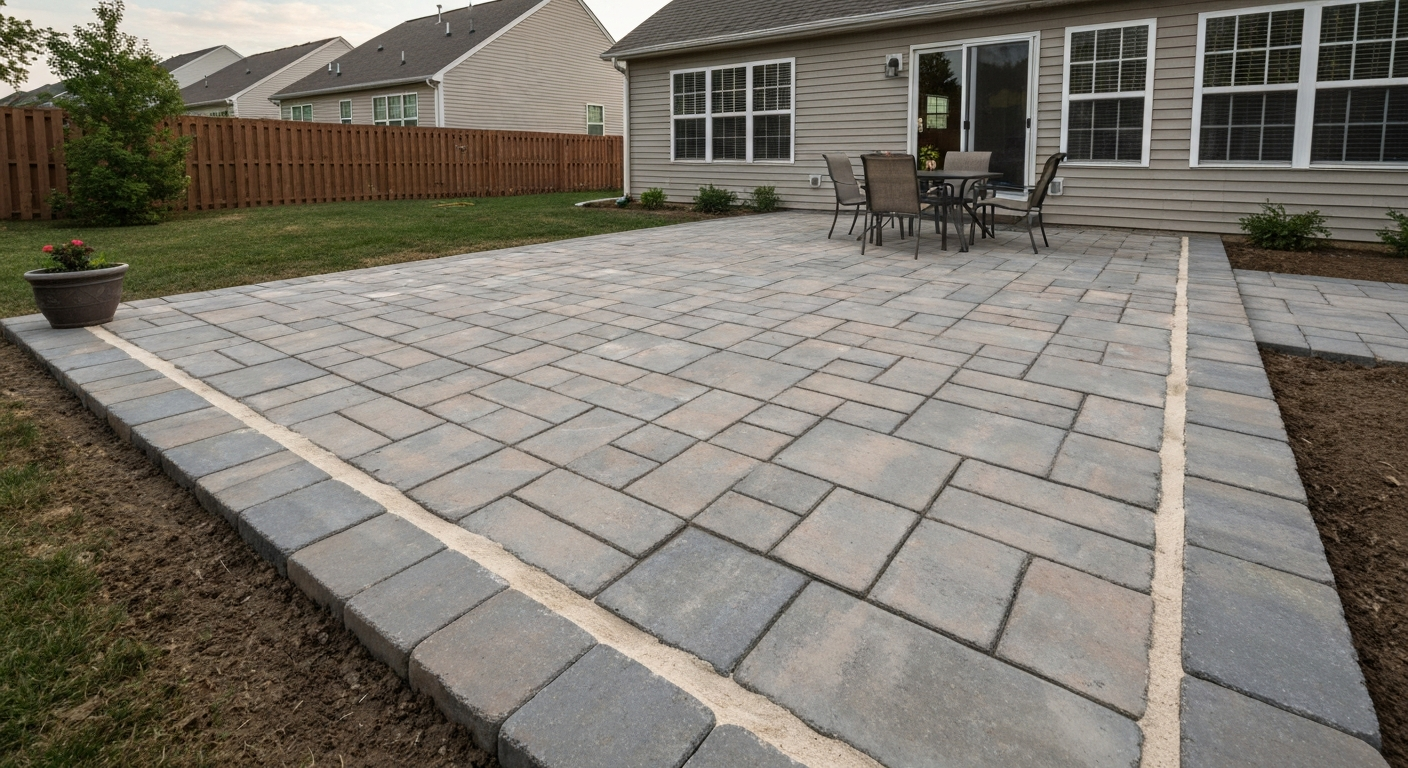
How to Install Patio Pavers (Lowe’s): Complete DIY Guide
How to install patio pavers Lowes: step-by-step DIY using Lowe’s materials, tools, costs, cuts, sealing & tips.